How To Vacuum Pool To Waste With Sand Filter
Alright, fellow pool parents and backyard oasis enthusiasts, let’s talk about something that’s probably lurking in the back of your mind after a particularly epic pool party, or maybe just after a rogue squirrel decided to have a rave in your water. I’m talking about the moment you look at your sparkling blue paradise and realize it’s… well, a little less than sparkling. Maybe it’s that fine dust that seems to have materialized out of thin air, or perhaps a misguided attempt by your dog to become a synchronized swimmer. Whatever the culprit, the time has come. It’s time to vacuum to waste.
Now, before you start picturing yourself wrestling a giant industrial vacuum cleaner in the middle of your backyard, take a deep breath. It’s not that dramatic. Think of it like this: you’ve had a fantastic, slightly messy dinner party. The food was great, the company was even better, but now there are crumbs everywhere. You could try to sweep them under the rug (which, let’s be honest, we’ve all considered with pool dirt), but eventually, they’ll find their way out. Or, you could do a proper clean-up, getting rid of all that… evidence.
That’s where your sand filter and the magic setting called “waste” come in. It’s like having a secret superpower for your pool. Normally, when you vacuum, your filter is a diligent little bee, buzzing around, collecting all the gunk and then recirculating the clean water back into your pool. It’s a beautiful, closed-loop system, like a perfectly organized sock drawer. But sometimes, the gunk is too much gunk. We’re talking about the kind of debris that makes your water look like a murky swamp, or worse, like someone’s been doing interpretive dance with a bag of potting soil.
Must Read
In these extreme cases, your filter can get overloaded. Imagine trying to filter a milkshake through a coffee strainer – it’s not going to end well. You’ll end up with a clogged filter, slower circulation, and a general feeling of pool-related despair. This is where the "waste" setting enters the chat. It’s your emergency escape hatch for pool debris. Instead of sending that dirty water back into your pool, you're essentially telling it, "You know what? You've seen better days. Go have an adventure elsewhere."
So, How Does This Whole “Waste” Thing Work?
Think of your sand filter like a sophisticated sieve. When you set it to “filter,” the water gets pushed through the sand, trapping all the little baddies. When you flip that handle to “waste,” you’re bypassing the sand altogether. It’s like telling the bouncer at a club, "You know what? Forget the VIP list, just let this rowdy bunch out the back door and don’t let them back in." The dirt and the water that you suck up with your vacuum go straight out through your backwash hose and… well, somewhere else. It’s unfiltered water being expelled from your pool.
This is why it’s crucial to understand the difference. Using the “waste” setting for your everyday vacuuming is like using a fire extinguisher to water your houseplants. It’s overkill, and you’ll end up with a very soggy, very sad plant (or in this case, a very depleted pool). But for those truly disaster-level cleaning jobs? It’s your best friend.

When Should You Unleash the Waste Monster?
Let’s paint a picture, shall we? Imagine you’ve hosted a pool party of epic proportions. Think cannonballs, inflatable flamingos doing unauthorized flips, and Uncle Barry attempting to teach the poodle the Macarena. By the end of it, there might be a fine layer of… stuff… at the bottom of your pool. This is the perfect time to engage the waste setting. It's for those moments when the debris is so overwhelming, your regular filter would be like a single lifeguard trying to manage a tsunami of beach balls.
Another classic scenario? You’ve had a storm. A big one. The kind where it feels like the sky is auditioning for a role in a disaster movie. Leaves, twigs, perhaps even a small, bewildered frog might have made an appearance in your pool. Vacuuming this directly to “filter” would be like trying to digest a whole pizza in one bite – it’s just too much, too fast. The “waste” setting is your digestive system for pool chaos.
Or, and this is a personal favorite, you’ve got that mysterious, powdery dust that seems to settle on everything. It’s like the universe’s way of reminding you that even paradise isn’t immune to fine particulate matter. When that layer gets thick, and you’d rather not recirculate it back into your clean water, it’s time to go rogue with the “waste” setting.
Let’s Get Our Hands (and Our Hoses) Dirty: The Step-by-Step Guide
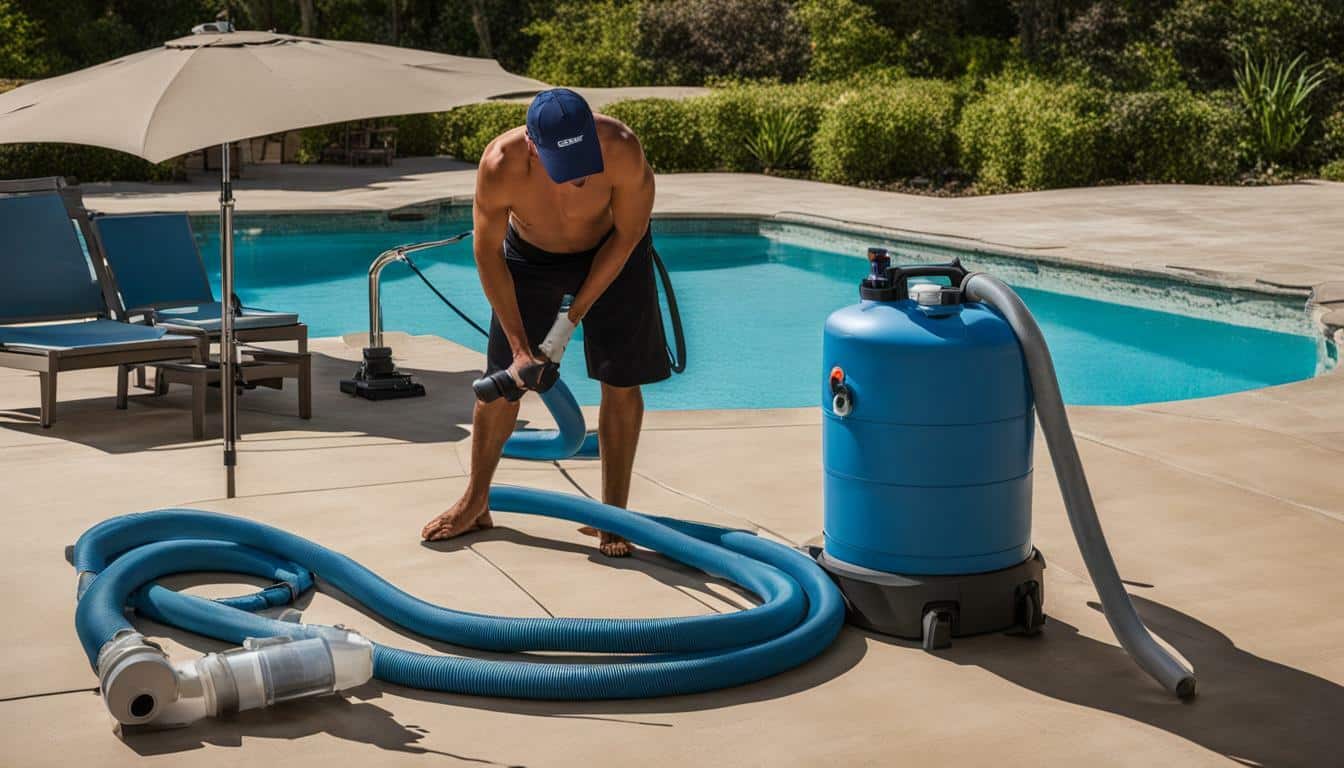
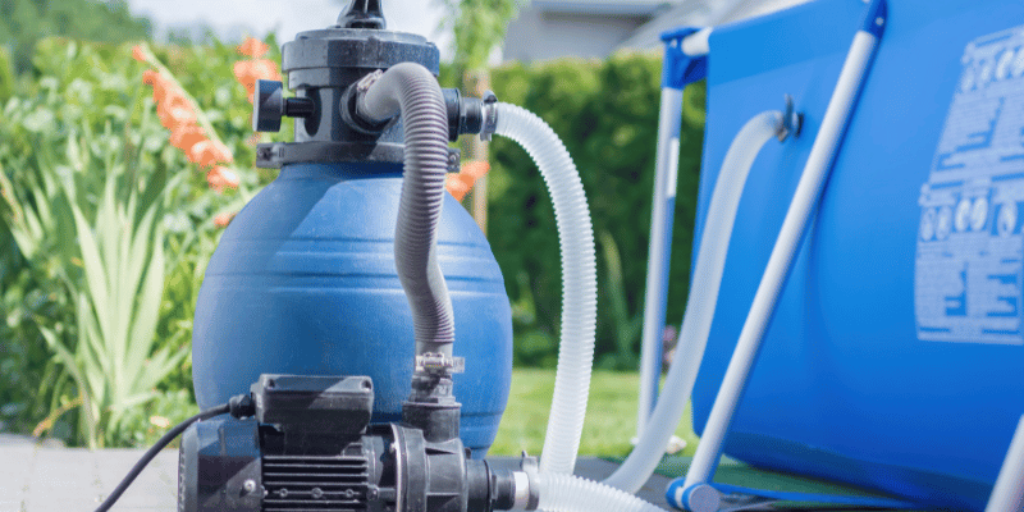
Alright, so you’ve decided it’s time. You’re ready to deploy the waste wizardry. First things first, you need to locate your filter’s multiport valve. This is the chunky, usually plastic, handle that sits on top of your sand filter. It’s the command center of your filtration system. It likely has several settings, and the one we’re interested in is clearly labeled “WASTE” (or sometimes “DRAIN”).

Before you even think about touching that handle, a word of caution: turn off your pool pump. Seriously. Trying to move that valve while the pump is running is like trying to change gears on a race car while it’s doing 200 mph. It’s not going to be pretty, and you might end up with a broken valve and a very unhappy pool owner. So, pump off. Done. Good.
Now, with the pump off, you can gently move the handle to the “WASTE” position. You might hear a satisfying click, or perhaps a groan – depending on how old your filter is. Think of it as the valve clearing its throat, ready for its new mission.
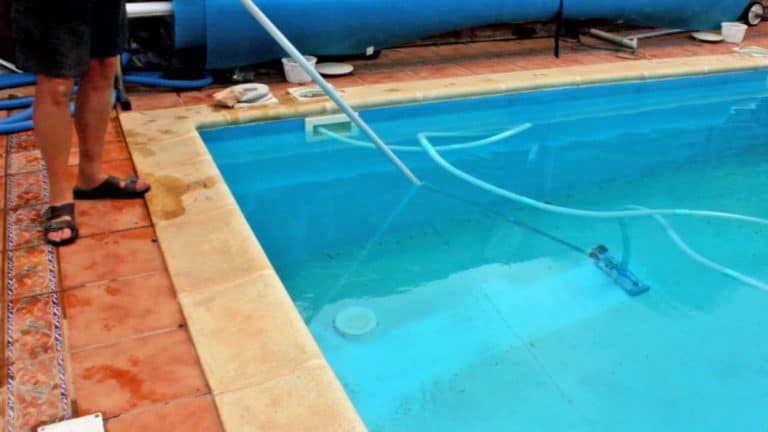
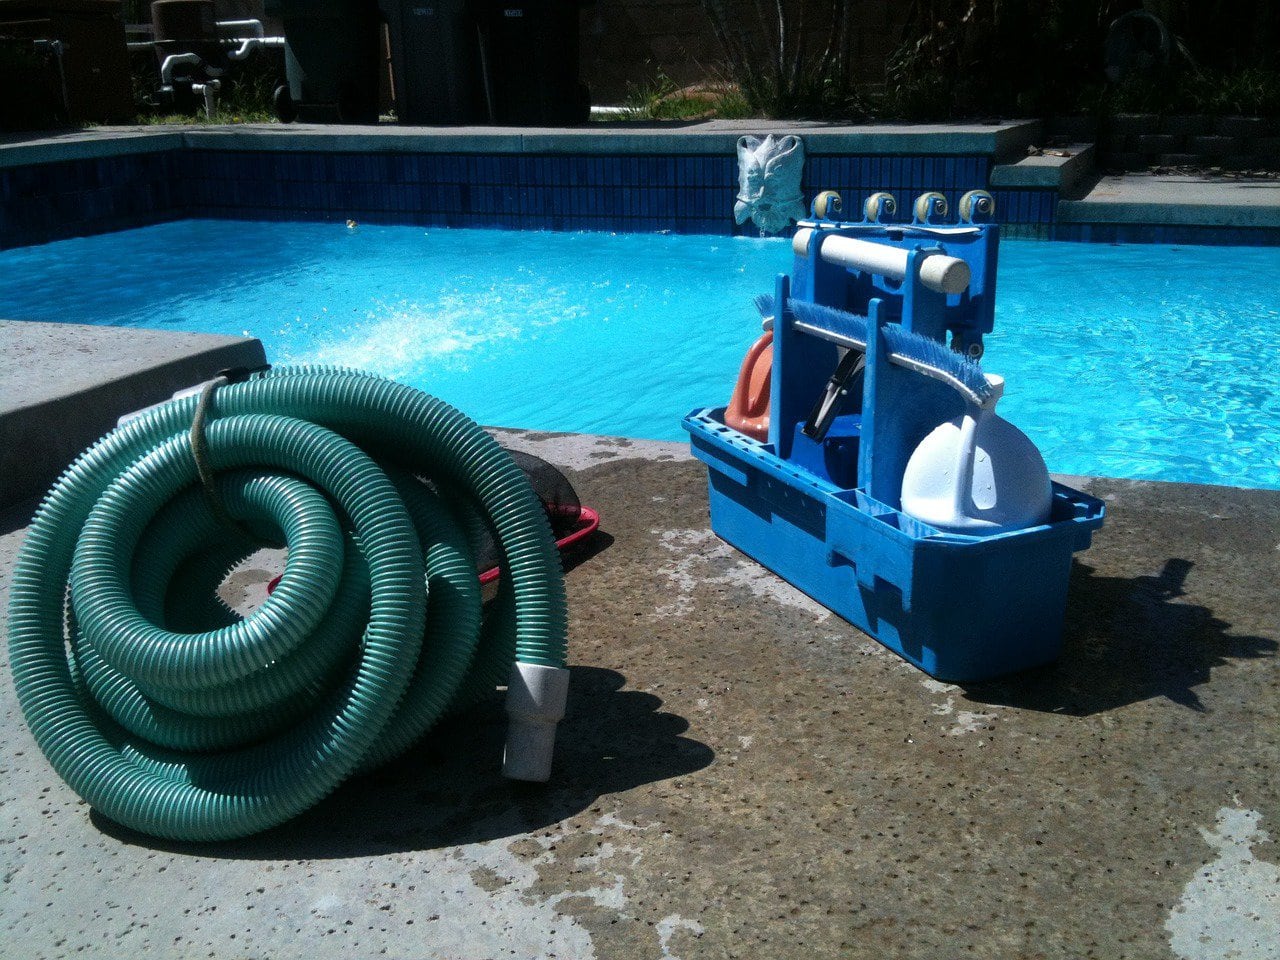
Next up, connect your vacuum head to your telescoping pole, and then attach your vacuum hose to the head. You know the drill. This is like assembling your cleaning weapon of choice. Then, you’ll need to get the vacuum head and hose into the pool and submerge it completely. The trick here is to get all the air out of the hose. You can do this by holding the end of the hose up to a return jet (one of the outlets where water comes back into the pool) until you see water flowing steadily through it. This is like priming your engine – you want smooth sailing, not sputtering.

Once your vacuum is assembled and the air is purged, connect the other end of the vacuum hose to your skimmer. This is where the magic (or rather, the science) begins to happen. You’ll also need to attach your backwash hose to the waste port on your filter. This is the hose that will be carrying away all that lovely, dirty water. Make sure it’s routed to a safe area – we’re talking about a place where a bit of pool water won’t cause a neighborhood incident. Think a lawn that needs watering, or a designated drain. Never connect the backwash hose to anything that could be damaged by chlorinated water.
Now, for the moment of truth: turn your pool pump back on. You should see water being sucked through your vacuum, disappearing down the hose, and making its merry way out through the backwash hose. You’re essentially creating a direct, unfiltered drain from your pool, powered by your pump. It’s like a portable black hole for pool grime!
As you vacuum, keep an eye on the water level in your pool. Since you’re removing water, you’ll need to monitor it. If it gets too low, you’ll have to turn off the pump, remove the vacuum from the skimmer, and add fresh water to your pool. Think of it as a delicate dance between cleaning and hydration. You don’t want to drain your pool dry like a forgotten cup of coffee!
Pro-Tips for a Waste-Free (or Waste-Full, Depending on Your Perspective) Experience
One of the biggest things to remember is that you are losing water when you vacuum to waste. This is not a self-replenishing cleaning method. So, keep an eye on your pool’s water level. If it drops significantly, you’ll need to add fresh water. This is why it’s best saved for those really dirty jobs, not for your weekly tidy-up. You don’t want to be constantly refilling your pool, that’s like trying to fill a bucket with a leaky hose – frustrating and inefficient.
Another crucial point: monitor your filter pressure gauge. While you’re vacuuming to waste, your filter isn’t actually filtering anything. However, if you leave the pump running for an extended period on waste, you can still cause issues. It’s not about protecting the sand, but rather the pump and plumbing from running dry if the water level gets too low. You’re essentially bypassing the filtering process, so there’s no resistance to speak of. If you notice your pressure gauge is unusually low (or if you were to accidentally run the pump dry), that’s a sign to stop.
Also, be aware of your surroundings. That backwash hose is expelling a lot of water. Make sure you're not flooding your neighbor's prize-winning petunias or creating a mini-lake in your own backyard. Choose your waste destination wisely! Think of it as choosing a responsible place to throw away your pizza crusts – you wouldn't just toss them out your car window, would you?
Once you’ve finished vacuuming, and your pool looks (heaven forbid) clean again, it’s time to switch back. Again, turn off the pool pump. Move the multiport valve handle back to the “FILTER” position. Turn the pump back on. You might want to do a short backwash (the normal kind, not to waste) after vacuuming to waste, just to clear out any residual debris that might have gotten lodged in the filter’s laterals. This is like giving your filter a quick rinse after a tough workout.
The Bottom Line: When in Doubt, Go Waste-ful (Responsibly!)
Vacuuming to waste isn’t your everyday spa treatment for your pool. It’s the heavy-duty, emergency cleaning service. It’s for those moments when your pool looks less like a serene oasis and more like a forgotten science experiment. By understanding how to use this feature correctly, you can tackle even the messiest of pool situations and get your backyard paradise back to its shimmering glory. So, the next time your pool gets a little too… lived-in, you’ll know just what to do. Happy (wasteful) vacuuming!