How To Unlock The Cell In Excel
Ever stared at an Excel spreadsheet, feeling like you're staring at a locked door? You know there's a hidden treasure of information in there, but you can't seem to get to it. Well, get ready to become a spreadsheet locksmith! Unlocking cells in Excel might sound a bit dramatic, but trust us, it's incredibly satisfying and surprisingly useful. Think of it like finding a secret passage or deciphering a hidden code. It’s not just about changing a number; it's about gaining control, understanding your data, and making Excel work for you, not against you. Whether you're a seasoned Excel pro or just dipping your toes into the data ocean, learning to unlock cells is a superpower that will make your spreadsheet adventures much smoother and more enjoyable.
The Mystery of the Locked Cell and How to Solve It
So, what exactly is a "locked" cell in Excel? It’s not like it has a tiny padlock icon visible to the naked eye (though that would be kind of cute, wouldn't it?). Instead, it's a setting you apply, often as part of protecting a sheet. Imagine you've built a fantastic spreadsheet for budgeting, tracking projects, or even managing your fantasy sports league. You’ve got formulas working their magic, and you want to make sure nobody accidentally deletes a crucial piece of data or, even worse, messes up your beautiful calculations. This is where cell locking comes in. By default, all cells in Excel are marked as "locked." This doesn't do anything on its own. The real magic happens when you combine this "locked" status with Sheet Protection.
When a sheet is protected, any cell that is marked as locked becomes... well, locked! You won't be able to edit the content, delete it, or change its formatting. This is a fantastic feature for safeguarding your work. For example, if you've created a master template that others will use, you might want to lock the cells containing important headers, formulas, or instructions, allowing users to only edit specific data entry fields. It’s like putting a velvet rope around the important parts of your spreadsheet.
Must Read
Why You'd Want to Unlock a Cell (and When You Wouldn't!)
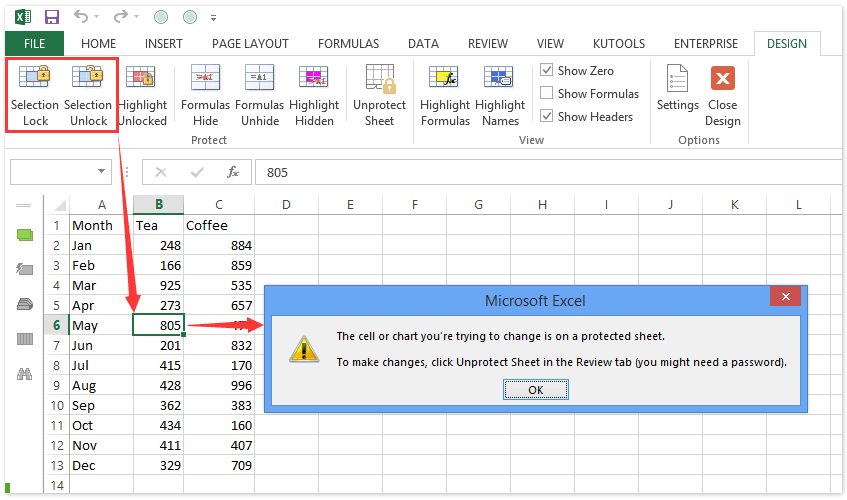
The primary reason you'll want to unlock a cell is to gain the ability to edit it when your worksheet is protected. Let’s say you've protected a sheet to prevent accidental changes, but now you need to update a specific piece of information in a cell that’s currently off-limits. Without unlocking it, you’re stuck. You'll need to temporarily unprotect the sheet, make your change, and then re-protect it.
However, there's a flip side to this. You generally don't want to unlock cells that contain critical formulas or data that you absolutely don't want anyone to change. Unlocking those cells would defeat the purpose of protecting your sheet in the first place. So, think of unlocking as a selective invitation to edit, not an open invitation to wreak havoc. It's about granting specific permissions.
The "How-To" - Your Secret Spreadsheet Unlocking Guide
Ready to wield your newfound unlocking powers? It’s a straightforward process, and we'll break it down into simple steps. Remember, the key here is that unlocking individual cells is only effective when the sheet is protected. If the sheet isn't protected, all cells are editable regardless of their "locked" status.
Step 1: Select the Cell(s) You Want to Unlock
First things first, you need to tell Excel which cells you want to free from their digital shackles. You can do this by clicking on a single cell, or if you need to unlock a whole range, click and drag your mouse to select them. For even more advanced selection, you can hold down the Ctrl key (or Cmd on a Mac) while clicking on individual cells that aren't next to each other. Selecting multiple cells is super quick and efficient!

Step 2: Access the "Format Cells" Dialog Box
Now, with your desired cells highlighted, it's time to dig a little deeper. The easiest way to get to the right settings is to right-click on your selected cell(s). A context menu will pop up. Look for the option that says "Format Cells..." and click on it. If you prefer using the ribbon, you can also go to the Home tab, then in the Cells group, click on Format, and then select "Format Cells...". It’s like opening a secret door to advanced cell properties.
Step 3: Navigate to the "Protection" Tab
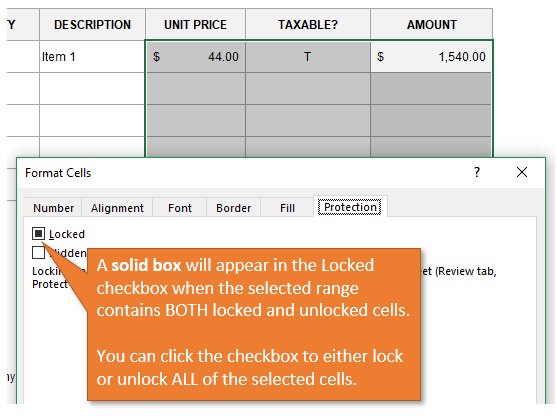
Inside the "Format Cells" dialog box, you’ll see several tabs at the top: Number, Alignment, Font, Border, Fill, and then… Protection! Click on the Protection tab. This is where the magic happens. You'll see two checkboxes: Locked and Hidden. For our current mission, we are interested in the Locked checkbox.
Step 4: Uncheck the "Locked" Box
Here’s the crucial step! If the Locked checkbox is currently ticked, it means these cells are marked as locked. To unlock them, simply click on the checkbox to remove the tick. This tells Excel, "Hey, these specific cells are allowed to be edited, even if the sheet is protected."

Step 5: Apply the Changes
Once you've unchecked the Locked box, click the OK button at the bottom of the "Format Cells" dialog box. Your selected cells are now officially unlocked! Remember, at this point, nothing has visibly changed yet. The real power of this action will be seen when you protect your sheet.
Step 6: Protect Your Sheet (The Grand Finale!)
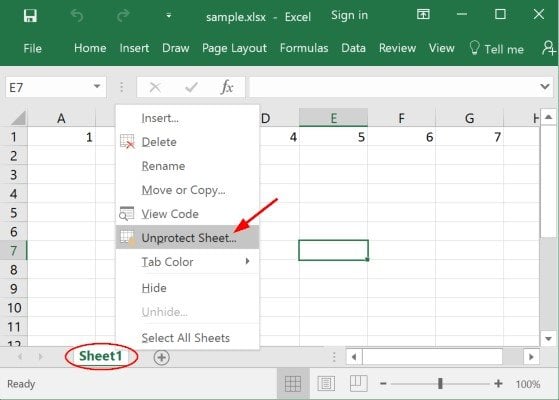
To see your unlocked cells in action, you need to protect the worksheet. Go to the Review tab on the Excel ribbon. In the Changes group, you’ll find a button called Protect Sheet. Click on it.

A dialog box will appear asking you to set a password (optional, but recommended if you want to prevent others from unprotecting your sheet) and choose what users are allowed to do. You'll see a list of actions like "Select locked cells," "Select unlocked cells," "Format cells," etc. Make sure that "Select unlocked cells" is checked. You can also check other permissions as needed. Click OK.
Now, try to edit a cell that you left locked. You’ll likely get an error message. But then, try editing one of the cells you just unlocked! Voilà! You can now freely edit that cell, while all the other locked cells remain safe and sound. Pretty neat, right?
A Word of Caution and Best Practices
While unlocking cells is a fantastic tool, it’s wise to use it strategically. Always protect your sheet after making changes to cell locking. Leaving a sheet unprotected after unlocking cells makes your previous locking efforts pointless. Also, consider using passwords for sheet protection if you're working on shared documents to prevent unauthorized unprotecting. Think of it as adding an extra layer of security to your digital vault. By mastering the art of unlocking cells, you're not just becoming a better Excel user; you're becoming a more confident and capable data manager!
![How to Lock and Unlock Cells in Excel [2024 Guide]](https://10scopes.com/wp-content/uploads/2021/11/lock-and-unlock-cells-in-excel.jpg)