How To Tape Your Knee With Kt Tape

Hey there, fellow humans navigating this wonderful, sometimes creaky, thing called life! Ever wake up and your knee feels like it's auditioning for a role in a horror movie? You know, that little twinge that turns into a full-blown “oh dear” when you’re just trying to grab that last slice of pizza or, you know, conquer Mount Laundry Pile?
Yeah, I’ve been there. We’ve all got those days. Whether you’re a weekend warrior who really gets into those pick-up basketball games (and maybe a little too much!), a parent chasing after tiny humans at warp speed, or just someone who’s decided that gravity really has it out for your joints, a little knee support can be a game-changer. And guess what? You don’t need to be a professional athlete with a personal physio to get some relief. We’re talking about the magic of Kinesiology Tape, or as it’s more commonly known, KT Tape.
Now, before you picture yourself looking like a mummy with brightly colored bandages, let me tell you, it’s way cooler and way more effective than that! Think of KT Tape as a super-smart second skin for your knee. It’s not a bulky brace that restricts your every move. Instead, it’s this stretchy, comfy fabric tape that works with your body, not against it.
Must Read
So, why should you even care about this magical tape? Well, let’s be real. Our knees take a beating! They’re the unsung heroes of our daily adventures, from taking that first step in the morning to gracefully (or not so gracefully) navigating stairs. When they’re not happy, we’re not happy. KT Tape can help with all sorts of knee woes. Think about that annoying ache when you go downstairs, that feeling of instability when you pivot, or even that general soreness that just won’t quit. It’s like giving your knee a little pep talk and some gentle encouragement.
And the best part? It’s surprisingly easy to use! Forget those complicated instructions that make you feel like you need a degree in engineering. We’re going to break it down, no sweat. It’s almost as simple as deciding what to binge-watch next!
Ready to Give Your Knee Some Love? Let’s Tape It Up!
Okay, so you’ve got your KT Tape (or you’re mentally adding it to your online shopping cart, which is a great life choice, by the way). What’s next? First things first: clean and dry skin. This is crucial. Think of it like preparing a canvas for a masterpiece. You wouldn’t paint on a dirty surface, right? So, give your knee a good wash and make sure it’s totally dry. No lotions, no oils – they’re the arch-nemesis of good tape adhesion.

Next up, you’ll want to cut your tape. Most KT Tape comes in a roll, and you’ll usually need two strips. The general idea is to create a sort of “I” shape around your kneecap. One strip will go vertically, and the other will lie across it. For the vertical strip, aim for a length that goes from the bottom of your thigh, down over your kneecap, and onto the top of your shin. Don’t worry about being perfectly precise. We’re going for supportive, not surgical!
Step 1: The Vertical Support Strip
Now, here’s a fun little trick. If you’re taping for pain or a bit of weakness, you might want to add a little pre-stretch to the tape. Imagine you’re gently pulling a rubber band – not super hard, but with a noticeable tug. This pre-stretch is key to how KT Tape works its magic. It creates a slight lift or tension that helps to… well, it’s a bit like giving your underlying muscles and ligaments a gentle hug, helping them do their job better and maybe even reducing some of that pesky swelling.
Take your first strip of tape and find the middle of it. Tear the backing paper away from that middle section. Now, with your knee slightly bent (think of it like you’re sitting down, but not all the way), place that middle section directly over the center of your kneecap. Press it down firmly. This is the anchor point.

Now, peel the rest of the backing paper off each end of the tape. With that gentle pre-stretch we talked about, lay down one end of the tape down your thigh, and the other end down your shin. Rub it in! Seriously, give it a good rub. The friction from rubbing actually activates the adhesive and helps it stick like superglue (but without the permanent commitment!). You want to make sure there are no wrinkles or bubbles.
Step 2: The Horizontal Comfort Strip
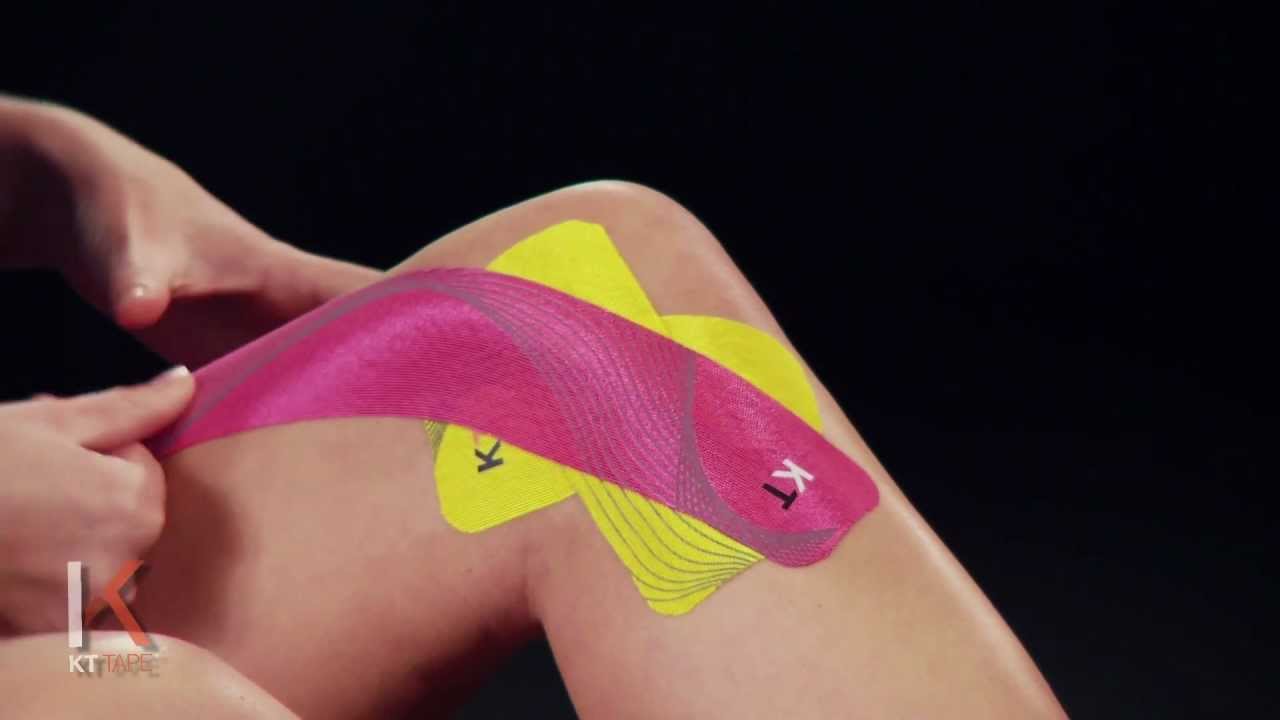
For this strip, we’re going to create a sort of “smile” or an upside-down “U” shape around your kneecap. This helps with overall stability and can be especially nice if your kneecap feels a bit… wobbly. You’ll want a piece of tape that’s a little shorter than the first one. Again, tear off the backing paper from the middle section.
With your knee still in that slightly bent position, place the middle of this second strip just above or below your kneecap. Again, press it down firmly. Now, peel off the backing paper from the ends and gently lay them down on either side of your kneecap. This time, you might not need as much pre-stretch, or even none at all, depending on what feels good. The goal here is to provide support and comfort without restricting movement too much. Think of it as giving your knee a gentle hug from the sides.

And voilà! You’ve just taped your knee like a pro. Give it another good rubdown to make sure everything is secure. You should be able to move your knee comfortably. If it feels too tight or restrictive, you might have used too much stretch. Don’t be afraid to adjust or even try again. Practice makes perfect, and your knee will thank you!
A Little Bit About Why This Works
So, what’s the science behind this stretchy tape? It’s pretty cool, actually. When you apply KT Tape with that gentle stretch, it creates a slight lift in your skin. This lift is believed to help with a few things:
- Decompression: It can create a little space between your skin and the underlying tissues, which might help reduce pressure on pain receptors. Think of it like giving your sore spot a little breathing room.
- Proprioception: This is a fancy word for your body’s awareness of its position in space. The tape provides constant feedback to your brain about your knee’s position, which can improve your coordination and stability. It’s like your knee is whispering sweet nothings to your brain, saying, “Hey, I’m still here and I’m doing okay!”
- Muscle Support: It can help cue your muscles to engage properly, providing gentle support without hindering movement. It’s like a helpful nudge in the right direction.
When to Use It (and When to Call a Doctor)
KT Tape is fantastic for minor aches, strains, and general knee support. It's great for that post-workout soreness, that ache from doing too much gardening, or just that general feeling of “my knee isn’t thrilled today.” You can wear it for a few days, even through showers and workouts. Just try not to rub it vigorously after a shower!
However, it’s super important to remember that KT Tape is not a magic cure-all. If you have severe pain, swelling that doesn’t go down, a suspected injury like a tear, or if your pain is persistent and not improving, please, please, please see a doctor or a physiotherapist. They are the real superheroes with the superpowers of diagnosis and proper treatment. KT Tape is a wonderful tool, but it's not a substitute for professional medical advice.
The Takeaway
So, there you have it! Taping your knee with KT Tape is a simple, accessible way to give your joints a little extra love and support. It’s about making those everyday movements a little more comfortable, a little less ouchy, and a lot more enjoyable. Think of it as investing in your ability to grab that last slice of pizza, chase those little ones, or simply enjoy a pain-free walk. Your knees will thank you, and you’ll be feeling a whole lot better about conquering your own personal Mount Laundry Pile!