How To Take Off Gel Nail Polish

So, you’re rocking some fabulous gel nails, right? They’re shiny, they’re strong, they’ve survived everything from dishwashing marathons to that impromptu dance-off in the kitchen. Honestly, gel polish is a miracle, isn't it? But, every good thing must eventually… well, evolve. And when it's time for your nails to shed their gel armor, you might be staring at them with a little bit of dread. "How on earth," you might be asking yourself, "do I get this off without looking like I’ve been gnawing on my fingertips?" Don't worry, friend! We’ve all been there. It’s like trying to peel a particularly stubborn sticker, but way more important for your nail health. Grab your coffee (or tea, or that fancy sparkling water you’ve been saving), and let’s chat about how to get those gels off without turning your natural nails into something resembling a sad, parched desert.
First things first, let's acknowledge the elephant in the room: do not, I repeat, do not just start picking at it. Seriously. Think of it this way: your gel polish is like a tiny, super-strong superhero cape for your nails. If you try to rip it off, you're going to rip off a whole lot more than just the polish. You might end up with layers of your natural nail clinging to the gel, which is… not the vibe we're going for. It's a recipe for weak, brittle nails that scream, "Help me! I've been through a manicure trauma!" And who wants that? Not you, not me, not your future nail art dreams.
The "Soak-Off" Strategy: Your New Best Friend
The most common and, dare I say, the safest way to remove gel polish is the trusty soak-off method. It sounds a little spa-like, right? And it kind of is. You're basically giving your nails a little vacation. This is where the magic happens, and it’s surprisingly simple. No need for fancy tools that look like they belong in a dentist’s office. We’re going for gentle, effective, and a little bit pampering.
Must Read
Step 1: The Buffing Bonanza
Okay, so before we get to the soaking part, there’s a tiny bit of prep work. Think of it as softening up the enemy. You need to gently buff the top layer of your gel polish. Why? Because that shiny, impermeable top coat is like a force field. You need to break through it just a smidge so the remover can actually do its job. Use a fine-grit nail file. We're not trying to sand down your actual nails here, just create tiny little openings in the gel's armor. A few gentle swipes over each nail should do the trick. Don’t go crazy! If you see your natural nail peeking through, you’ve probably buffed enough. It’s all about being subtle, not aggressive.
Some people even use a coarser grit file to really rough it up, but I’m a bit of a wuss when it comes to my nails, so I tend to stick to the gentler side of things. You do you! The goal is just to create some surface disruption. Imagine tiny little microscopic tunnels being bored into the gel. Sounds dramatic, I know, but it’s really just a light scuffing. And don't forget to file the edges a little too. Sometimes those edges can be a bit… stubborn. A little nudge helps everything along.
Step 2: The Acetone Adventure
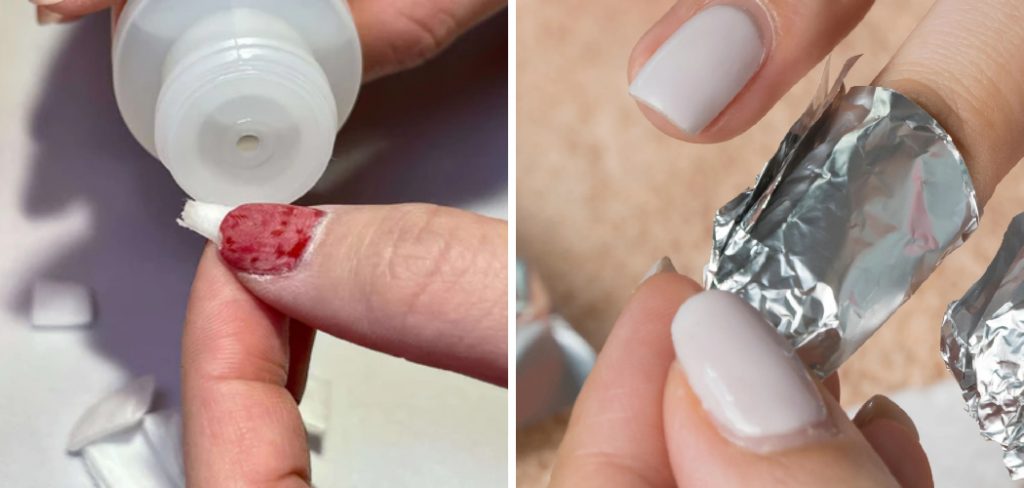
Now, for the main event: the acetone. Yes, pure acetone is your friend here. Don't let anyone tell you otherwise. It's the most effective solvent for breaking down gel polish. You can find acetone at pretty much any drugstore or beauty supply store. It might smell a little… intense. Like a nail salon threw a rave. But that’s okay! It’s doing important work. You can buy it in a big bottle, or you can get those little pads soaked in acetone. Both work. The bottle is usually more economical if you’re a regular gel wearer.

So, how do we apply this magical elixir? There are a few ways. The classic method involves cotton balls. You’ll need those little cotton balls you can pull apart into thinner wisps. Tear off a piece of a cotton ball, enough to cover your entire nail. Then, soak it thoroughly in acetone. Like, really soak it. It should be dripping a little, but not so much that it's a puddle. You want it saturated enough to do the job, but not so saturated that it's running all over your fingers and making a mess. Precision, my friend, is key.
Step 3: The Foil Frenzy
This is where the foil comes in. Yes, aluminum foil, like the stuff you use to bake potatoes. Who knew it had so many talents? Cut out little squares of foil, big enough to wrap around your fingertip, covering the cotton ball and your nail. So, you'll take your acetone-soaked cotton ball, place it directly on top of your buffed gel polish on your nail, and then – drumroll, please – wrap the foil tightly around your fingertip. You want it snug, like a little silver glove. This traps the heat from your finger and the acetone, creating a mini-sauna that helps to break down the gel. It’s like a little personal spa treatment for each finger! How fancy is that?
Make sure the foil is really sealed around your finger. No gaps! You want to keep that acetone concentrated on the nail. If it’s too loose, the acetone will evaporate, and your gel won’t soak off properly. It's like trying to steam a dumpling with the lid off – just not going to work. So, be generous with the foil and make sure it's nice and tight. You might feel a slight tingling sensation, which is totally normal. It just means the acetone is working its magic. If you experience any burning or severe discomfort, take it off immediately. Everyone’s skin is a little different, so listen to your body!
Step 4: The Waiting Game (and Maybe Some Netflix)
Now, you wait. This is the hardest part for some people. Patience is a virtue, especially when it comes to removing gel polish. You’ll want to let it soak for about 10-15 minutes. Some really stubborn gels might need a little longer, maybe up to 20 minutes. You can use this time to catch up on your favorite show, scroll through social media, or just close your eyes and pretend you’re on a tropical vacation. Whatever helps pass the time! Think of it as a forced break. Your nails are getting a treat, and you’re getting a moment of peace. It's a win-win!
During this time, the acetone is working its way through the tiny holes you made with the file, softening the gel. You might feel your fingers getting a little warm under the foil. That's a good sign! It means the process is happening. Don't be tempted to peek too early! Resist the urge. The longer you let it soak, the easier it will be to remove the gel. Trust the process. It's like waiting for a cake to bake – you can’t rush perfection. And perfect, gel-free nails are the goal here!
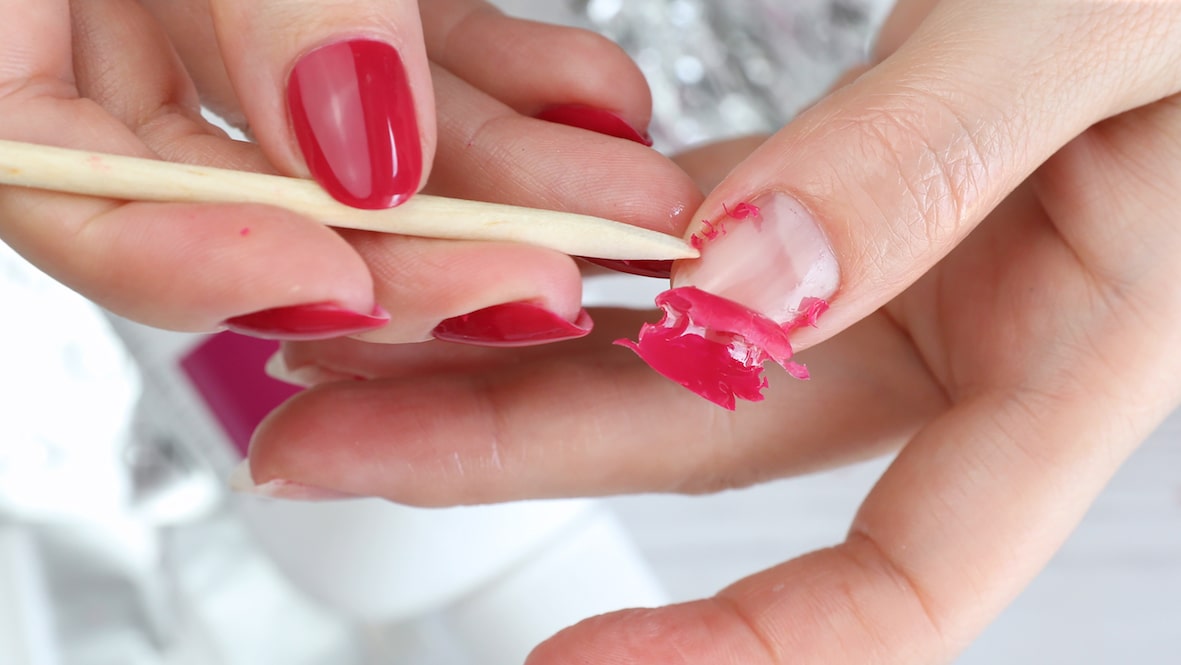
Step 5: The Gentle Scrape-Off
After your waiting period is up, it’s time for the grand finale. Unwrap one finger at a time. You should see the gel polish starting to look a little… gummy. Or bubbly. It’s no longer a solid, shiny shield. Now, gently take an orange wood stick or a cuticle pusher (the metal kind is usually better for this) and gently push the gel polish off your nail. You want to push from the base of the nail towards the tip. If it’s coming off easily, great! You’ve done it right. If it’s still a bit stubborn, don’t force it. Re-wrap that finger with a fresh, acetone-soaked cotton ball and foil for another 5-10 minutes. No shame in a second round!
The key word here is gently. Seriously. We are not excavating ancient artifacts. We are coaxing the gel off. If you have to scrub or scrape hard, something’s not right. You might need to buff a little more next time, or let it soak a bit longer. The gel should be lifting off in soft, pliable pieces, not chipping away stubbornly. Imagine you’re a surgeon, performing a delicate operation. Calm, steady, and precise. If you’re using an orange wood stick, you can also use the pointy end to gently lift any edges that are still stuck. Just be careful not to dig into your nail bed. That would be… ouch.
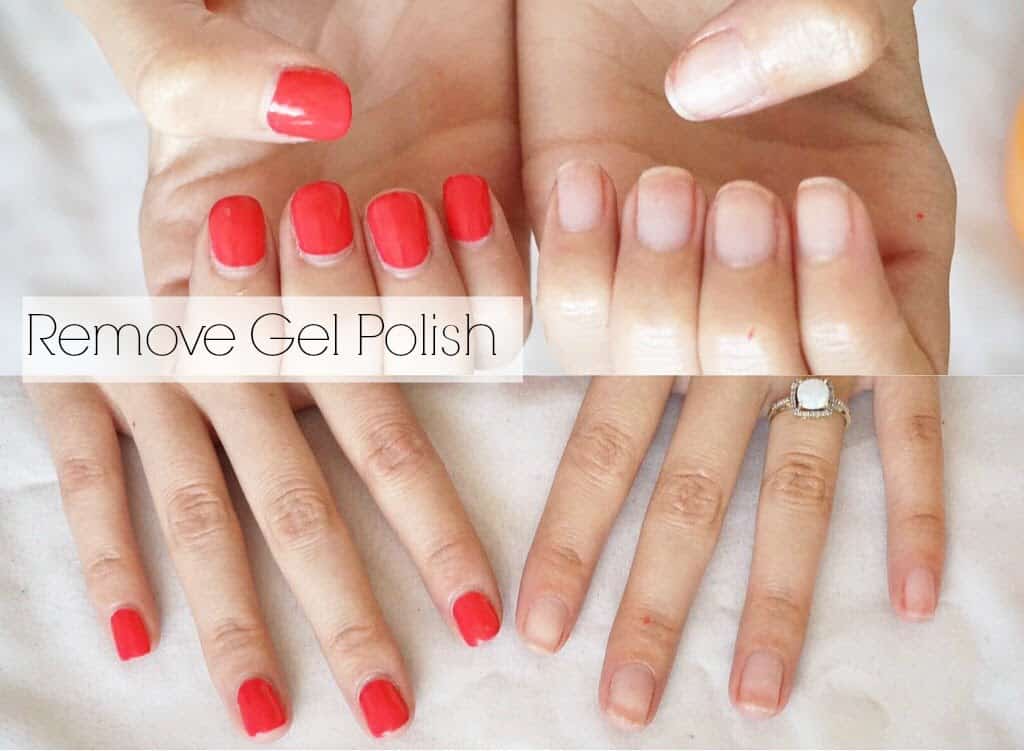
Post-Removal Pampering: Don't Forget This Part!
Once all the gel is off, your nails might feel a little… naked. And maybe a little dry. That's where the pampering comes in. This is just as important as the removal process, if not more so. You’ve just put your nails through a little bit of a chemical bath, and they deserve some TLC. Think of it as a spa day for your fingertips.
Step 6: Clean Up and Condition
After you've scraped off all the gel, give your nails a good wash with mild soap and water to get rid of any lingering acetone residue. You can also gently buff your nails with a buffer block to smooth out any rough spots. Again, be gentle! We're not trying to file them down to nothing. Just a light buffing to create a smooth surface. This will also help to get rid of any tiny bits of gel that you might have missed.
Then, the most important part: moisturize. Slather on a good cuticle oil or a rich hand cream. Really massage it into your nails and cuticles. Acetone is notoriously drying, so you need to replenish that moisture. Coconut oil, almond oil, or a dedicated cuticle oil will do wonders. Apply it generously, let it soak in, and reapply throughout the day. Healthy nails are hydrated nails, my friend! It's like giving your plants a good watering after a long dry spell.
What About Those "Gel Removers" That Aren't Pure Acetone?
You might see some products marketed as "gel removers" that don't contain pure acetone. While some of them might work for very thin layers of gel or certain brands, they are generally less effective. Pure acetone is the gold standard for a reason. If you’re struggling to get your gel off with a non-acetone remover, you'll likely end up spending more time and frustration trying to make it work. Sometimes, it's just better to go with the powerful stuff. Just be sure to follow up with plenty of moisturizing!
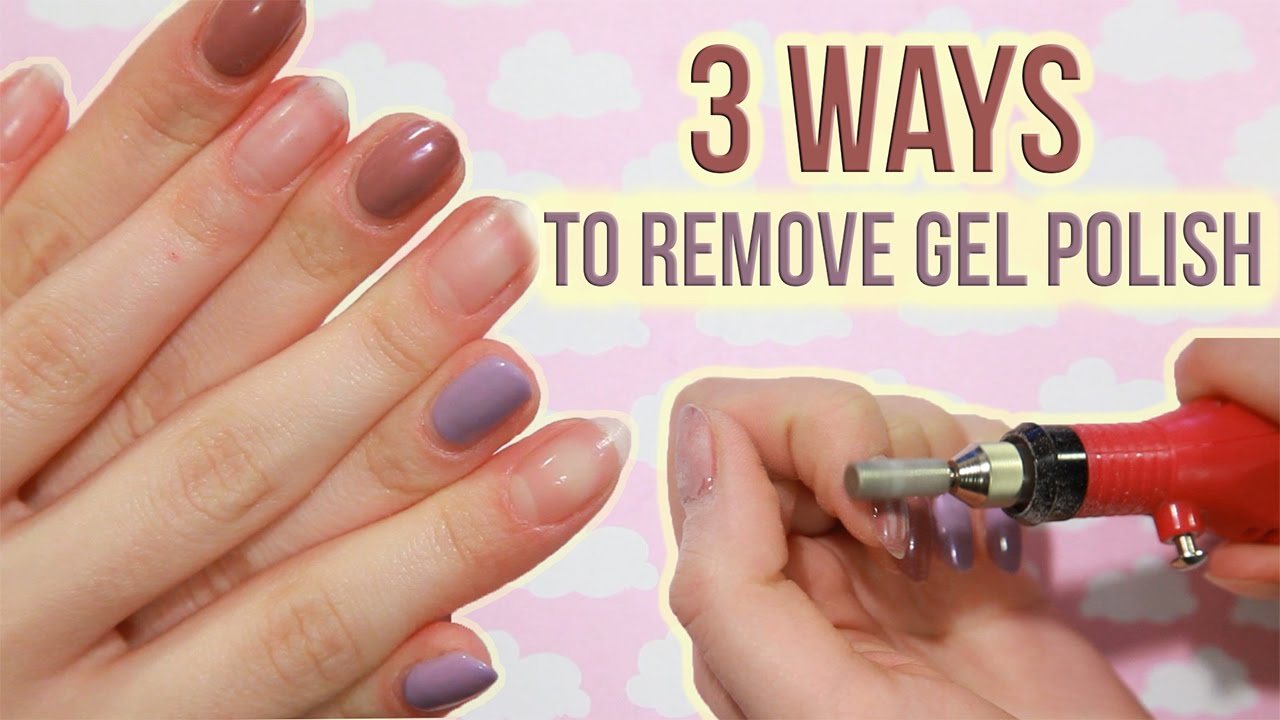
The "Drill" Option: When to (and When Not To) Use It
Okay, so I have to mention the electric nail file, or "e-file," also known as the drill. Some professionals use these to quickly remove gel polish. They have different bits that can effectively file away the gel. However, this is definitely not recommended for beginners or home use. Why? Because it’s incredibly easy to overdo it and file away your natural nail, causing serious damage. Imagine a tiny, high-speed sanding machine in your hand. It's powerful, and it requires a lot of skill and practice to use safely. If you're not trained in using one, stick to the soak-off method. Seriously. We want healthy nails, not an emergency trip to the nail doctor. Leave the drills to the pros!
A Word on Peeling and Scraping (The Bad Way)
I’ve already touched on this, but let’s reiterate: do not peel or scrape with metal tools without soaking. It’s the fastest way to damage your nail plate. Think of your nail plate as a stack of thin, delicate paper. When you peel or scrape aggressively, you’re tearing those layers apart. This leads to weak, thin, and even painful nails. If you’ve ever tried to peel off gel and ended up with half your nail gone with it, you know exactly what I’m talking about. It’s a harsh lesson, but a good one to learn. The soak-off method is designed to break down the gel chemically so it lifts off easily, rather than being forcefully removed.
When to Call a Professional
If you’re really nervous about removing your gel polish, or if you’ve had a bad experience in the past, there’s absolutely no shame in going to a salon for a gel removal. They have the right tools, the right products, and the experience to do it safely and efficiently. It's a small price to pay for peace of mind and healthy nails. Sometimes, it’s just worth letting someone else handle it. They can also give your nails a nice conditioning treatment afterward.
So there you have it! Gel polish removal doesn't have to be a dreaded chore. With a little patience and the right technique, you can have your nails looking fresh and healthy again, ready for their next nail art adventure. Remember to be gentle, moisturize well, and your nails will thank you for it. Now go forth and conquer those gels! You’ve got this.