How To Split A Cell In Excel

Have you ever looked at a dazzling mosaic, a beautifully intricate stained-glass window, or even a captivating pixel art masterpiece and thought, "Wow, how did they make that look so cool?" Well, prepare to have your mind slightly, but delightfully, blown. Because the secret ingredient to some of these stunning creations might be hiding in plain sight, right on your computer screen: Microsoft Excel! Yes, you read that right. While often associated with spreadsheets and crunching numbers, Excel can also be a surprisingly creative playground for artists, hobbyists, and anyone with a curious mind. And at the heart of this artistic transformation lies a simple, yet powerful technique: splitting cells.
Why would you want to split a cell, you ask? Imagine you're a budding artist wanting to experiment with digital mosaics. Splitting cells allows you to divide a single large block into smaller, more manageable units, much like individual tiles. For hobbyists creating pixel art, each split cell becomes a tiny canvas, perfect for adding vibrant colors and intricate details. Even for the casual learner looking for a fun, visual way to grasp concepts, splitting cells can make complex data visually appealing and easier to digest. It’s about breaking down the big picture into bite-sized, controllable pieces, opening up a world of visual possibilities.
The applications are wonderfully diverse. Think of creating a vibrant pixel portrait of your pet, where each split cell represents a single pixel. Or perhaps you’re a knitter wanting to visualize a complex pattern – you can use split cells to map out your stitches with different colors. Even for something as simple as a geometric design, splitting a cell diagonally or into thirds can add an instant touch of sophistication and interest. You can create anything from abstract art and intricate mandalas to even basic diagrams and flowcharts with a unique, segmented aesthetic. The flexibility is truly the key!
Must Read
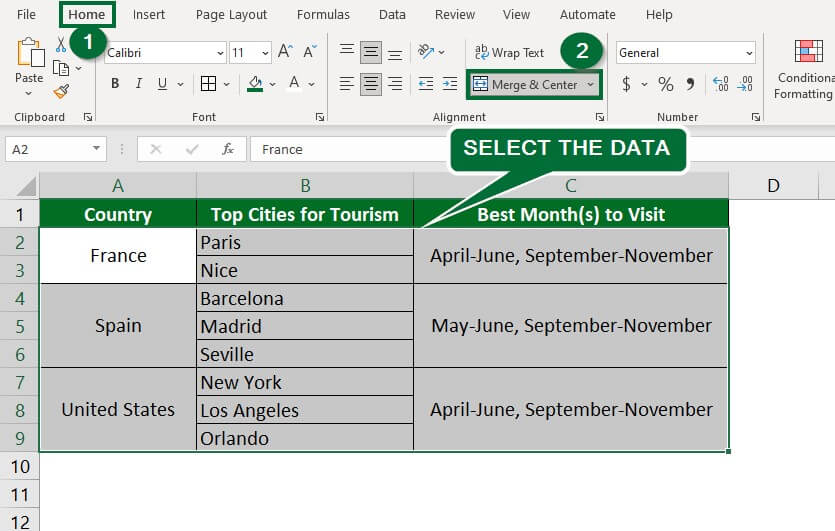
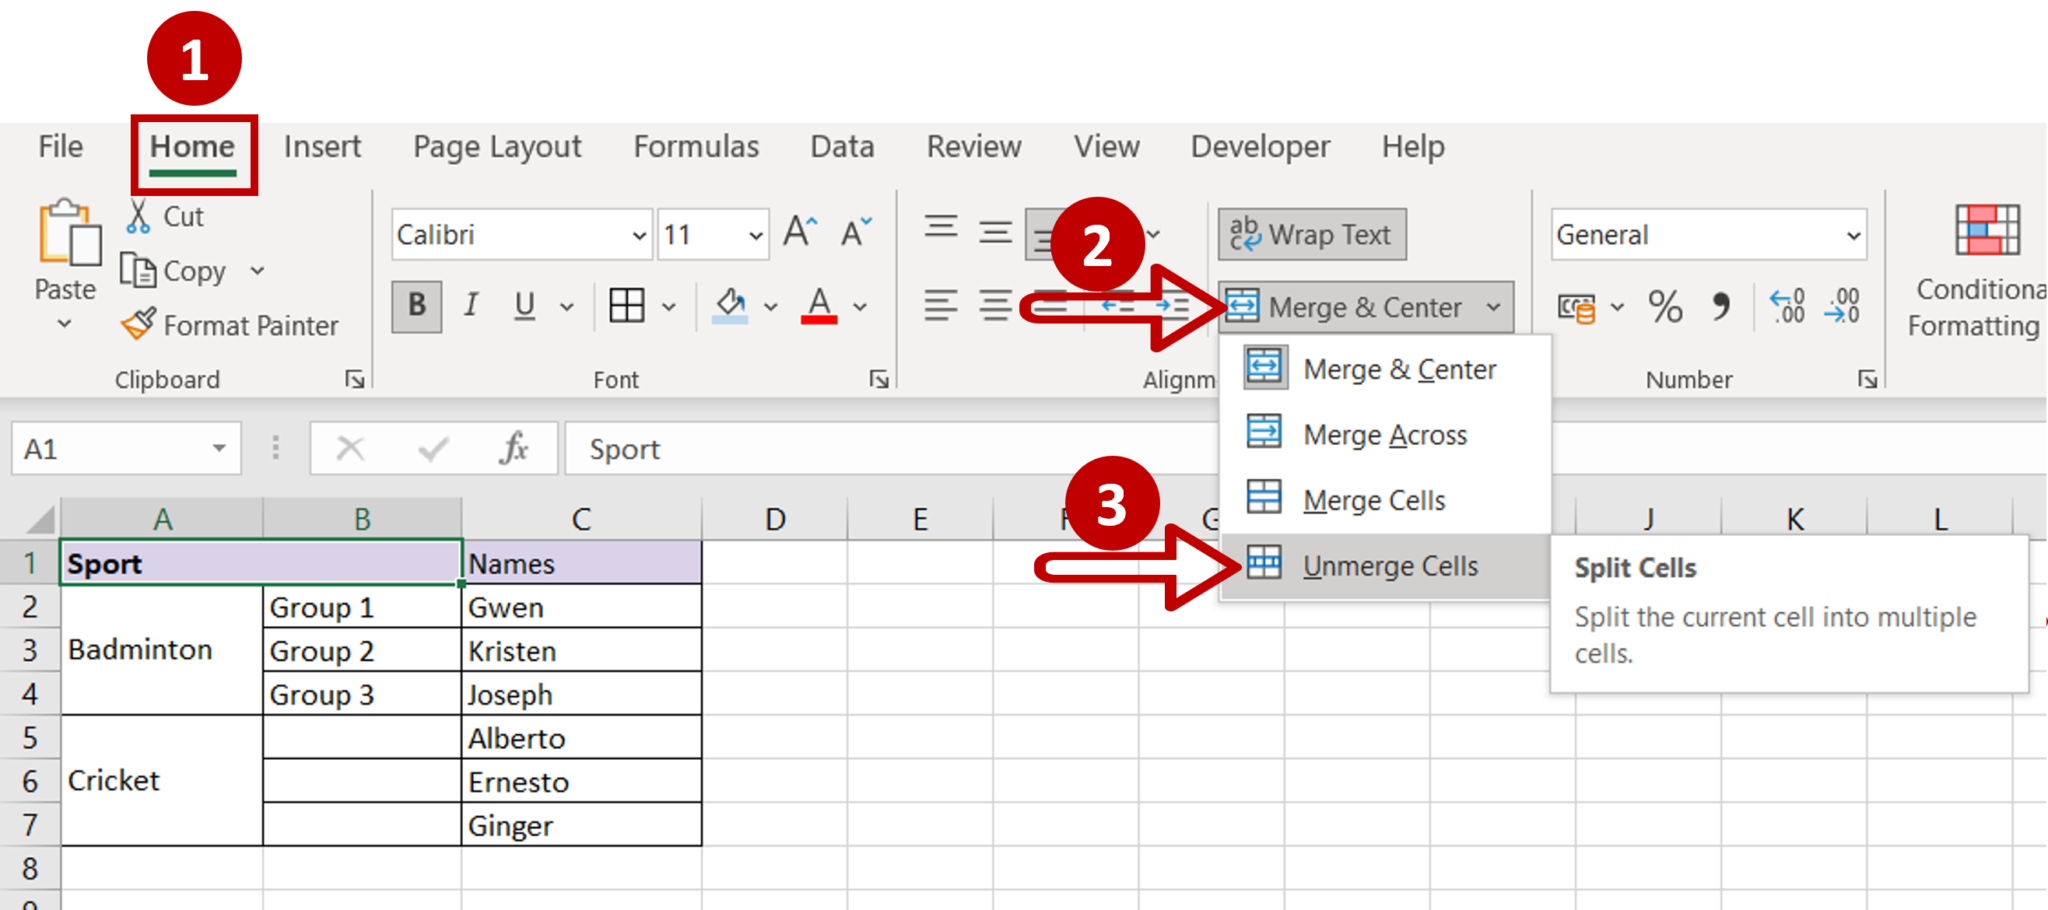
Ready to try it yourself? It’s remarkably straightforward. Select the cell or range of cells you want to work with. Then, head over to the ‘Home’ tab and look for the ‘Alignment’ group. You’ll find an option labeled ‘Merge & Center’. Click the small arrow next to it, and voilà! You’ll see options to ‘Merge Cells’ or ‘Merge Across’. To split them, you’ll actually use the reverse! Select a merged cell, click the arrow, and choose ‘Unmerge Cells’. To create custom splits within a single cell, it’s a little more hands-on. You can manually insert rows and columns within your existing cell boundaries, effectively dividing it. Experiment with merging several cells, then unmerging them to see how Excel reinterprets the grid. The magic happens when you start filling these segmented cells with color, text, or even images!
What makes this process so enjoyable is the sense of discovery. It’s a departure from the typical, utilitarian use of Excel and taps into a more playful, experimental side. The satisfaction of seeing a blank grid transform into something visually engaging, block by block, is incredibly rewarding. It’s a reminder that creativity can be found in the most unexpected places, and that even the most common tools can unlock extraordinary results with a little imagination. So go ahead, dive in, and start splitting those cells – you might just surprise yourself with what you create!