How To Sew Pleats On A Skirt

So, you’ve decided to tackle skirts. Excellent choice! And what’s a skirt without some fabulous folds? That’s right, we’re talking about pleats. They’re like the stylish little secrets your fabric holds, just waiting to be released. Think of them as organized chaos, a deliberate wave, a way to add some serious oomph to your wardrobe.
Why pleats, you ask? Oh, let me count the ways! They’re practically magic. They can make a simple fabric swish and sway like a pro dancer. They give structure to flowy materials. They can hide a multitude of sins (like a slightly-too-big waistband, wink wink). Plus, let’s be honest, who doesn't love a skirt that looks like it just stepped out of a vintage movie scene?
Sewing pleats might sound a bit intimidating, like trying to fold a fitted sheet perfectly. But trust me, it’s totally doable. It’s more about precision than rocket science. And the feeling of accomplishment when you see those neat little rows forming? Pure joy. It’s like unlocking a hidden talent you didn’t even know you had. Get ready to impress yourself (and probably everyone else).
Must Read
The Pleat Party: What You Need to Get Started
First things first, let’s gather our troops. You'll need some basic sewing supplies. Nothing fancy, just the usual suspects.
- Your fabric, of course! Choose something that drapes nicely. Stiff fabrics can be a bit tricky for your first pleat adventure. Think cottons, linens, or even some lighter weight wools.
- A sewing machine. Hand-stitching pleats is a labor of love, but a machine makes it go so much faster.
- Thread that matches your fabric. Or, you know, a contrasting color if you're feeling bold and want your pleats to pop.
- Sharp scissors. For clean cuts. No one wants raggedy pleats.
- Pins. Lots and lots of pins. You'll be pinning like a madwoman, but it's worth it.
- A measuring tape. Accuracy is key here.
- A ruler or a straight edge. For those perfectly straight lines.
- Fabric chalk or a washable marker. To mark your pleat lines.
- An iron and ironing board. This is your secret weapon. Ironing is where the magic really happens with pleats.
Got it all? Great! Now, let’s talk about the different types of pleats. It’s not just one-size-fits-all, you know. It’s like choosing your favorite ice cream flavor – so many delicious options!
A Plethora of Pleats: Know Your Folds
Okay, so there are a few main players in the pleat game. Don't worry about memorizing them all. Just get a feel for what they look like.
The Humble (but Mighty) Hem or Knife Pleat
This is your everyday pleat. It’s just one fold, all going in the same direction. Like little soldiers marching in a line. They’re super easy to create and look super chic. Think of a classic school uniform skirt or a sophisticated business skirt. They’re the reliable best friend of the pleat world.
The Fancy-Pants (but Still Approachable) Box Pleat
This one's a bit more structured. It’s like two knife pleats folded back-to-back. You get a neat little “box” shape in the middle. This gives your skirt a bit more volume and a really polished look. It's like giving your skirt a little architectural upgrade. Think of the flared skirts in those old Hollywood musicals – a lot of that is thanks to box pleats!
The Swirly-Twirly (and Seriously Fun) Inverted Pleat
This is the opposite of a box pleat. You fold two edges inwards, and they meet and fold back on themselves. It creates a hidden pleat on the inside, giving you a nice, smooth front. It's a bit of a chameleon pleat – it looks neat and tidy from the outside, but has a little secret on the inside. This is fantastic for adding fullness without all the bulk.
There are others, of course – accordion pleats, sunburst pleats – but for a beginner, sticking to these three will get you a long way. And honestly, once you master these, the world of pleats opens up like a treasure chest!
The Art of the Fold: Let's Get Pinning!
Alright, time to get down to business. We’re going to focus on the most common and beginner-friendly: the knife pleat. It’s the foundation for so many other things.

First, you need to figure out how much fabric you need. This involves a little bit of math, but don’t let it scare you. You’ll typically need to multiply the circumference of your waist (or where the skirt will sit) by a factor. This factor determines how full your skirt will be. For a simple, not-too-full skirt, a factor of 1.5 to 2 is a good start. For something more dramatic, you might go up to 3!
Once you’ve got your fabric cut to the right width and length, it’s time to mark. This is where your chalk or marker comes in. You’ll be marking out lines for your pleats. Imagine dividing your waist measurement by the total number of pleats you want. Let’s say you want 10 pleats. You’ll mark lines every so often, indicating where each pleat will start and end.
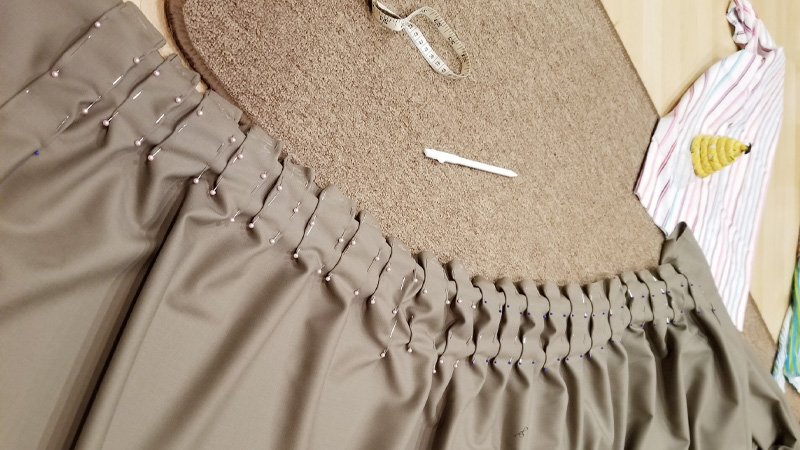
Now for the fun part: the pinning. You'll be folding your fabric according to your marked lines. For a knife pleat, you'll fold one section of fabric over another, so they all go in the same direction. This is where your ruler and measuring tape are your best friends. You want those folds to be even and consistent. Use your pins to hold each fold in place. Don't be shy with the pins! The more you use, the more secure your pleats will be.
Here’s a little quirky fact: ancient Egyptians were actually the first to wear pleated clothing! They used fine linen and achieved incredibly intricate pleats. So, when you’re pinning, you’re channeling a little bit of ancient fashion history. How cool is that?

Ironing: The Secret Sauce to Perfect Pleats
Seriously, I can’t stress this enough: ironing is crucial. Once you have your pleats all pinned, it’s time to hit them with the iron. You want to press those folds firmly. Start at the top and work your way down, giving each fold a good press. This sets the pleat and gives it that crisp, defined look.
Don’t rush this step. Take your time. Go over each pleat a couple of times if needed. You’re essentially training your fabric to stay in that folded position. Think of it as giving your skirt a spa treatment. A very precise, fold-focused spa treatment.
Some people like to press their pleats with a pressing cloth. This is especially useful for delicate fabrics or if you’re worried about your iron leaving a shine mark. A pressing cloth is just a piece of thin cotton fabric you lay over your pleats before ironing. It diffuses the heat and protects your fabric.
Sewing Your Pleats: The Grand Finale
Once your pleats are beautifully pressed and pinned, it’s time to sew them in place. You’ll be stitching along the edge of the folded pleats, usually at the top of where the pleat will sit on your waist. You don't need to sew all the way down the entire length of the pleat. Just enough to secure it at the waistband.

Set your sewing machine to a straight stitch. You'll want to stitch right along the edge of the folded pleat, about 1/4 inch from the raw edge. Go slowly and carefully, keeping your seam allowance consistent. You’re essentially creating a neat line of stitching that holds all your hard work in place.
For box pleats and inverted pleats, the sewing process is similar, but you’ll be stitching along the folded edges that form the box or the inverted fold. The key is to keep everything neat and tidy. Don't let your stitches go crooked – that's a pleat's worst nightmare!
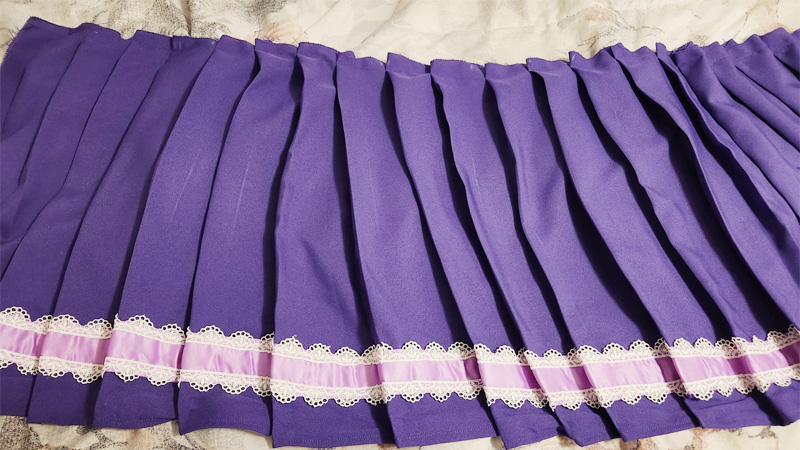
And there you have it! You’ve sewn pleats! It’s not rocket science, right? It’s just a series of careful folds and a bit of heat. The satisfaction you’ll feel when you have a skirt with perfectly formed pleats is immense. You can then attach your waistband, hem your skirt, and voilà! You’ve created a garment with serious style.
So, go forth and pleat! Experiment with different fabrics, different pleat types, and different fullness factors. You might even discover you have a secret passion for fabric origami. Happy sewing!