How To Save As Mp4 In Imovie
So, you’ve been dabbling in the magical world of iMovie. You’ve chopped, you’ve spiced, you’ve added glittery titles that would make a disco ball weep. Now comes the moment of truth: getting your masterpiece out into the wild. And you want to share it as a nice, neat MP4. Excellent choice, my friend.
It’s a bit like sending your kid off to college. You’ve nurtured it, you’ve polished it, and now you’re just hoping it behaves well on its own. And an MP4 is like the trusty backpack that holds all its important stuff, ready for any adventure.
Now, I have a confession. I think we make this whole "exporting" thing way more complicated than it needs to be. Like, ridiculously so. It’s not rocket science, people. It’s iMovie. It’s designed to be friendly. Let’s embrace that.
Must Read
The biggest hurdle for many, I’ve observed, is the sheer panic of the export menu. It looks like a secret government code. But fear not! We’re going to crack this code together, with a smile and maybe a slight eye-roll at ourselves for ever being intimidated.
Think of your iMovie project as a delicious cake. You’ve spent hours mixing, baking, and frosting. Now you need to serve it. Do you need a PhD in cake engineering to cut it? No. You need a knife. iMovie’s export function is your knife.
Let’s get down to brass tacks. You’ve finished your epic saga of your cat chasing a laser pointer. Or perhaps your in-depth documentary on the best way to fold a fitted sheet. Whatever your creative genius, it’s ready.
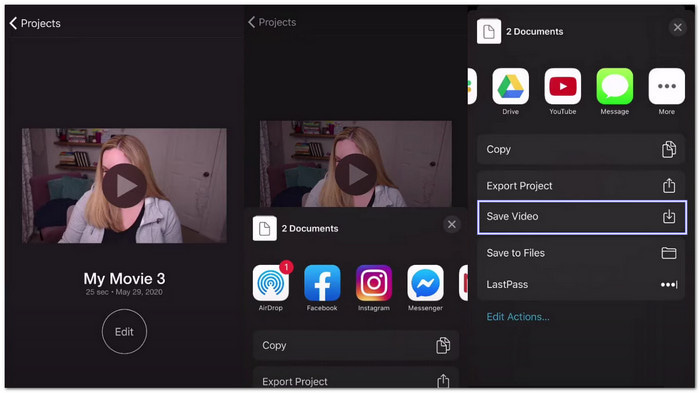
First things first, find that magical button. It’s usually hiding in plain sight, like that one sock that always disappears in the laundry. Look up. Look around. It’s there. And it’s usually labeled something like “Share” or has a little arrow pointing upwards. Very intuitive, right? Almost… too intuitive.
Once you’ve located this elusive “Share” button, give it a friendly little click. Don’t be shy. It’s been waiting for you. It’s like the door to the buffet table. You know what’s inside, and you’re ready to feast.

Now, a little menu might pop up, like a shy waiter presenting you with options. And here’s where the MP4 magic happens. You’ll see various choices. Don’t get overwhelmed by terms like “ProRes” or “Animation.” Those are for folks who speak in hexadecimal code and wear lab coats while editing. We’re here for simple, effective, shareable.
You want the one that says “File.” Yes, just “File.” So straightforward, it’s almost insulting. But perfect for us. Click on “File.”
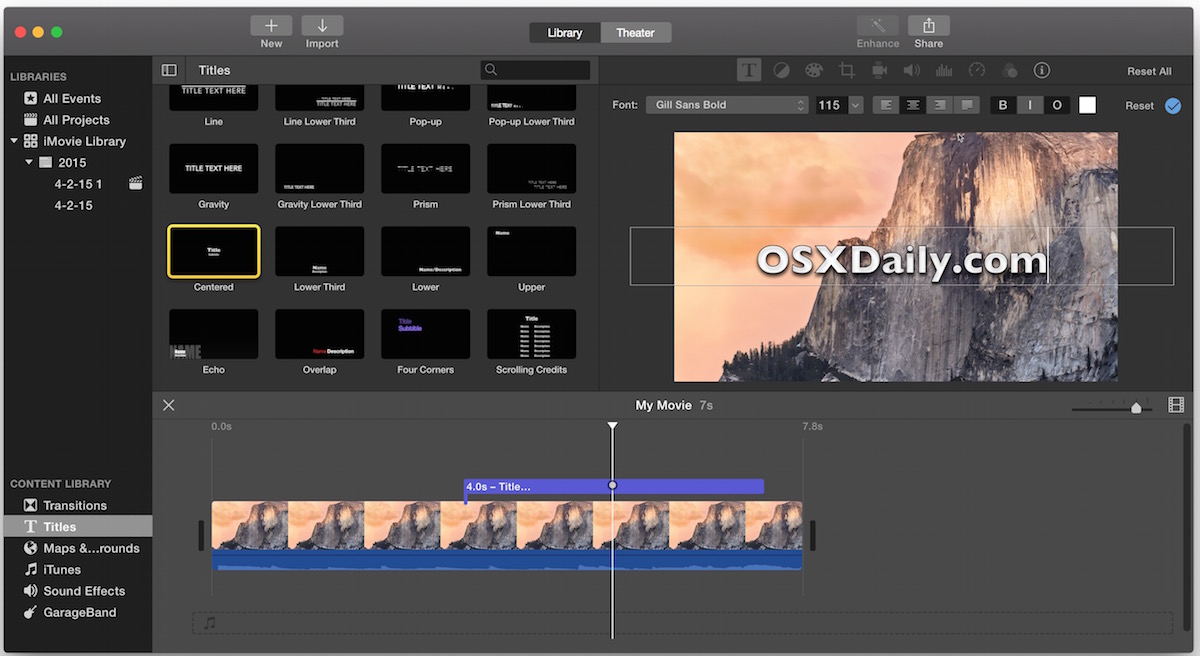
After you click “File,” a new window will appear. This is the VIP lounge of your export options. Here’s where you get to tell iMovie how you want your cake sliced, so to speak.
Look for the “Format” setting. This is your moment of power. And what do you think you should select here? If you said “MP4,” give yourself a pat on the back. You’re practically a video guru now. If you didn’t say MP4, well, you’re about to learn, and that’s just as good!
So, choose MP4. It’s the universally accepted language of video sharing. It’s like the handshake of the digital world. Everyone understands it. Your Grandma will understand it. Your tech-wiz nephew will understand it. Your slightly confused neighbor will probably understand it too, after a few tries.
Next up is “Resolution.” This is basically the crispness of your video. Think of it like the resolution of your TV. Do you want a fuzzy old picture, or something that makes your cat’s fur look like you can reach out and pet it? For most sharing purposes, 1080p is your sweet spot. It’s a good balance between quality and file size. Don’t go overboard unless you’re planning on projecting your cat video onto the side of a skyscraper.
There’s also “Quality.” This is like the juiciness of your cake. You can go from “Low” (a bit dry) to “High” (moist and delicious). I usually opt for “High” or “Best (ProRes)” if I’m feeling fancy, but “High” is perfectly fine for most casual sharing. We’re not aiming for Hollywood blockbusters here, just a well-presented video.
And then there’s “Compress.” This is like deciding if you want your cake to be a regular slice or a mini-slice. “Better Quality” means a bigger file. “Faster Export” means a smaller file but might sacrifice a tiny bit of sparkle. For MP4, “Better Quality” is usually the way to go if you have the space. It ensures your hard work doesn’t look like it was edited on a potato.
Once you’ve made your selections, look for that magical button that says “Next.” It’s the gateway to the final step. Click it with confidence. You’re almost there.
Now, iMovie will ask you where you want to save your precious creation. Think of this as choosing the perfect spot on your shelf for your cake. Give it a descriptive name, like “Fluffy’s Laser Chase Extravaganza” or “Fitted Sheet Folding: The Unfolding Truth.” Don’t just leave it as “Movie 1.” That’s like labeling your masterpiece “Food.”

Choose a location on your computer. Your Desktop is fine for immediate access, or a dedicated “Videos” folder if you’re feeling organized. The world is your oyster. Or, more accurately, your hard drive.
And finally, the grand finale: the “Save” button. Take a deep breath. Click it. You’ve done it. iMovie will now work its magic and convert your project into a beautiful, shareable MP4 file.
It might take a few minutes, depending on the length and complexity of your video. Go grab a cup of tea. Admire your hands. You’ve just conquered the iMovie export beast. You are a video warrior.
When it’s done, you’ll have a shiny new MP4 file ready to be uploaded to social media, sent to your friends, or even projected onto a wall for a private screening. It’s a versatile little format, our MP4.
So there you have it. Saving as MP4 in iMovie. It’s not a dark art. It’s a simple process. And the next time you’re faced with that export menu, you can just smile, knowing you’ve got this. You’ve got the MP4.
![How to Save iMovie as Video on Mac and iOS [Easy Steps]](https://www.tipard.com/images/video/save-imovie/save-imovie-mac-file.jpg)
Remember, the goal is to share your awesomeness with the world. And an MP4 is a fantastic way to do it. It's accessible, it's compatible, and it's the digital equivalent of saying, "Here's my cool thing, and I made it easy for you to see!"
Don't let the fancy jargon scare you. Most of the time, iMovie defaults are pretty good. But knowing you can tweak things to specifically get that MP4 is powerful. It means you’re in control.
So go forth and export! Create more amazing content! And always remember the simple joy of hitting that “Save” button, knowing your video is now ready to conquer the internet, one MP4 at a time.
Honestly, the most important part is just getting it out there. The format is just a vehicle for your brilliance. And MP4 is a very reliable vehicle.
And if, by some chance, you mess it up? No worries! You can always go back into iMovie and export it again. It’s not like you’re permanently altering the original project. It’s all very forgiving. That’s the beauty of iMovie and the flexibility of the MP4 format.

