How To Replace A Tap Washer Uk

Right, so your tap’s doing that annoying little drip, drip, drip, eh? Drives you mad, doesn’t it? Like a tiny, watery drummer playing a solo on your sanity. You know, the kind that starts when you’re just about to drift off to sleep? Yep, that one. Well, fear not, my friend! Replacing a tap washer in the UK is totally doable. Seriously, it’s not some mystical plumbing ritual. You can totally be a tap-fixing hero.
Think of this as your friendly guide, a bit like a cuppa and a natter about how to sort out that leaky menace. No jargon, no scary diagrams that look like they belong in a rocket science textbook. Just plain ol’ English, with a few chuckles thrown in for good measure. Ready to ditch the drip? Let's dive in!
So, What’s Actually Going On?
Okay, first things first. What is a tap washer? It’s basically a little rubbery circle, usually black, that lives inside your tap. Its job? To create a watertight seal. When you turn the tap on, the washer lifts, water flows. When you turn it off, it squishes back down, stopping the flow. Simple, right?
Must Read
But, like all rubbery things that get a lot of action (you know, from turning and squishing), they wear out. They get hard, they crack, they just lose their mojo. And then? Drip. Drip. Drip. The villain of our story.
Is It Always The Washer?
Now, before you go tearing your tap apart, let’s have a quick think. Most of the time, it is the washer, especially on older, traditional taps. The ones with separate hot and cold handles? Yeah, they’re the classic washer suspects. But, and it’s a big but, some newer taps, like mixer taps or those fancy ceramic disc ones, don’t have washers at all. They have a different system. So, if you have one of those, this guide might not be your exact solution, but knowing how a washer works is still good intel!
How can you tell if it’s a washer-based tap? Usually, you’ll have two handles that you turn. You know, the old-fashioned way. If you’ve got one lever that moves up, down, left, and right? Probably not a washer. But don’t panic, we’ll get to the fun bit soon.
Tools of the Trade (Nothing Too Scary!)
Alright, let’s gather our trusty sidekicks. You don’t need a whole toolbox for this, promise. Just a few bits and bobs that you might already have lurking in a drawer somewhere:
- A selection of screwdrivers: You'll probably need a flathead and a Phillips head (the cross-shaped one).
- Adjustable spanner or pliers: This is for gripping and turning bits that are a bit stubborn.
- A cloth or rag: Essential for protecting surfaces and for, well, cleaning up any rogue drips.
- A small bowl or container: To pop all those little screws and bits into so you don't lose them. A mug works too if you're feeling resourceful!
- Penetrating oil (optional, but handy): If things are really stuck, this stuff is like magic.
- New tap washers: The stars of the show! More on how to get the right ones in a sec.
See? Not too bad, is it? Most of this you probably have already. If not, a quick trip to your local hardware store will sort you out. And while you’re there, you can have a good sniff of all those interesting plumbing smells. Just me?
Where To Find Your New Washers
This is crucial, folks. You can't just grab any old rubber ring. You need the right size and type of washer. The best place to get them is a good old-fashioned hardware shop. They’re brilliant for this kind of thing. Take your old washer with you if you can, or at least take a really good look at your tap and try to remember the size.

You can also get tap repair kits, which are super handy. They usually contain a selection of common washer sizes, so you're more likely to find a match. Some bigger DIY stores will sell these too. And hey, if you’re feeling brave, you could always just have a guess at the size online, but in-person is usually best for this one. Unless you enjoy returning things, which is… a hobby?
The Big Moment: Turning Off The Water
Now, before we even think about unscrewing anything, this is the most important step. You absolutely, positively, have to turn off the water supply to that tap. No ifs, no buts, no maybes. Unless you fancy a mini swimming pool in your bathroom or kitchen, of course. Which, let’s be honest, is probably not on your agenda today.
Where are your stopcocks? Usually, they’re under the sink where the pipes connect to the tap. You'll see little handles or valves. Turn them clockwise until they're fully shut. If you can't find them there, they might be on the main water pipe coming into your house. This is usually in a cupboard, under the stairs, or sometimes even outside.
Pro Tip: Turn on the tap you're about to fix after you’ve turned off the stopcocks. This will drain any remaining water in the pipes and confirm that the water is definitely off. If water still comes out, you haven’t turned them off properly! Back to step one, captain.
Let's Get This Tap Apart!
Okay, water’s off. Hooray! Now for the slightly more… fiddly bit. We’re going to dismantle the tap. Don't worry, it’s like a puzzle, but one that eventually stops dripping. Win-win.
Step 1: The Decorative Cap
Most taps have a little decorative cap on top of the handle. This usually hides a screw. You might be able to pop this off with your fingernail, or you might need a thin flathead screwdriver to gently lever it up. Be gentle! We don’t want to scratch or break it.
Pop that cap off and set it aside. Don't lose it! It's the tiny crown of your tap.

Step 2: Unscrew The Handle
Underneath the cap, you’ll find a screw. This is what holds the handle onto the tap body. Use the appropriate screwdriver (Phillips or flathead) and undo this screw. Again, keep it safe! A little bowl is your friend here.
Once the screw is out, you should be able to lift the handle straight off. Sometimes, they can be a bit stiff. Give it a gentle wiggle. If it’s really stuck, a tiny spray of penetrating oil might help, but usually, a bit of wiggling is enough.
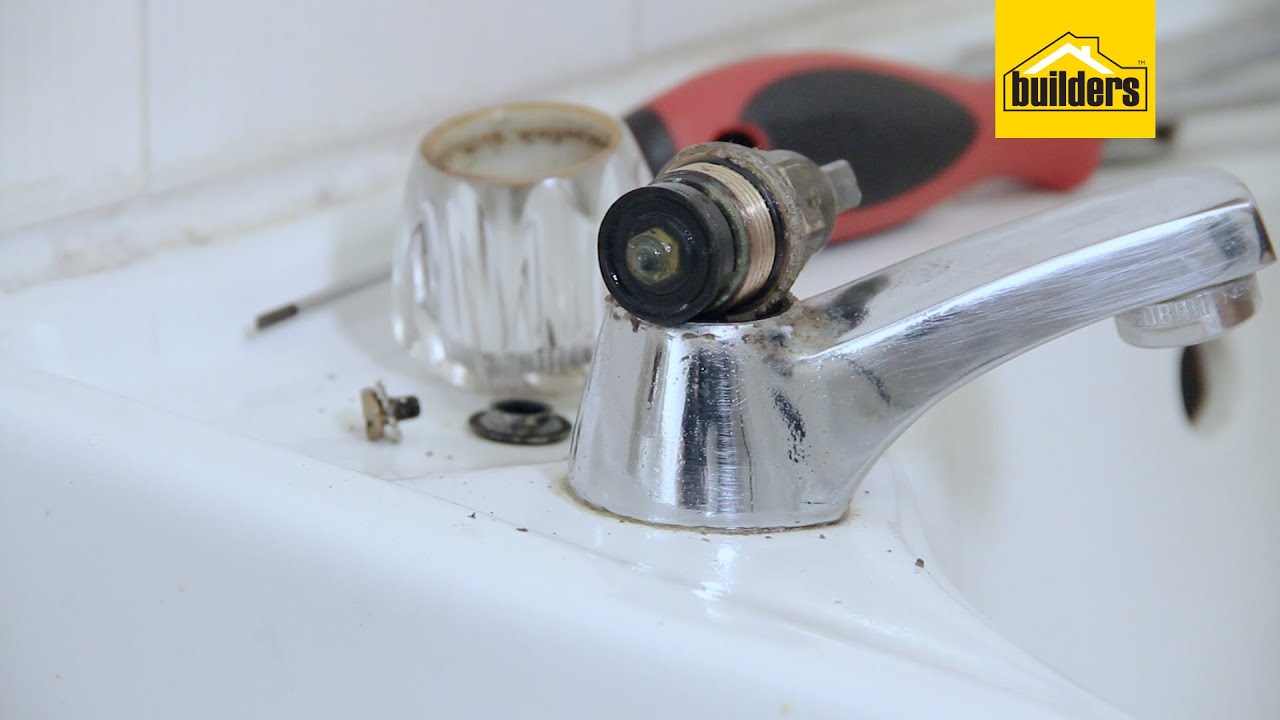
Step 3: Revealing The Inner Workings
With the handle off, you’ll see more of the tap’s innards. There might be a decorative shroud or cover that you can unscrew or pull off. This just protects the workings underneath. Once that’s off, you’ll see the main part of the tap that you turn – the valve. This is often a hexagonal or octagonal shape.
This is where your adjustable spanner or pliers come in handy. You need to unscrew this valve. Again, turn it anticlockwise. It might be a bit tight, so you might need to put a bit of elbow grease into it. Make sure you’re using your spanner or pliers on the valve, not just any old bit of metal.
Word of Caution: Some taps have a slightly different setup. If you see a retaining nut holding the valve in, you’ll need to unscrew that first. Just take your time and have a good look. It’s like being a detective, but for leaky taps.
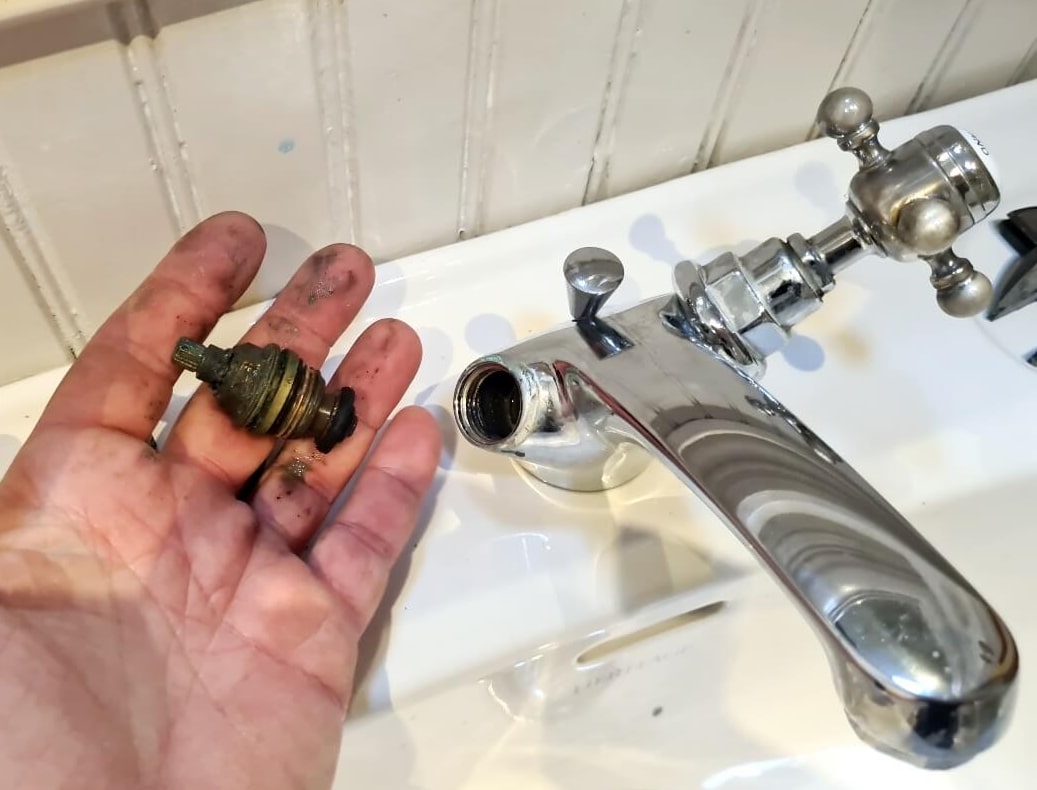
The Moment of Truth: The Washer!
Right, you’ve got the valve out. Congratulations! Give yourself a pat on the back. Now, look at the bottom of the valve. You should see a little screw holding a small rubber disc in place. That’s your washer!
Carefully unscrew the small screw holding the washer. Use a screwdriver that fits it snugly. You don’t want to strip this screw head – that would be a whole new adventure we don't need!

Once the screw is out, you can pry off the old, worn-out washer. It might be brittle or stuck on, so be a bit patient. If it’s really stubborn, a tiny bit of persuasion with a screwdriver might be needed, but again, be gentle. You want to remove the old washer, not damage the valve itself.
Replacing The Washer
Now, take your new washer. It should be the same size and thickness as the old one. Place it onto the valve where the old one was. Then, screw the small screw back in to secure it. Don’t overtighten it, just make it snug. Too tight and you could damage the new washer or the screw.
Important Note: While you’re in there, it’s a good idea to check the valve seat. This is the surface inside the tap that the washer presses against. Sometimes, this can get a bit rough or pitted, which can also cause leaks. If it feels rough, you might need a valve seat grinder (a fancy tool!) or it might be time to call in the cavalry. But for most dripping taps, a new washer is the magic bullet.
Putting It All Back Together
You’ve replaced the washer! You’re practically a plumber now. Time to reverse the process and put everything back together.
First, screw the valve (with its shiny new washer!) back into the tap body. Turn it clockwise until it’s snug. Don’t force it, it should screw in fairly easily.
Next, put the decorative shroud or cover back on, if your tap had one.
Then, pop the tap handle back on. Line up the stem with the top of the valve and push it down.

Finally, put the screw back in to secure the handle. Tighten it up, but again, don’t go crazy. Then, pop the decorative cap back on top.
The Grand Reveal: Turning The Water Back On
This is the moment of truth! Head back to your stopcocks and turn them anticlockwise to turn the water supply back on. Do this slowly. You might hear a bit of gurgling as the pipes fill up. That’s normal!
Now, go back to your tap. Turn it on gently. Any drips? Any leaks around the handle or valve? Hopefully not! If it’s still dripping, double-check that everything is tightened properly and that you definitely have the right size washer.
If everything looks good and the drip has stopped, hallelujah! You’ve done it! Go celebrate. Maybe with a nice, quiet cup of tea, free from the tyranny of the drip.
When To Call In The Professionals
Look, I’m all for DIY, and you’ve totally got this. But sometimes, things are a bit more complicated. If you’ve tried all this and your tap is still behaving like a leaky faucet from hell, it might be time to call a professional plumber. There could be a more serious issue with the tap body or the pipework.
Also, if you’re not comfortable with any part of this process, or if your taps are very old or unusual, don’t hesitate to get expert help. A plumber might seem expensive, but it can save you a lot of hassle and potential water damage in the long run. And sometimes, you just need someone who’s seen it all before, you know?
But for the most part, that pesky drip is just a worn-out washer. And you, my friend, are now equipped to banish it forever. So go forth, be brave, and conquer that drip! You’ve got this. Now, about that coffee… perhaps a second one to celebrate your plumbing prowess?