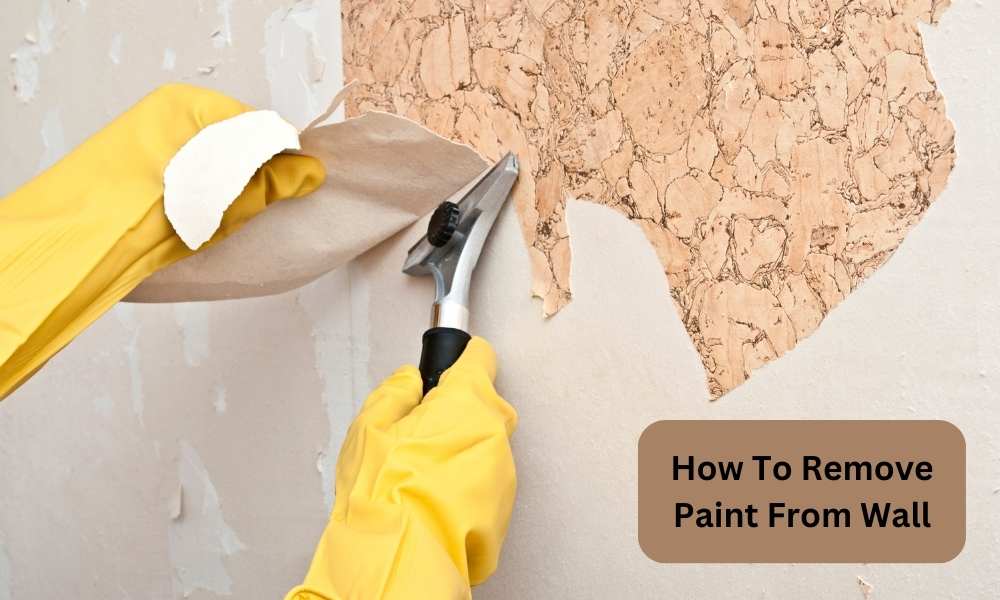
How To Remove Paint On The Wall
Ah, the wall. It’s seen it all, hasn’t it? From your toddler’s artistic declarations in crayon (and, let’s be honest, possibly jam) to that experimental phase where you thought teal really brought out the sofa. Walls are the unsung heroes of our living spaces, silently bearing witness to our lives. But sometimes, a wall needs a fresh start. Maybe you’ve grown tired of that “statement” colour, or perhaps it’s time to embrace a more minimalist vibe. Whatever the reason, you’ve decided it’s time for a paint-removal adventure. Don’t sweat it! This isn't a DIY disaster movie; it’s more like a gentle spa day for your walls. We’re going to walk through this together, with a side of good tunes and maybe a sneaky biscuit.
Let’s set the scene. Imagine this: you're curled up on a Sunday morning, a steaming mug of coffee (or perhaps something a little stronger, no judgment here) warming your hands, scrolling through endless home decor inspiration. You see that perfect, serene, light-grey haven, and suddenly, your bright orange feature wall feels… well, a little loud. Or maybe it’s the aftermath of a legendary house party that’s left its mark in more ways than one. Whatever your motivation, stripping paint can feel daunting, like tackling a particularly stubborn knot in your favourite sweater. But fear not, my friend. With the right approach and a sprinkle of patience, you’ll have your walls ready for their next chapter in no time.
The "Why" Behind the "What"
Before we dive into the nitty-gritty, it's worth a quick ponder about why we might need to strip paint. It’s not always about aesthetics. Sometimes, layers of old paint, especially lead-based paint (which we'll touch on later, because safety first!), can be a health hazard. Other times, a new coat of paint just won't adhere properly to a flaky, peeling surface. Think of it like trying to apply a fresh coat of mascara over old, clumpy layers – it’s just not going to give you that smooth, flawless finish you desire.
Must Read
The texture of your walls can also play a role. If you’ve got textured wallpaper that’s seen better days, or if the paint itself has developed a rather… unique bumpy texture over the years, stripping might be the most effective way to achieve a smooth, paint-ready surface. It’s all about creating a blank canvas, a fresh slate for whatever design dreams you have simmering.
Gear Up: Your Paint-Stripping Toolkit
Okay, so we’re not about to embark on a perilous mountain expedition, but a little preparation goes a long way. Think of this as assembling your superhero squad. Each tool has a vital role to play in our mission. Safety is paramount, so let’s start there. Safety goggles are non-negotiable. Paint chips can fly, and nobody wants a rogue bit of latex in their eye. Think of them as your personal force field against flying paint debris. Next up, gloves. Latex or nitrile are your best bets. They’ll keep your hands clean and protected, especially if you’re using any chemical strippers. And finally, a dust mask. If you're dealing with older paint or doing a lot of scraping, this will save your lungs from inhaling any… vintage dust.
Now for the muscle. For most jobs, you’ll want a sturdy putty knife or a dedicated paint scraper. These are your trusty swords, ready to wage war against stubborn paint. For larger areas, a wall scraper with a long handle can be a real game-changer, saving your back and giving you more leverage. If you’re dealing with a lot of paint or particularly tough layers, a heat gun can be your secret weapon. It softens the paint, making it much easier to scrape away. Just remember, heat guns get hot, so proceed with caution. Think of it as a powerful blow dryer, but for paint.
You’ll also need something to catch the falling debris. Drop cloths are your best friends here. Lay them down generously, covering everything you don’t want to be covered in paint flakes. Think of them as a cozy, disposable blanket for your furniture and floors. Old towels or even large plastic sheeting can also do the trick. And of course, you’ll need some trash bags for the inevitable mountain of paint chips.
Finally, depending on your chosen method, you might need some cleaning supplies. A good all-purpose cleaner and some rags or sponges will be essential for the post-stripping clean-up. We’ll get to that in a bit.
Method 1: The Gentle Approach - Scraping Away
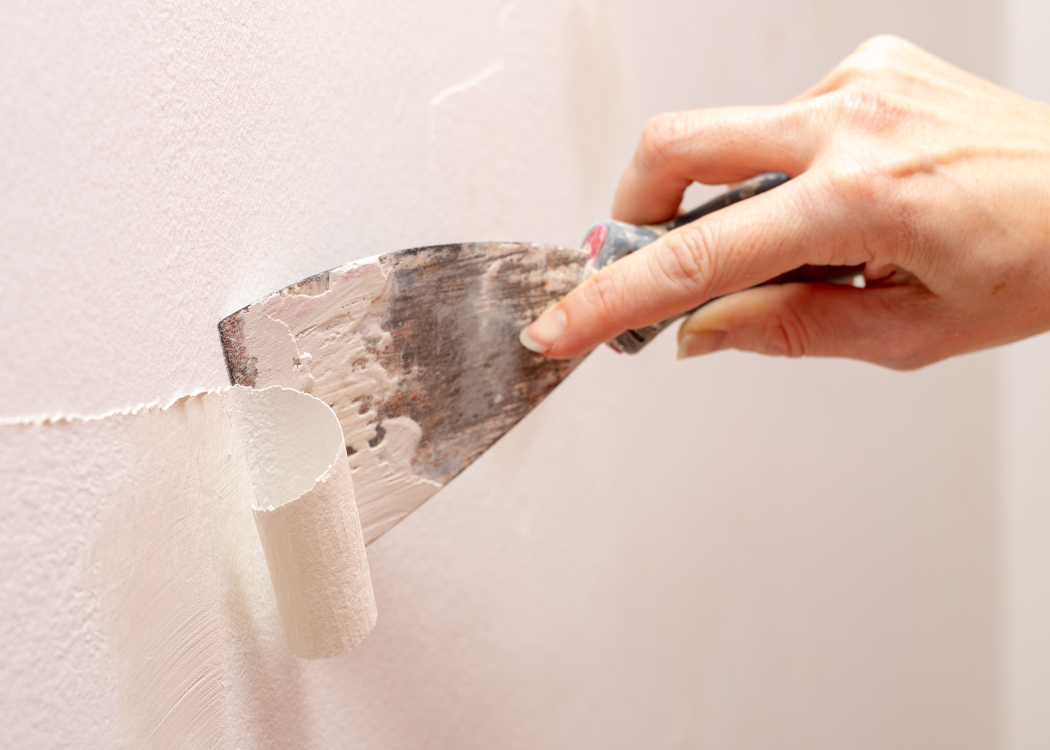
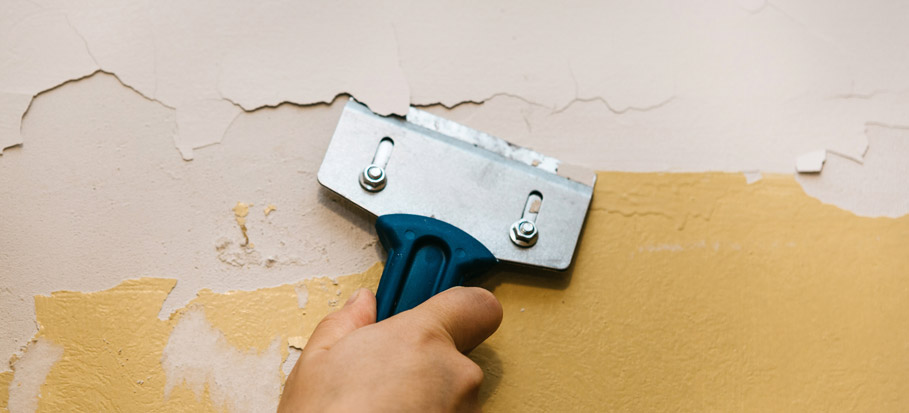
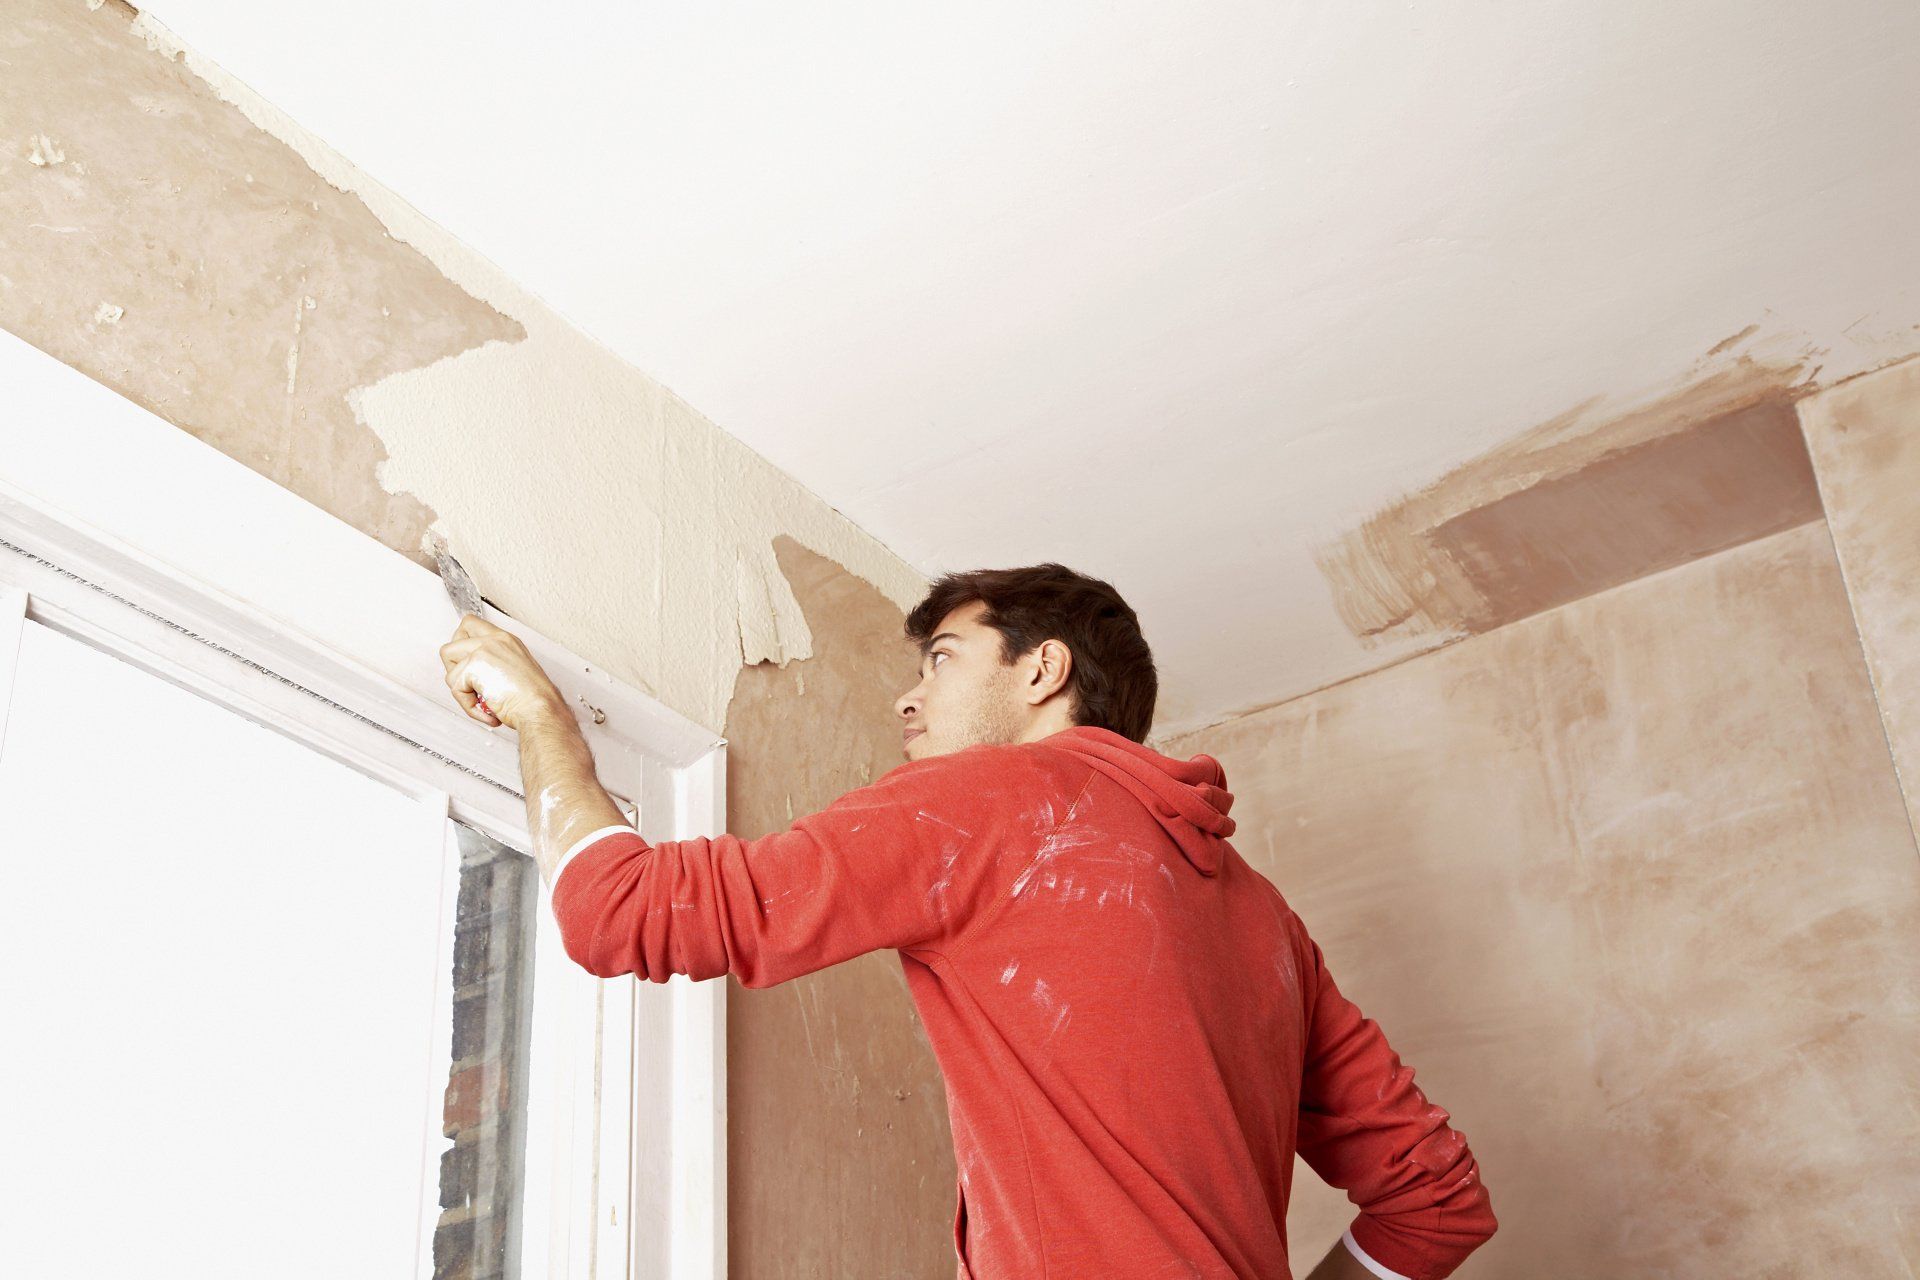
This is your go-to for paint that's already showing signs of rebellion – flaking, peeling, or bubbling. It’s the least invasive and often the most satisfying, like peeling an orange in one clean swoop. Start by gently testing a small, inconspicuous area of your wall. You’re looking for the paint that’s already loose. If it scrapes away easily, you’re in for a good time.
Begin by running your putty knife or scraper under a loose edge. Use steady, firm pressure, and try to work with the natural lines of the paint. Don't force it if it's not giving way easily; you don't want to gouge the drywall underneath. Think of it as coaxing, not conquering. Small, controlled strokes are key. As you scrape, let the paint chips fall onto your drop cloths. It might feel like a lot of effort at first, but trust the process.
If you encounter areas where the paint is more stubborn, this is where the heat gun can come in handy. Hold the heat gun a few inches away from the paint, moving it constantly in a circular motion. You'll see the paint start to soften and bubble. As soon as it looks pliable, use your scraper to lift it away. Be patient! Rushing this step can lead to burnt paint (which smells awful, by the way) or damaged walls. It’s like making caramel; a little bit of heat applied correctly does wonders, too much and you’ve got a mess.
Pro Tip: For very old walls, especially if you suspect lead paint (more on that critical topic in a moment), it’s often best to use the wet scraping method. Lightly mist the paint with water (or a special lead-safe encapsulant if advised) before scraping. This helps to minimize dust. You can also look into DIY paint removal cloths, which are designed to trap dust.
Method 2: The Chemical Crusaders - Paint Strippers
Sometimes, scraping just won't cut it. You've got multiple layers of stubbornly adhered paint, and you need something a bit more potent. Enter the paint strippers. These come in various forms: gels, liquids, and even aerosol sprays. Gels are generally preferred for walls as they cling better and don't run as much. They're like a thick, powerful mask for your wall.
First and foremost, read the manufacturer’s instructions carefully. Each stripper has its own quirks and recommended application methods. Ensure your room is well-ventilated – open those windows wide! If you can’t get good airflow, consider a low-VOC (volatile organic compound) or a citrus-based stripper, which are generally less harsh. These are your eco-friendly warrior options.
Apply the stripper liberally to a small section of the wall using an old paintbrush or a roller. Follow the recommended dwell time – this is the time the stripper needs to sit and work its magic. It’s like letting a face mask do its thing. You'll see the paint begin to soften, bubble, and wrinkle. Once it looks ready, use your putty knife or scraper to gently lift the softened paint. Again, avoid gouging the wall.
Multiple applications might be necessary for stubborn layers. After you’ve removed as much paint as possible, you’ll need to neutralize and clean the wall. Most strippers come with specific instructions for this, often involving a wash with water and a bit of mineral spirits or a specialized neutralizer. This is crucial to stop the stripper from continuing to break down the paint and potentially damaging the underlying surface.
Fun Fact: Many modern paint strippers are designed to be more eco-friendly than their predecessors. Early paint strippers often contained harsh chemicals like methylene chloride. While still available, there’s a growing market for safer, plant-based alternatives, making your paint-stripping journey a little kinder to the planet and your olfactory senses.
The Lead Paint Dilemma: A Very Important Detour
Now, before we get too carried away with scraping and stripping, we need to have a serious chat about lead paint. If your home was built before 1978, there's a high chance it contains lead-based paint. This stuff is seriously dangerous, especially for children, as ingesting or inhaling lead dust can cause significant health problems. If you suspect lead paint, do not attempt to remove it yourself without proper precautions or professional help. Contact your local health department or a certified lead abatement professional. They have the specialized equipment and knowledge to handle it safely. This isn't a DIY project you want to mess with; it’s like trying to defuse a bomb with a butter knife – not advisable!
Testing for lead paint is relatively simple. You can buy DIY lead test kits at most hardware stores. If a test comes back positive, pause your project and seek professional advice. Your health and the health of your loved ones are far more important than a freshly painted wall. Think of it as an important safety check before starting any major construction on a historic building – you want to know what you’re dealing with.
The "Aftermath" Party: Cleaning and Prep
Once you’ve waged your war on paint and emerged victorious, it’s time for the clean-up. This is where your drop cloths really earn their keep. Carefully gather them up, trying to contain as much of the paint debris as possible. Dispose of the paint waste according to your local regulations. Some areas have specific disposal methods for paint products.
Wipe down your walls with a damp sponge or cloth and your all-purpose cleaner. This will remove any lingering dust, stripper residue, or grime. Rinse your sponge frequently to avoid spreading dirt. For stubborn spots, you might need a bit more elbow grease. It’s like giving your walls a good wash after a long, dusty journey.
Once the walls are clean and dry, inspect them closely. You might find minor imperfections like small holes or gouges from the scraping process. These are easily fixed with a bit of spackling paste. Apply a small amount to the imperfection, smooth it flush with the wall using your putty knife, and let it dry completely. Once dry, lightly sand the patched area smooth. This ensures a seamless surface for your new paint.
Cultural Reference: Think of this stage like prepping for a photoshoot. You want that perfect, smooth canvas before you apply the final artistic touch. Like a meticulous makeup artist, you’re ensuring every imperfection is addressed for that flawless final look. This meticulousness is what separates a good result from a truly great one.
The goal is to have smooth, clean walls that are ready for a fresh coat of primer and paint. This is where you transition from demolition to creation.
A Moment of Reflection
As you stand back and admire your freshly stripped walls, take a moment to appreciate the transformation. It's more than just removing old paint; it's about clearing away the past to make space for the future. Think about it in your daily life. We all have our own "paint" to remove sometimes – old habits that no longer serve us, limiting beliefs, or even just a cluttered mind. The process might seem daunting, messy, and require a bit of effort, but the reward of a fresh, clear space is incredibly liberating.
Just like we choose the right tools and techniques for our walls, we can be mindful about the "stripping" we do in our personal lives. Whether it's decluttering our physical space, setting new boundaries, or consciously letting go of what weighs us down, the principles are similar: preparation, the right approach, patience, and a commitment to a clean, clear outcome. So, go forth and embrace your inner wall whisperer. Your walls, and your life, will thank you for it.

