How To Remove Heating Element From Dishwasher
So, your dishwasher is playing hooky. The dishes are piling up like a Mount Everest of grime, and that once-magical appliance is now just… taking up space. You’ve tried the usual tricks: unplugging it, giving it a stern talking-to, maybe even a little tap on the side (we’ve all been there). But nope, still no sparkling plates. It’s a modern-day tragedy, right up there with running out of coffee on a Monday morning.
And then it dawns on you. The culprit might be that humble, yet vital, part: the heating element. Think of it as the dishwasher’s little furnace, responsible for making sure your water gets nice and toasty, so your soap can do its thing and banish those stubborn food remnants. When it’s kaput, your dishes come out looking… well, like they just had a lukewarm spa day. Not exactly the clean you were hoping for.
Now, the thought of fiddling with appliance innards can sound about as appealing as a root canal performed by a squirrel. But trust me, removing a dishwasher heating element is usually a pretty straightforward affair. It's less "brain surgery" and more "assembling IKEA furniture with surprisingly few leftover screws." You don't need to be a certified appliance whisperer, just someone willing to roll up their sleeves and get their hands a little… dishwatery.
Must Read
Let’s break it down, shall we? Think of this as your friendly neighborhood guide to giving your dishwasher’s heater the boot, so you can get back to the important things in life, like not hand-washing a mountain of pasta bowls. We’re talking about a task that’s entirely doable, even if your DIY experience extends to changing a lightbulb and successfully assembling a sandwich. You’ve got this!
First things first, and this is the golden rule of all appliance shenanigans: unplug the darn thing. Seriously. I know it sounds obvious, but in the heat of the moment, when you’re staring down a sink full of dirty dishes and feeling a mild panic, it’s the one thing that can slip your mind. Safety first, folks! We're aiming for a fixed dishwasher, not a new, electrified bathtub.
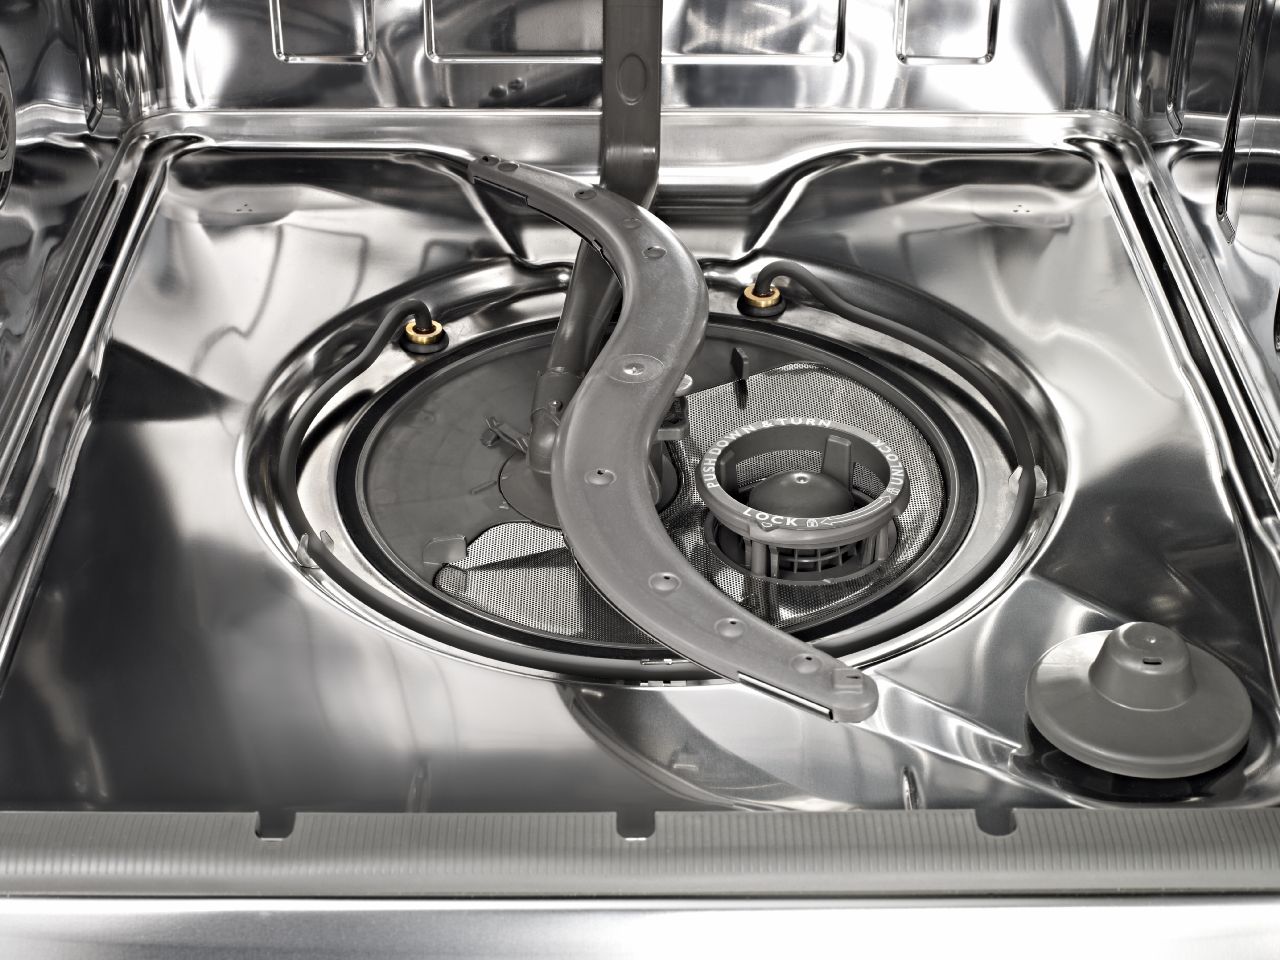
Imagine you're about to tackle a tricky puzzle. You wouldn’t just shove pieces together randomly, right? You'd want to understand the layout, identify the key pieces. The heating element is often at the bottom of your dishwasher, a sort of coiled serpent lurking in the depths. You might need to get down on your hands and knees for this part, giving your knees the workout they secretly deserve.

Most dishwashers have a kick plate at the bottom, a bit like a stylish skirt for your appliance. This is usually held on by a couple of screws. Think of these screws as the little guardians of the heating element's territory. Unscrew them, and you’ll be rewarded with access to the inner workings. It’s like opening up a treasure chest, except the treasure is access to a potentially broken part. Still exciting, though!
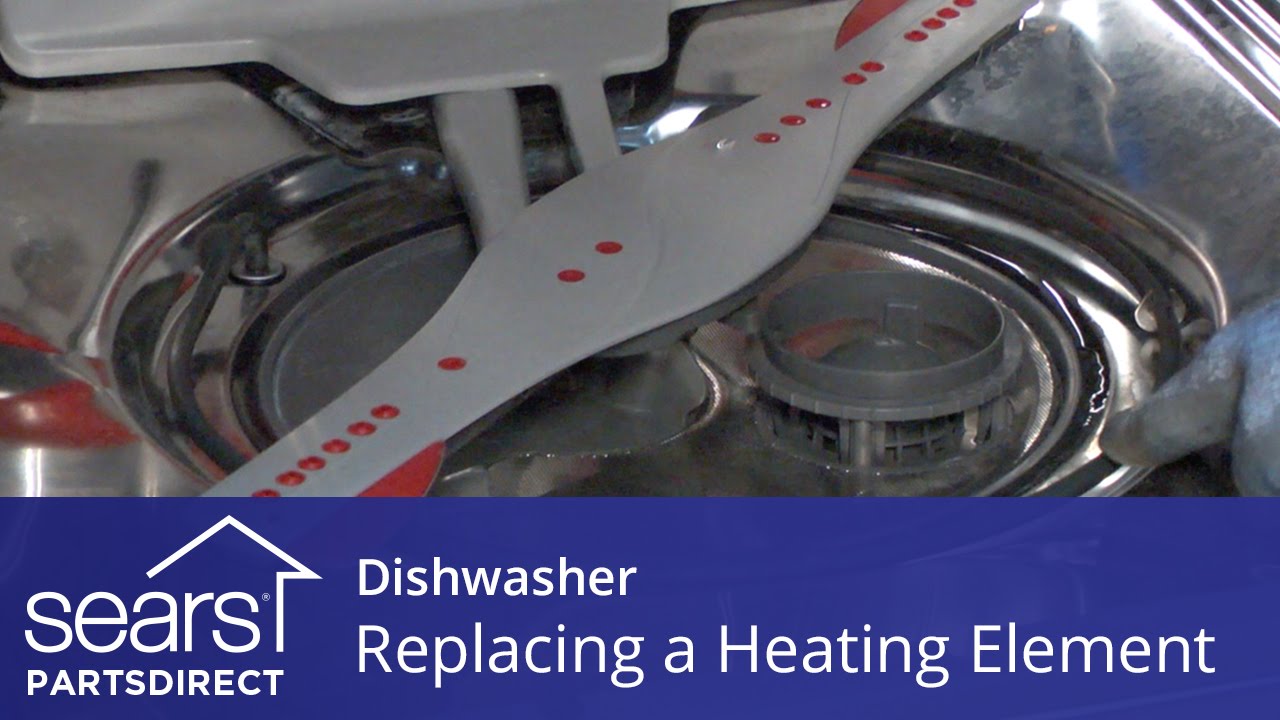
Now, depending on your dishwasher’s make and model, the heating element might be visible once that kick plate is off. It's usually a U-shaped or circular metal rod. If you can’t see it right away, don’t panic. It might be hidden behind a different panel or part. You might need to consult your dishwasher’s manual. Think of the manual as the ancient scroll of wisdom, filled with diagrams and cryptic instructions. If you’ve lost it, a quick search online for "[your dishwasher brand] + [your dishwasher model] + heating element location" should do the trick. The internet is our collective brain, after all.
Once you’ve located the beast, you’ll see it's typically attached to the tub from the outside. There are usually two little nuts or bolts holding it in place. These are the nuts and bolts that are literally keeping the heating element in its rightful place. You’ll likely need a wrench or a socket set for these. Don’t worry if you don’t have a fancy toolbox; a basic set from the hardware store is usually sufficient. It’s like having the right key for a tricky lock.

Now, here’s where things get a tiny bit messy. When you remove those nuts, the element might loosen up. Some models have a rubber gasket around the element on the inside of the tub. This gasket is the unsung hero, creating a watertight seal. When you pull the element out, this gasket might get a bit smooshed or stubborn. A little gentle persuasion might be needed.
Think of it like trying to get a slightly over-ripe avocado out of its skin. It needs a firm but gentle touch. Don't go yanking and wrestling with it like you're trying to disarm a bomb. A slow, steady pull is usually the way to go. If it’s really stuck, a very slight wiggle might help. Just be careful not to damage the surrounding tub material. We’re not looking for any new holes in the dishwasher, just the old heating element.
As you pull the element out, you’ll notice wires connected to it. These are the electrical arteries that provide power to the heating element. Before you get too enthusiastic about yanking, make a note or take a quick photo of how these wires are connected. It’s like taking a mental snapshot of how to put a puzzle piece back together. You don’t want to end up with a wiring diagram that looks like a plate of spaghetti after a toddler’s birthday party.
There’s usually a plastic connector or terminal block where the wires attach. These often just pull off. If they feel really tight, a gentle wiggle or a flathead screwdriver used as a lever (carefully, please!) can help. Remember, we’re coaxing, not conquering.
Once the wires are detached, you can fully remove the heating element. Congratulations! You’ve successfully extracted the potential villain. Now you can examine it. Sometimes, you can visually see the problem. Is it corroded? Is there a visible break in the coil? If it looks like it’s been through a tiny, fiery apocalypse, it’s probably time for a new one.
When you’re ready to replace it, the process is basically the reverse of removal. Get your shiny new heating element – they’re usually pretty affordable online or at appliance parts stores. Make sure you get the exact model that fits your dishwasher. Trying to force a square peg into a round hole is a recipe for disaster, both in DIY and in life.
Slide the new element into place from the outside, making sure the gasket is properly seated. Again, think of that gasket as a crucial seal. It needs to be snug and even to prevent leaks. If you’re having trouble getting it to sit right, sometimes running a little warm water over the gasket can make it more pliable. It's like giving it a warm hug to help it relax into its position.
Then, reattach the nuts or bolts that hold the element securely. Tighten them until they’re snug, but don’t overtighten. You don’t want to strip the threads, which would be an unfortunate and slightly embarrassing addition to your DIY resume.
Next, reconnect the wires to the new heating element. Refer back to your photo or your mental notes. Make sure they’re firmly attached. This is where a loose connection can cause all sorts of grief. It’s like making sure your shoelaces are tied properly before a marathon – essential for smooth operation.
Finally, put the kick plate back on, screw it in, and then, with a deep breath and a hopeful heart, plug your dishwasher back in. Close the door, select a wash cycle, and cross your fingers. If all has gone according to plan, you should hear that familiar hum of a healthy dishwasher, and soon, your dishes will emerge sparkling clean, as if by magic. Except, of course, the magic was you, armed with a few basic tools and a can-do attitude.
It's a satisfying feeling, isn't it? Knowing you tackled a household problem yourself. It's like finding a perfectly ripe avocado or snagging the last parking spot at the grocery store – a small victory that makes your day a little bit brighter. So next time your dishwasher is being a diva, remember this little guide. You might just be able to save yourself a service call and a whole lot of dirty dishes. And hey, if all else fails, at least you can say you tried. That’s half the battle, right?


:max_bytes(150000):strip_icc()/dishwasher-repair-guide-4154049-13-8cee96affad54abda45d0c8727f7d776.jpg)
