How To Remove A Tile From Wall
So, the other day, I was admiring this rather… charming mosaic I’d painstakingly (and perhaps a little too enthusiastically) put up in my kitchen a few years back. You know the one, with the slightly wonky iridescent fish and the questionable grout color. It had character, let’s just say that. Anyway, I’d decided it was time for a little… redecoration. A fresh coat of paint, maybe a new splashback. Simple, right? Wrong. As I reached out to gently nudge a particularly proud-looking tile, my finger slipped. And pop! One of those little iridescent fish decided it had had enough of its aquatic comrades and made a dramatic solo exit, leaving a gaping, plaster-scuffed hole in its wake. Cue the dramatic music. My grand redecoration plans suddenly felt like they were facing a rebellion of rogue adhesives.
It’s funny, isn’t it? How something as seemingly mundane as a single loose tile can throw a spanner in the works. You imagine a quick fix, a little tap, and it’s all sorted. But no, life (and in this case, tile adhesive) rarely plays that nicely. This little incident, however, got me thinking. We’ve all been there, haven’t we? That moment when a tile goes rogue, or you’re planning a renovation and need to, you know, remove a tile. It’s not exactly rocket science, but it’s also not something you want to tackle without a slight idea of what you’re doing. Because, trust me, my rogue fish friend taught me that going in blind can lead to more problems than you started with. More holes, more mess, and a whole lot of frustration.
So, if you’ve found yourself in a similar predicament, or if you’re just a DIY enthusiast with a penchant for preparedness (good on you, by the way!), then this little guide is for you. We’re going to dive into the nitty-gritty of how to safely and effectively remove a tile from a wall. No drama, no rogue mosaics (hopefully!), just solid, practical advice. Think of this as your friendly neighborhood guide to tile extraction. We’ll cover everything from the tools you’ll need to the techniques that’ll save your plaster (and your sanity).
Must Read
Step 1: Assess the Situation (and Your Courage)
Before you even think about wielding a hammer (and please, try not to wield a hammer unless absolutely necessary!), take a moment. Look at the tile you want to remove. Is it loose already, practically begging to be set free? Or is it firmly cemented in place, laughing maniacally at your removal aspirations? This is where your detective skills come in. Gently try to wiggle the tile. If it moves easily, you’re in luck! The adhesive might be old, or it might have failed for some reason. If it’s rock solid, well, you’ll need to bring out the slightly more… persuasive tools.
Also, consider the surrounding tiles. Are they in good condition? You don’t want to be the hero who saves one tile but demolishes an entire section of your bathroom. Be gentle. This is a marathon, not a sprint. And by marathon, I mean a very short, slightly dusty one.
Step 2: Gather Your Arsenal (The Right Tools for the Job)
This is where we get down to business. You can’t fight tile monsters with just your bare hands. You need the right equipment. And don’t worry, it’s not a complex shopping list. You probably have some of this stuff lying around your garage or shed already. If not, a quick trip to your local hardware store will sort you out.
Essential Tools You’ll Need:
- Safety Glasses: This is non-negotiable. Seriously. Bits of tile, grout, and plaster can fly everywhere. Protect those peepers!
- Gloves: To protect your hands from sharp edges and general grime.
- Chisel: A good quality chisel is your best friend here. You’ll want a relatively narrow one, maybe 1/2 inch or 3/4 inch wide.
- Hammer: A standard claw hammer will do the trick. Nothing too heavy, you’re not trying to bring down the house.
- Putty Knife or Scraper: For getting rid of stubborn adhesive residue.
- Utility Knife: For scoring grout lines.
- Dust Mask: Especially if you’re dealing with old grout or a lot of dust. Nobody likes breathing in a decade’s worth of old bathroom.
- Bucket and Dustpan/Brush: For obvious reasons.
- Optional: Small Pry Bar: For those really stubborn tiles.
- Optional: Grout Saw or Oscillating Multi-Tool: If you have one of these, they can be incredibly helpful for cutting through grout.
See? Not too scary. Just a few bits and bobs. And remember, the better the tools, the easier the job. Don’t go using a butter knife for this, okay? We’re trying to remove a tile, not spread tile-shaped jam.
Step 3: The Grout Gambit (Or How to Make Things Easier)
This is a crucial step, especially if the tile is firmly adhered. The grout is like the tile’s little security fence. You need to breach that fence first. Trying to pry a tile out with the grout still intact is like trying to pull a stubborn tooth without numbing it first – painful and likely to cause collateral damage.
So, grab your utility knife. You want to carefully score along the grout lines surrounding the tile you want to remove. Go deep enough to break the seal. If you have a grout saw or an oscillating multi-tool, now’s its time to shine! These tools are designed for this and will make short work of the grout. Work your way around all four sides of the tile. Imagine you're drawing a little dotted line for the tile to follow when it makes its escape.
Be methodical. Don’t rush it. The goal here is to create a clean break between the tile and the surrounding grout. This will give your chisel a clear path to work later. If you’re feeling particularly fancy, you can even use a shop vacuum to suck up the grout dust as you go. Multitasking! I love it.
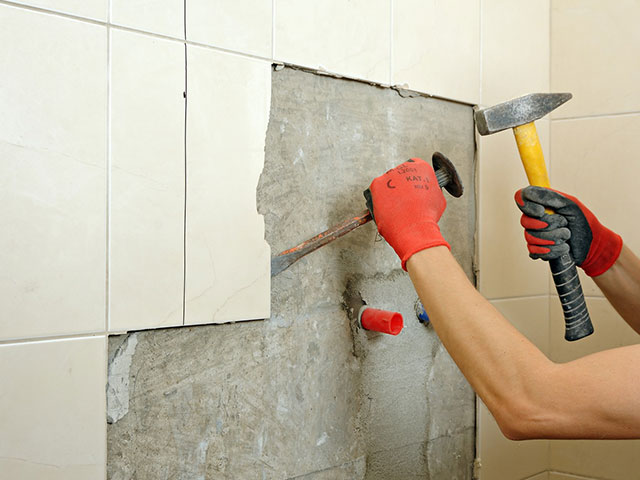
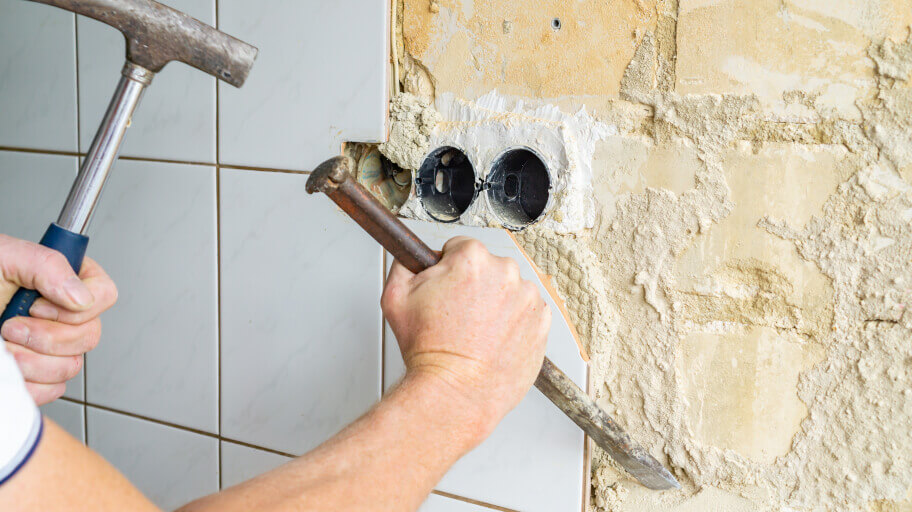
Step 4: The Chisel and Hammer Tango (Proceed with Caution!)
Alright, this is where things get a little more… physical. With the grout lines scored, it’s time to introduce your chisel and hammer. You want to find a small gap between the tile and the wall. If you can’t find one, you might need to gently tap the chisel into the grout line you just created with your utility knife. Work the chisel in, aiming to get it as far under the tile as possible.

Now, the gentle taps. Use the hammer to lightly tap the back of the chisel. You’re not trying to shatter the tile or punch a hole through the wall. You’re trying to gently lever the tile away from the adhesive. Start at one corner and work your way around. Little taps, little movements. Observe the tile. Is it starting to budge? Is it cracking? If it's cracking, you might need to adjust your angle or apply pressure a bit more cautiously.
If you have a pry bar, this is where it can be useful. Once you have a bit of leverage with the chisel, you can sometimes slip a small pry bar in and apply more controlled pressure. Remember, the aim is to detach the tile from the wall, not to obliterate it. Think of yourself as a skilled surgeon, performing delicate tile removal surgery. (Okay, maybe less surgery, more careful demolition).
Pro Tip: If the tile is really stubborn, try working from the center outwards. Sometimes there's a bit more give there. And if you’re worried about damaging the wall behind the tile, you can place a thin piece of cardboard or scrap wood between the chisel and the wall as you pry.
Step 5: The Adhesive Aftermath (The Gritty Reality)
Once the tile is (finally!) free, you’ll likely be left with a sticky situation – literally. The wall will probably have remnants of tile adhesive clinging to it. Don’t just leave it like that, or your new tile (or your patch job) won’t adhere properly.

This is where your putty knife or scraper comes in handy. Gently scrape away as much of the old adhesive as you can. You want a relatively smooth surface for whatever comes next. If the adhesive is particularly tough, you might need to soak it with a damp cloth for a few minutes to soften it up. Be patient. Again, we’re not aiming for perfection at this stage, just a clean enough surface to work with.
Also, take a good look at the wall surface itself. Did you accidentally gouge the plaster? Don’t panic. Minor nicks and scratches can usually be repaired with a bit of filler. If you’ve made a significant hole, that’s a whole other DIY project, but for now, focus on getting that wall ready for its next inhabitants.
Step 6: Cleanup, Glorious Cleanup!
You’ve done it! You’ve successfully removed the rogue tile. Now comes the less glamorous but equally important part: cleaning up. Sweep up all the tile shards, grout dust, and general debris. Use your dustpan and brush, or better yet, your trusty shop vac. Bag up all the waste and dispose of it properly. Nobody wants a tile-related tripping hazard in their trash.
Wipe down the area with a damp cloth to remove any lingering dust. You might even want to give the wall a good clean with some mild detergent. Remember, a clean slate is the best foundation for whatever you plan to do next.

What If the Tile is REALLY Stuck?
Okay, so sometimes, despite your best efforts, a tile just refuses to budge. It’s like it’s become one with the wall. In these cases, you might need to consider a slightly more aggressive approach, but always with caution.
If your chisel isn't making progress, you might need to try and break the tile itself. This is where things get a bit riskier, and you really need to emphasize your safety precautions. Place a piece of thick cloth or a drop cloth over the tile to contain the fragments. Then, give the center of the tile a few sharp, firm taps with your hammer. The aim is to create a crack. Once cracked, you can then try to remove the pieces with your chisel and hammer. Be aware that this will create more mess and more sharp edges.
If you’re dealing with a particularly large or valuable tile, or if you’re just not feeling confident, it might be time to call in a professional. There’s no shame in admitting when a job is beyond your current skill set or comfort level. It’s better to pay for expert help than to cause more damage and end up with an even bigger repair bill.
The Moral of the Story (and the Rogue Fish)
So, what did my little iridescent fish teach me? It taught me that even the simplest tasks can have their challenges. It taught me the importance of preparation, of having the right tools, and of approaching a job with a bit of foresight and a lot of patience. It also taught me that sometimes, things just break. And that’s okay. The important thing is knowing how to fix it.
Removing a tile might seem daunting at first, but with the right approach, it’s a completely manageable DIY task. Whether you’re replacing a damaged tile, preparing for a renovation, or just dealing with a rogue fish escaping its aquatic confines, you now have the knowledge to tackle it. So, go forth, be brave, be patient, and happy tiling (or, you know, untiling)!

