How To Read A Tape Measure Uk
So, you've got this contraption, right? This little metal ribbon that magically unfurls and tells you, like, how long stuff is. Pretty cool, huh? We’re talking about the humble tape measure, my friend. And if you’re in the UK, chances are it’s got a few quirks you might not have noticed at first glance. No worries, though! Think of me as your friendly guide, the one who’s already wrestled with the beast and lived to tell the tale. Grab your cuppa, settle in, and let’s decode this measuring marvel, shall we?
First off, let's acknowledge the sheer drama of a tape measure. It's a coiled spring of pure potential, just waiting to spring back and potentially take out an eye if you're not careful. We’ve all been there, right? That sudden thwack as it snaps shut? A rite of passage, I tell you. But today, we’re focusing on the reading part, not the near-death experiences. Though, let’s be honest, sometimes it feels like a close call.
Now, the tape measure you’re holding – if it’s a standard UK one – is probably a glorious mix of inches and centimetres. Yep, a bit of a hybrid, like some exotic animal. Some are all metres and centimetres, some are inches and feet, and some, bless their complicated little hearts, have both. It’s like the universe decided we needed a bit of a challenge. So, step one: figure out what units your tape measure is showing. Is it clearly marked? Sometimes they have little little icons, or just a whole bunch of numbers in different sizes. Look closely, don't just guess!
Must Read
Let’s dive into the metric side of things first, because honestly, it’s usually the simpler one. Think of it like this: one big step, ten small steps. Easy peasy. You’ll see the big numbers, usually in bold or slightly larger font. These are your metres. So, if you see a ‘1’ and then a whole bunch of other marks, that’s one metre. And a metre is, well, about the length of a decent-sized dog lying down. Or maybe a really long baguette. You get the idea. Metres are for the big stuff.
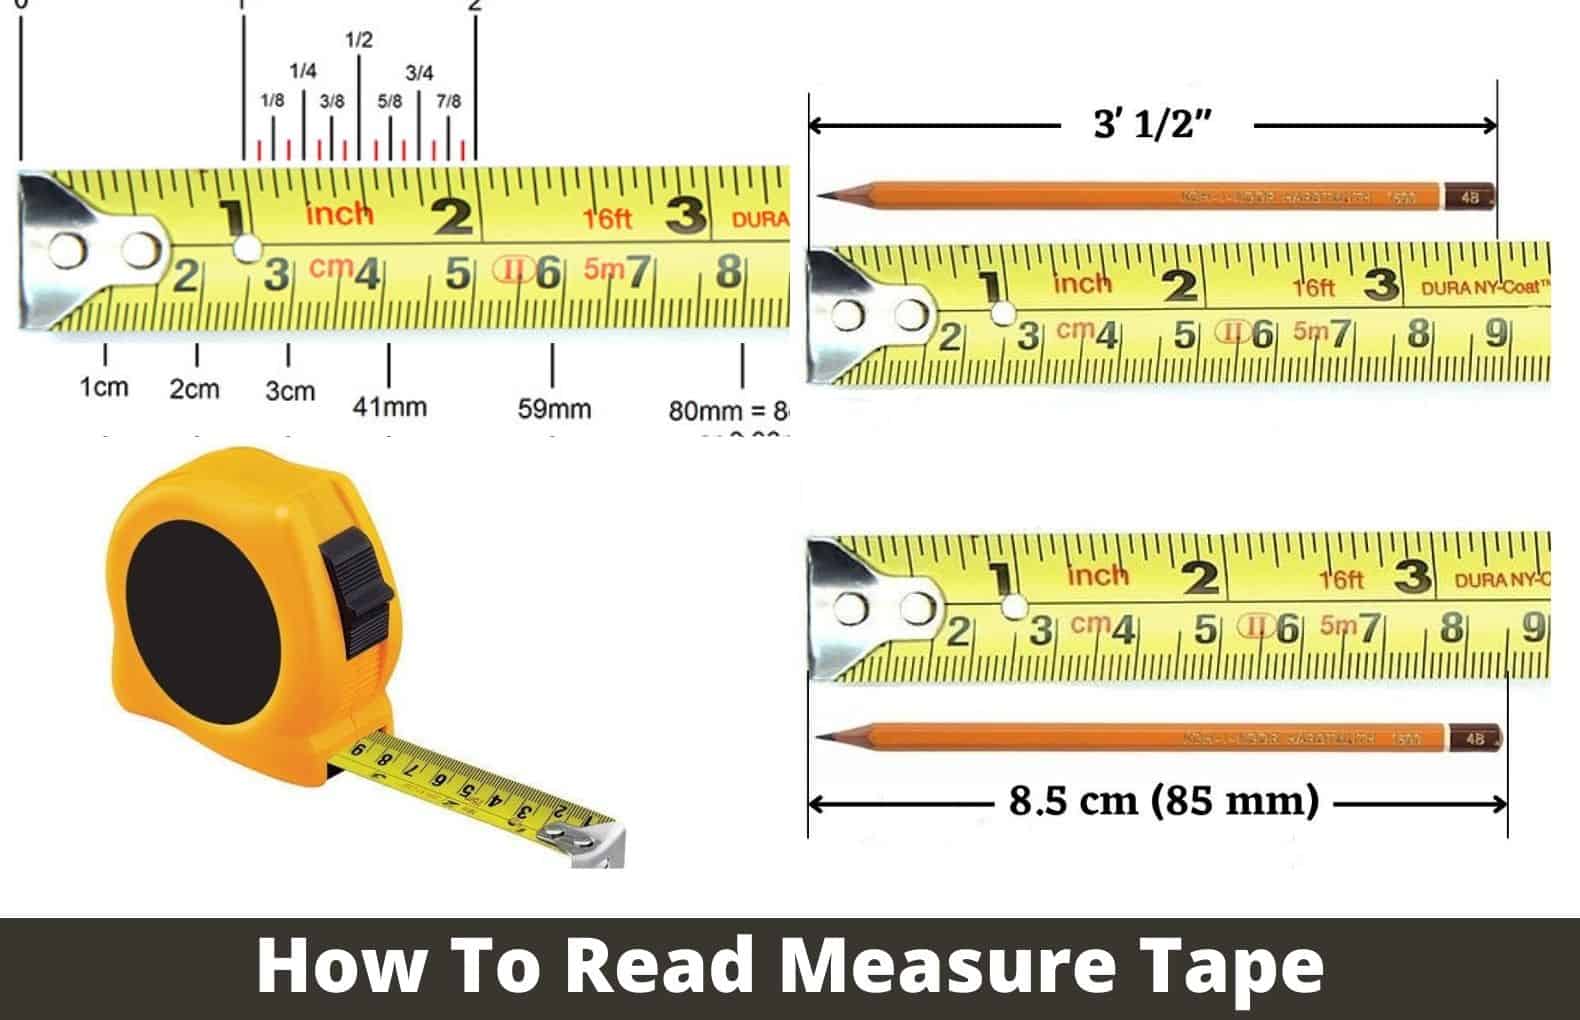
Then, you have the smaller numbers, often running alongside the metres. These are your centimetres. And here’s the magic: there are 100 centimetres in one metre. So, that ‘1’ for a metre? It’s followed by 100 little tick marks. The big bold numbers in between are usually every 10 centimetres. So, you’ll see ‘10’, ‘20’, ‘30’, all the way up to ‘90’, and then you hit the next metre mark. It’s like a mini-party every ten centimetres. Centimetres are your go-to for most everyday things. Building shelves? Measuring a door frame? Yep, you’ll be living in centimetre land.
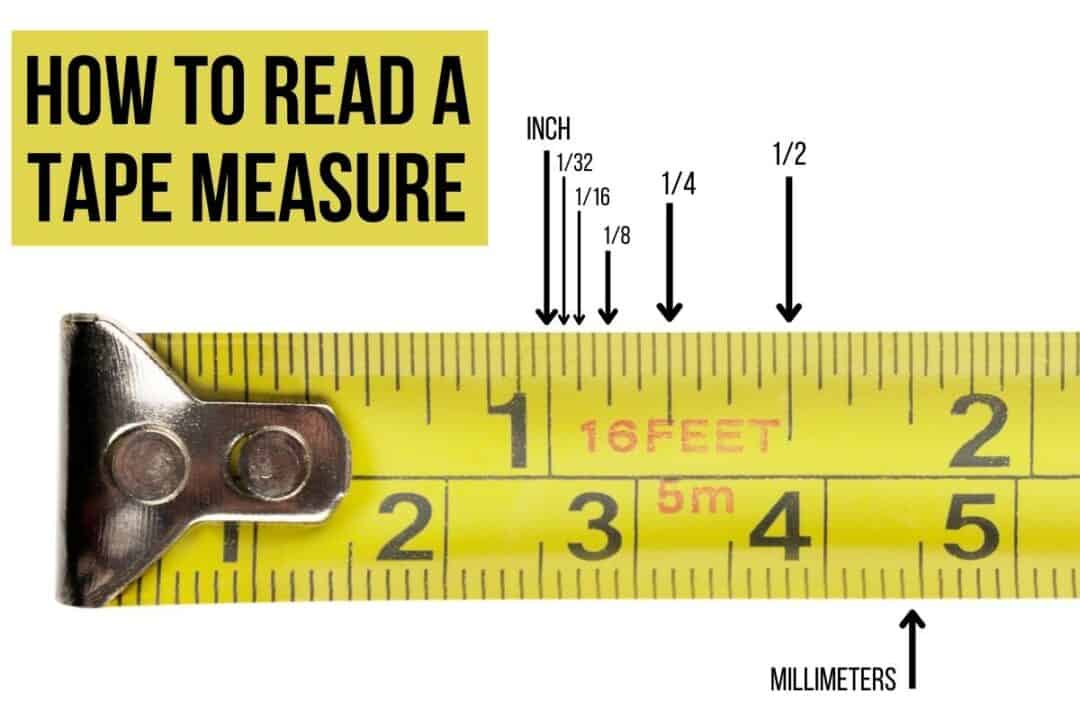
Now, if you’re feeling really adventurous, or if you’re doing something super precise, you might even see millimetres. These are the tiny little tick marks between the centimetre marks. And just like the metres and centimetres, it’s a neat decimal system. There are 10 millimetres in every centimetre. So, that little space between ‘1’ and ‘2’ on your centimetre scale? That's 10 millimetres. Millimetres are for the super-duper detailed work. If you’re assembling tiny furniture or trying to get a perfect fit for a picture frame, you might need to squint and count those millimetres. Don’t worry if your eyes cross a bit, it happens to the best of us.
So, to recap the metric side: Big numbers are metres. The numbers in between are centimetres (usually marked every 10). The teeny-tiny ticks are millimetres. See? Not so scary, is it? It's all about counting in tens. It’s a beautiful, logical system. I almost wish I could just live in a world of metres and centimetres, honestly.
But then… there’s the imperial side. Ah, the imperial side. This is where things get a little more… whimsical. If your tape measure also has inches and feet, get ready for a slightly different adventure. Because while centimetres are all neat and tidy in tens, inches are a bit more… scattered. They like to break things down into halves, quarters, and even eighths. It’s like a little puzzle every time you look at it.
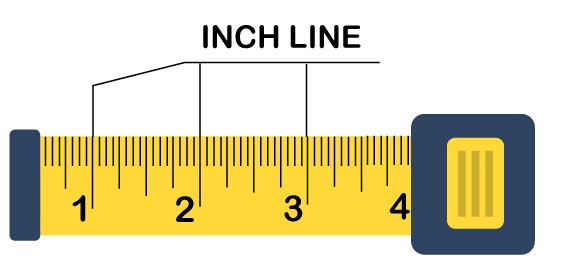
You’ll see the big numbers on this side, and these are your inches. So, if you see a ‘1’, that’s one inch. If you see a ‘12’, that’s twelve inches. And here’s the crucial bit, the piece of knowledge that will change your life: 12 inches make one foot. It's like a little inch-party that eventually becomes a foot-celebration. So, when you hit the ‘12’ mark, you’re not just at twelve inches, you’re also at one foot. Mind. Blown.
Now, the marks between the inches are where the fun (or mild confusion) really begins. You’ll see a mark that’s halfway between the ‘1’ and the ‘2’. That, my friends, is half an inch. Then, you might see a mark that’s halfway between the ‘0’ and the ‘half-inch’ mark. That's a quarter of an inch. And if you’re really lucky, or unlucky, depending on how you feel about fractions, you’ll see even smaller marks for eighths of an inch. It’s a fractal nightmare, but in a good way, probably.
So, how do you read, say, three-quarters of an inch? Well, you find the half-inch mark, and then you go halfway between that and the next full inch. Or, you can count up. You've got the first quarter, the second quarter (which is half), the third quarter… you get the idea. It’s like counting sheep, but with more fractions. The longer the tick mark, the bigger the fraction. So, the longest marks are for full inches. The next longest are for half inches. Then you get the quarter-inch marks, and the shortest little ticks are your eighths (and sometimes even sixteenths, if your tape measure is feeling particularly ambitious).
Think of it like a pie chart. A full inch is the whole pie. A half-inch is half the pie. A quarter-inch is a quarter of the pie. And an eighth? Well, that's just a sliver. It takes a bit of practice to get your eye in. Don’t be discouraged if you have to look at it for a solid minute, turning it this way and that. It’s a skill, like juggling or making the perfect Yorkshire pudding.
A lot of UK tape measures will have the feet marked in red. You’ll see a little ‘1’ in red, then the inches leading up to it, then a ‘2’ in red, and so on. This is a super handy visual cue. If you see a red number, that’s your foot count. So, if you see a red ‘3’, you’re at three feet. Then you just count the inches after that red ‘3’ up to the next red number. Easy peasy…ish. It helps to break down the longer measurements into bite-sized foot chunks. Because let’s face it, counting up to, say, 60 inches is a bit of a chore. But 5 feet? Much more manageable.

Sometimes, you’ll also see specific marks for specific things. For example, some tapes might have marks for 16 inches or 24 inches, which are common stud spacing measurements in construction. You might also see marks for roof pitch or other specialised measurements. These are usually a bit more niche, but if you’re doing a specific job, they can be a lifesaver. Just keep an eye out for them, and if you’re curious, give them a quick Google. The internet knows all.
Now, here’s a little trick that will make you feel like a measuring wizard: conversion. You’ll often need to switch between inches and centimetres, or even feet and metres. The golden rule to remember is: one inch is approximately 2.54 centimetres. So, if you have a measurement in inches and want it in centimetres, just multiply it by 2.54. If you have centimetres and want inches, divide by 2.54. It's not always exact on the tape itself, but this is the official conversion. Your tape measure might round things a bit for simplicity.
And feet to metres? Well, one foot is about 0.3048 metres. Again, a bit of multiplication or division will get you there. Or, you can just look at the two scales on your tape measure and eyeball it. For most DIY jobs, a rough estimate is perfectly fine. No one’s going to dock points if your shelf is 0.01 metres longer than planned. Probably.
What about the end of the tape? You know, that little metal bit at the very tip? That’s the hook. And it’s designed to do two things. If you’re measuring against an inside edge, like the corner of a wall, you push the hook against that edge. The tape measure is actually designed to slide out a tiny bit to account for the thickness of the hook itself. So, it’s already factored in. Clever, eh? If you’re measuring against an outside edge, you hook the metal bit over the edge. And the tape will pull taut. Just make sure that hook isn't bent or damaged, otherwise, your measurements will be a bit off. Treat your hook with respect!
And the little cracks or notches on that hook? Those aren't just for decoration. They’re often there for you to hook onto a nail or screw head, so the tape stays put while you’re measuring. A small detail, but oh-so-useful. It's the little things, right?
A word of caution: the longer the tape, the more chance of error. If you're measuring something really long, like the length of your garden, and you're using a short tape, you'll have to unroll and re-roll it multiple times. Each time you do that, there's a tiny chance you might not start from exactly where you ended. So, for really big jobs, a longer tape is usually better. Or, if you're being super precise, maybe use a laser measure if you're feeling fancy. But for most of us, the trusty old tape measure will do just fine.
So, what have we learned? Metric is your friend for its neatness. Imperial is a charmingly complex puzzle. The longer the tick mark, the bigger the measurement (usually). That hook at the end is your best mate for precise starts and stops. And conversion is your secret weapon. Don't be afraid to ask for help, or to practice on random objects around your house. Measure your cat (they’ll probably move), measure your sofa, measure your shoe. The more you do it, the more natural it becomes. Soon, you'll be a tape measure ninja, measuring with the best of them. Now, go forth and measure bravely, my friend!

