How To Make Tassels For A Scarf

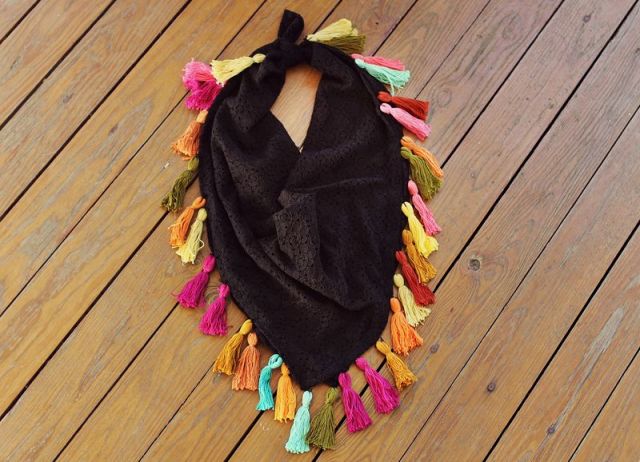
So, picture this: I'm at my favourite little antique shop, the one that smells perpetually of old paper and lavender. I'm browsing through a bin of forgotten treasures – you know, the kind of place where you might unearth a perfectly good, slightly dusty silk scarf. And there it was. A gorgeous, hand-knitted scarf, the colour of a deep twilight sky. But oh, the tragedy! The tassels were…well, they were sad. Limp, uneven, and frankly, a bit embarrassing for such a beautiful piece. It was like finding a supermodel with a bad case of bed head. I almost didn't buy it. Almost.
But then, a little spark ignited. I realised that this beautiful scarf was missing its crowning glory, its little flourish of fabulousness. And that, my friends, is how I found myself on a mission to become a tassel-making guru. Because let's be honest, a scarf without proper tassels is like a pizza without cheese. Just…wrong.
You see, tassels are the unsung heroes of the accessory world. They add personality, movement, and that je ne sais quoi that can elevate a simple scarf from "nice" to "OMG, where did you get that?!" And the best part? They are surprisingly easy to make. Like, shockingly easy. So easy, you'll wonder why you ever paid extra for them. Or why you ever put up with sad, droopy ones in the first place. Consider this your official permission slip to banish limp tassels forever.
Must Read
We're going to dive headfirst into the wonderful, fuzzy world of tassel creation. No fancy tools required, no years of crafting experience needed. Just a bit of yarn, a bit of patience, and a whole lot of enthusiasm. Ready to add some serious pizzazz to your next scarf project? Let's get this party started!
The Nitty-Gritty: What You'll Need to Whip Up Some Tassel Magic
Alright, let's get down to business. Before we start winding yarn like a mad scientist in a crafting lab, we need to gather our troops. Think of these as your essential tassel-making toolkit. And don't worry, it's not exactly an armory.
First up, the star of the show: your yarn. This is where the fun really begins! What kind of yarn? Well, that depends entirely on the vibe you're going for. For a classic, soft scarf, a good quality acrylic or wool yarn will be your best friend. If you're feeling fancy, silk or a blend can give you a luxurious drape. And for something a bit more rustic, maybe a cotton or linen blend? The world is your oyster, or in this case, your yarn stash.
Pro Tip: When choosing your yarn, think about the weight and texture of the yarn you used for your scarf. You want your tassels to complement, not overpower, your beautiful handiwork. A super chunky scarf might look a bit comical with tiny, delicate tassels, and vice versa. It's all about balance, people!
Next, you'll need something to wrap your yarn around. This is your tassel's "form." The easiest thing to use is your own hand. Yep, your very own appendage! Or, if you prefer a more uniform size, you can use a thick piece of cardboard, a book, a ruler, or even a small wooden block. The wider the object you use, the longer your tassels will be. Simple as that. Experiment! See what length tickles your fancy.
Then, you'll need a pair of sharp scissors. And I mean sharp. Dull scissors are the sworn enemy of a clean, crisp tassel. They'll snag, they'll fray, they'll make you question your life choices. Invest in a decent pair, your future tassels will thank you.
Finally, for the actual "tying" part, you'll need a piece of scrap yarn, a bit thinner than your main tassel yarn. This is going to be the crucial bit that holds everything together. Think of it as the tassel's belt, keeping all its fuzzy bits in line. You might also want a darning needle or a crochet hook to help thread this tie-off yarn.
And that's it! See? I told you it wasn't rocket science. More like, really fun yarn science. Now, let's get to the actual making.
The Method to the Madness: Crafting Your Perfect Tassels, Step-by-Step
Okay, deep breaths. We're about to embark on a journey of fuzzy creation. Don't be intimidated by the word "step-by-step." It's more like a friendly guide, a little nudge in the right direction.
Step 1: The Wrap-Around Wonderland
This is where your chosen form comes into play. If you're using your hand, simply wrap the yarn around your fingers. How many times? This is another variable you can play with! More wraps mean a thicker, fuller tassel. Less wraps mean a daintier one. I usually aim for somewhere between 30 and 50 wraps, depending on the yarn thickness and how plump I want the final tassel to be.
If you're using cardboard or another object, hold the end of the yarn firmly and start wrapping. Keep the tension consistent. Don't let it get all loose and sloppy; that's the first step to tassel tragedy. Just wrap, wrap, wrap, until you have a satisfactory amount of yarn.
A Little Word of Caution: If you're wrapping around your hand and you have long nails, be careful not to dig in too much! We're making tassels, not giving ourselves accidental manicures. And if your fingers start to feel like they're going numb, it's probably time for a break. Hydration is key, even for yarn crafters.
Step 2: The Great Divide
Once you've achieved tassel-worthy fullness, it's time to cut your yarn. This is where those sharp scissors come in handy. Carefully cut the yarn loops at one end of your wrapped bundle. So, if you wrapped around your hand, you'll cut the loops on the "pinky finger" side. If you used cardboard, cut the loops at one edge.
Be precise here. You want a clean cut, not a jagged mess. This is the foundation of your tassel's fringe. Once you've cut all the loops, you'll have a lovely, fluffy bundle of yarn strands hanging loose. It might look a bit wild at this stage, like a tiny yarn explosion. That's perfectly normal. Embrace the chaos!
Step 3: The Binding Ritual
Now for the magic that holds it all together. Take your scrap yarn and your darning needle or crochet hook. We're going to create a "head" for our tassel.
Slide the needle or hook under the entire bundle of yarn, close to the top (where you didn't cut). Pull a length of your scrap yarn through. Now, you're going to tie a really, really secure knot. Double knot it. Triple knot it if you're feeling extra cautious. You want this to be tight. This is what will prevent your tassel from unraveling into a sad, stringy mess later on.

Some people like to wrap the scrap yarn around the bundle a few times before tying the knot, creating a more defined "neck" for the tassel. This is an optional but highly effective step for a polished look. It's like giving your tassel a stylish little collar.
My Secret Weapon: I sometimes use a bit of fabric glue or a tiny dab of clear nail polish on the knot once it's tied. It might sound a bit extreme, but it adds an extra layer of security. Just a tiny bit, though. We don't want a stiff tassel!
Step 4: The Grand Reveal (and Trimming!)
Carefully slide the tassel off your form (if you used one). If you wrapped around your hand, you'll gently pull your hand out from the centre of the yarn bundle.
Now, it's time to make things neat and tidy. Gather all the loose ends of the yarn and hold them together. Take your sharp scissors and trim them to your desired length. This is where you achieve that uniform, polished look. This step is crucial for making your tassels look professionally done.
You can make them all exactly the same length for a very neat appearance, or you can create a slightly more organic, layered look by trimming at slightly different lengths. It's your tassel, your rules!
The Art of the Trim: I like to lay the tassel flat on a surface and trim. It helps me get a straighter line. Sometimes, I even measure the length from the knot to the bottom edge to ensure consistency across all my tassels. It's a bit of a perfectionist streak, I know, but it pays off!
Step 5: Attaching Your Fabulous Fringes
The final, glorious step! You've made your tassels, and now it's time to attach them to your scarf. Decide where you want them. Usually, they go at the corners, but you can get creative! You might want them along the entire edge, or even in clusters.
Simply thread your darning needle with a piece of yarn (either from the tassel itself or a matching thread) and stitch the top of your tassel securely to your scarf. Make sure to go through the knot or the "neck" of the tassel for maximum security. Reinforce the stitching if you're worried about them coming loose with wear and tear.
A Little Trick for Extra Security: When attaching, I like to make sure my needle goes through a few of the yarn strands at the top of the tassel as well as the knot. It makes them much more robust.
And there you have it! You've officially transformed your scarf from "nice" to "spectacular" with your own handmade tassels. How does it feel to be a tassel artisan? Pretty darn good, I'd bet!
Tassel Troubleshoot: When Things Get a Little Fuzz-tastic
Now, I wouldn't be your friendly crafting guide if I didn't prepare you for the occasional hiccup. Sometimes, even with the best intentions, things can go a little…fuzzy. Let's address some common tassel tantrums.
Problem: My tassels are uneven and messy.
Solution: This usually happens in the trimming stage. Make sure you're using those super sharp scissors. Lay your tassels flat and trim with precision. If they're really bad, you can always re-trim them. Sometimes, a little bit of yarn fuzz can be tamed with a quick trim. And remember, a tiny bit of unevenness can add character!
Problem: My tassels are unraveling.
Solution: This is almost always a knotting issue. Did you tie that binding knot tight enough? Really tight? If you suspect it's coming loose, you can carefully add a few more stitches with your darning needle around the knot to secure it further. The fabric glue or nail polish trick I mentioned earlier can also be a lifesaver here.
Problem: My tassels look too thin or too sparse.
Solution: This comes down to the wrapping stage. Next time, wrap more yarn around your form! More yarn equals a fuller tassel. You can also try using a yarn with a bit more "oomph" or texture. If you already have a sparse tassel, you can sometimes add a few extra strands of yarn through the knot to bulk it up a bit.
Problem: My tassels look too bulky or too wide.
Solution: Simpler than it sounds! Use a thinner form to wrap your yarn around. A narrower ruler or fewer fingers will result in a slimmer tassel. You can also trim them more severely if they're just too much for your liking.
Don't be discouraged if your first few aren't perfect. Crafting is a journey, and every stitch, every wrap, every knot is a learning experience. Think of it as your tassel apprenticeship. Soon enough, you'll be whipping out perfect tassels like a seasoned pro. And who knows, maybe you'll start a whole tassel business!

Beyond the Basics: Tassel Twists and Turns
So, you've mastered the basic tassel. Congratulations! But what if you're feeling a little adventurous? What if you want to take your tassel game to the next level? Don't worry, I've got you covered.
Colour Play: Why stick to one colour? Mix and match yarns for a multi-tonal tassel. You can do this by alternating colours as you wrap, or by using different coloured yarns for the binding knot. Imagine a beautiful sunset gradient in your tassels!
Bead It Up: Who doesn't love a little sparkle? Before you tie off your binding knot, thread a few beautiful beads onto the scrap yarn. They'll add a touch of elegance and catch the light beautifully. Just make sure the bead hole is large enough for your yarn.
The Twisted Tassel: Instead of just tying off, you can create a twisted effect. After wrapping and cutting, divide your yarn bundle into two halves. Twist each half separately, then twist the two halves together. It creates a more sophisticated look.
Beyond the Fringe: You don't have to stop at just trimming the ends. You can experiment with different cutting techniques. Try a slightly curved cut, or even a jagged edge for a more bohemian feel.
The Pom-Pom Cousin: If you're really feeling ambitious, you can combine tassel techniques with pom-pom making. Create a small pom-pom and then attach tassels to its base. It's a whole new level of fuzzy fabulousness!
The beauty of making your own tassels is the endless possibility for customization. Your scarf, your tassels, your rules. So go forth and create! Add them to hats, bags, blankets – anywhere that needs a little bit of extra flair. You are now officially a tassel wizard.
And remember that sad, dusty scarf from the antique shop? It's now sporting a set of glorious, plump, perfectly symmetrical tassels, and it looks like a million bucks. All thanks to a little bit of yarn, a bit of patience, and the knowledge that even the smallest details can make the biggest difference. Now go make some magic!

