How To Make An Index In Word
Okay, so picture this: I was younger, much younger, and my grandad, bless his cotton socks, decided to write his memoirs. This wasn't some little pamphlet, mind you. This was a sprawling saga of his life, filled with tales of wartime adventures, eccentric relatives, and enough gardening tips to fill a small encyclopedia. He painstakingly typed it all out, page after glorious page, and then proudly presented it to me, expecting a pat on the back. I was thrilled, of course, to read about Grandpa's exploits. But as I got deeper into it, I realized something was missing. Something crucial.
It was like trying to find a specific recipe in a cookbook with no chapter headings and definitely no index. You know that feeling? You're hunting for "Grandpa's Secret Apple Crumble Recipe" and you have to flip through fifty pages of "General Ramblings About Weather" and "Anecdotes Involving a Particularly Stubborn Goat." It was a labor of love, sure, but also… a bit of a nightmare to navigate. He’d even mentioned a specific incident where he’d almost won a prize pig at a local fair, but good luck finding that specific gem amidst the thousands of words about his prize-winning dahlias. That’s when it hit me: the power of an index. The unsung hero of any lengthy document!
And that, my friends, is how I learned the hard way that an index isn't just a fancy add-on for academic papers. It's your digital librarian for your own creations. It’s what turns a mountain of text into an easily accessible treasure trove. So, if you’ve ever found yourself scrolling endlessly, wishing you could just zap to that one crucial paragraph about your Uncle Barry’s questionable fashion choices, then this article is for you. We're diving headfirst into the magical world of creating an index in Microsoft Word.
Must Read
The Grand Unveiling: Why You Need an Index (Besides Avoiding Grandpa’s Memoir Mishaps)
Let's be honest, most of us probably haven't given much thought to indexes unless we're deep into a textbook or a hefty novel. But think about it. What makes a reference book useful? It's the ability to find what you need, fast. An index is your secret weapon against reader frustration. It's the difference between someone gleefully devouring your masterpiece and someone throwing it across the room in a fit of pique.
Whether you're writing a novel, a business report, a family history, or even just a really, really long recipe collection (looking at you, Grandma Agnes!), an index can be a lifesaver. It allows your readers to jump directly to the topics, names, or concepts they're interested in. No more slogging through irrelevant bits. It shows you've thought about their experience, and that’s always a win.
Think of it this way: you’ve poured your heart and soul into this document. You want people to engage with it, to find the nuggets of wisdom you’ve carefully placed. An index ensures they actually can. It’s like putting up clear signposts on a hiking trail. People can choose their own adventure, or simply get to the scenic overlook without getting lost in the brambles.
The Wordy Wizardry: Getting Started with Your Index
So, you’re convinced. You want this magical index. The good news? Microsoft Word, bless its techy heart, has built-in tools to help you out. It’s not as complicated as it might seem, I promise. It just requires a little bit of upfront effort, but trust me, the payoff is huge.
The core of creating an index in Word is marking the specific text you want to appear in your index. Think of it like this: you're highlighting all the important words or phrases that someone might search for later. Word then takes these marked entries and magically compiles them into a neat, alphabetized list at the end of your document.
Ready to roll up your sleeves? Let's get this show on the road.
Step 1: The Art of Marking an Entry (Don't Worry, It's Not Permanent!)
This is where the magic begins. You're going to tell Word what to include in your index. Don't panic; this isn't like tattooing important phrases onto your document. It’s a reversible process.
First, find the piece of text you want to include. Let’s say you’re writing about your cat, Bartholomew, and you want "Bartholomew" to show up in the index every time he’s mentioned.
Highlight the word "Bartholomew".
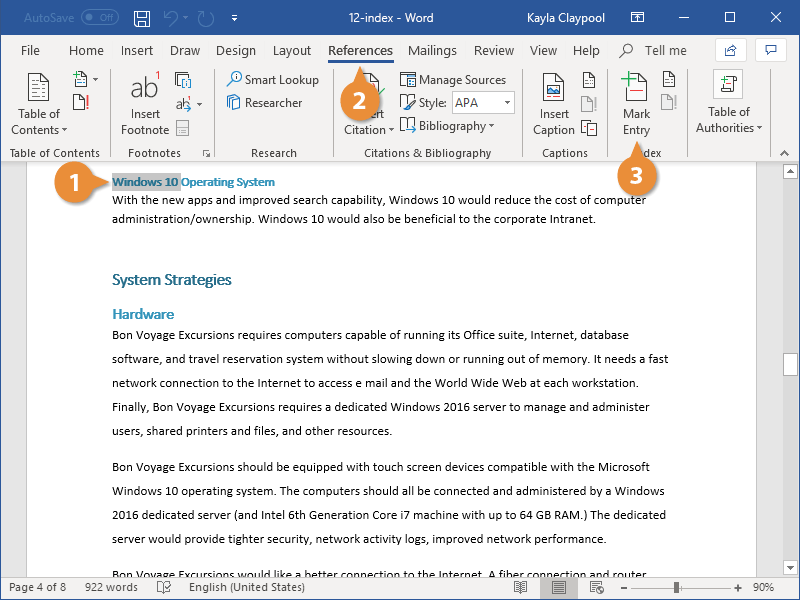
Now, head over to the References tab on the Word ribbon. See it? Right there, usually near the middle. Click on it.
In the Index group (it’ll be somewhere around there, Word’s layout can be a bit of a chameleon sometimes), you’ll find a button that says Mark Entry. Click that!
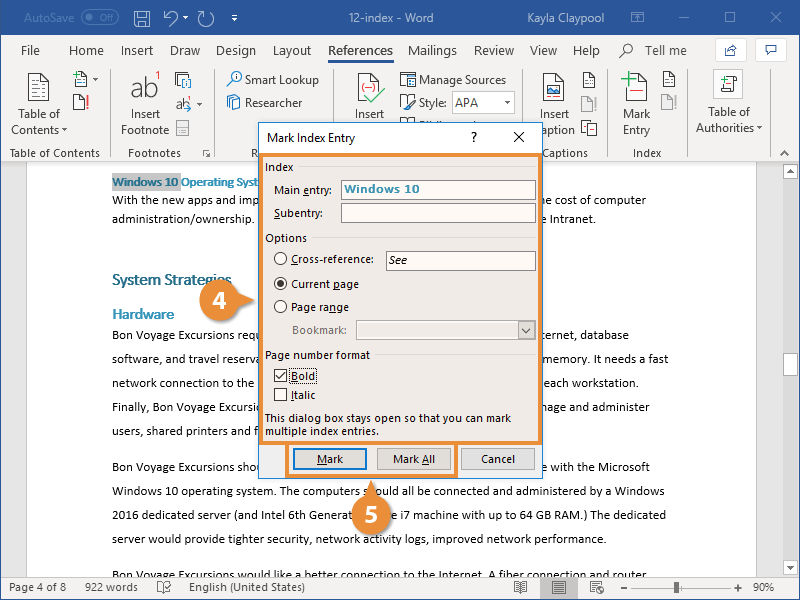
A small dialog box will pop up. This is your control center for index entries. You’ll see the text you highlighted already populated in the "Main entry" field. This is perfect!
Now, here’s where you have a few choices, and they’re important:
- Main entry: This is the text that will appear in your index. For our Bartholomew example, it would just be "Bartholomew".
- Subentry: This is for creating a hierarchical index. Imagine you have a main entry like "Gardening," and then subentries like "Flowers," "Vegetables," or "Pest Control." You can add these later, but for now, let’s keep it simple.
- Options: This is where things get interesting.
- Cross-reference to: This is super handy if you want to direct readers from one topic to another. For example, if you mention "Bartholomew's favorite toy" and want to link it to his main entry, you could use this. We'll touch on this more later.
- Current page: This is the default and usually what you want. It means Word will list the page number where you marked this entry.
- Page range: This is for marking a whole section of text. You’d highlight the entire section, then use this option to associate it with a specific index entry. More advanced, but good to know!
For now, just make sure "Main entry" has your word and "Current page" is selected. Then, click the Mark button. You’ll see a little symbol appear next to "Bartholomew" in your document – it looks like a dashed box with an ‘X’ inside. Don't freak out! This is just Word's way of showing you that you've marked an index entry. It's called a field code, and it won't print unless you tell it to.
If you want to mark multiple instances of "Bartholomew" at once, and you're feeling a bit adventurous, you can select all of them, click Mark Entry, and then hit the Mark All button. But be careful with this one! Sometimes you might want to phrase "Bartholomew" slightly differently in different contexts, and "Mark All" might not be the smartest move. I usually prefer to mark them individually, just to be sure.
Once you've marked an entry, you can click Close on the dialog box.
Step 2: The Power of "Mark All" (Use With Caution, Grasshopper!)
As I mentioned, Word has a "Mark All" feature. If you’ve got a word that appears hundreds of times and you want it in your index every single time, this can be a real time-saver. However, and this is a big "however," be absolutely sure that every single instance of that word needs to be in the index. Sometimes, a word might appear in a footnote, a heading, or just as part of a common phrase where it's not really a core topic. Using "Mark All" blindly can lead to a very cluttered and frankly, useless, index.
My advice? Use "Mark All" sparingly. If you’re just starting out, or if your document isn’t super long, manually marking each important instance is often the safer and more effective route. It gives you more control and ensures your index is truly reflective of the key themes in your document. Think of it as a quality control check that Word can't quite do on its own.
Step 3: Showing Off Your Index (The Grand Reveal!)
You've been a diligent indexer! You've marked all those juicy bits. Now, where is this magical list? It doesn't appear automatically, of course. That would be too easy.
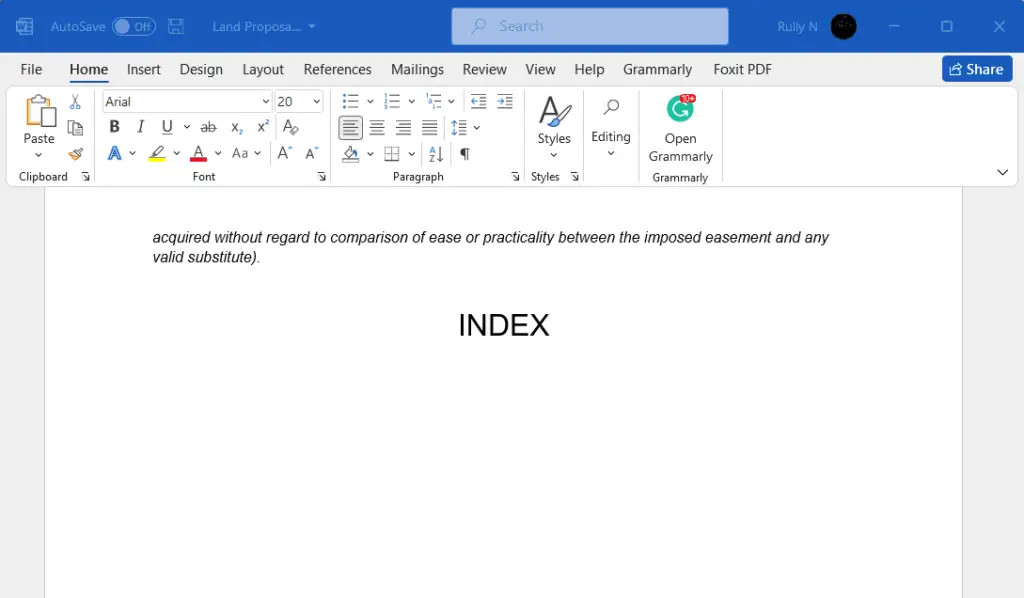
You need to tell Word where you want your index to go. Typically, indexes are placed at the very end of your document, after all your main content and any appendices.
Scroll to the end of your document. Place your cursor where you want the index to appear.
Go back to the References tab on the ribbon.
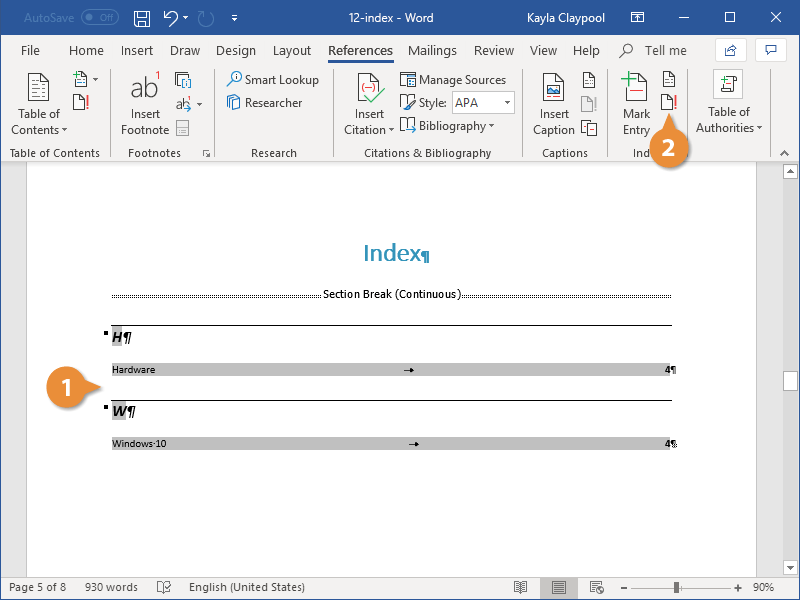
In the Index group, you'll see a button that says Insert Index. Click it!
A dialog box will pop up, and this is where you get to fine-tune your index's appearance. You can choose:
- Alignment: Do you want page numbers aligned to the right margin or indented?
- Formats: Word offers several pre-designed formats (like "Classic," "Fancy," "Modern"). Play around with these to see what looks best for your document.
- Columns: Do you want a single-column index, or a multi-column layout?
- Indented vs. Run-in: This affects how subentries are displayed.
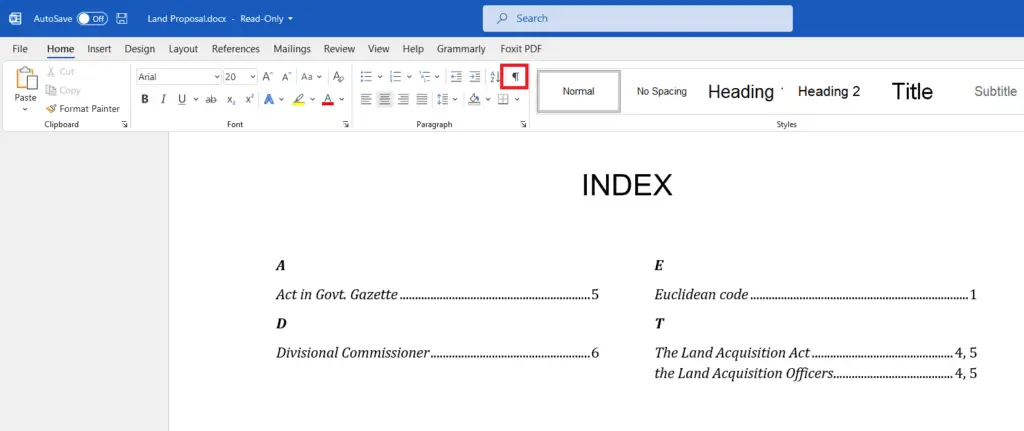
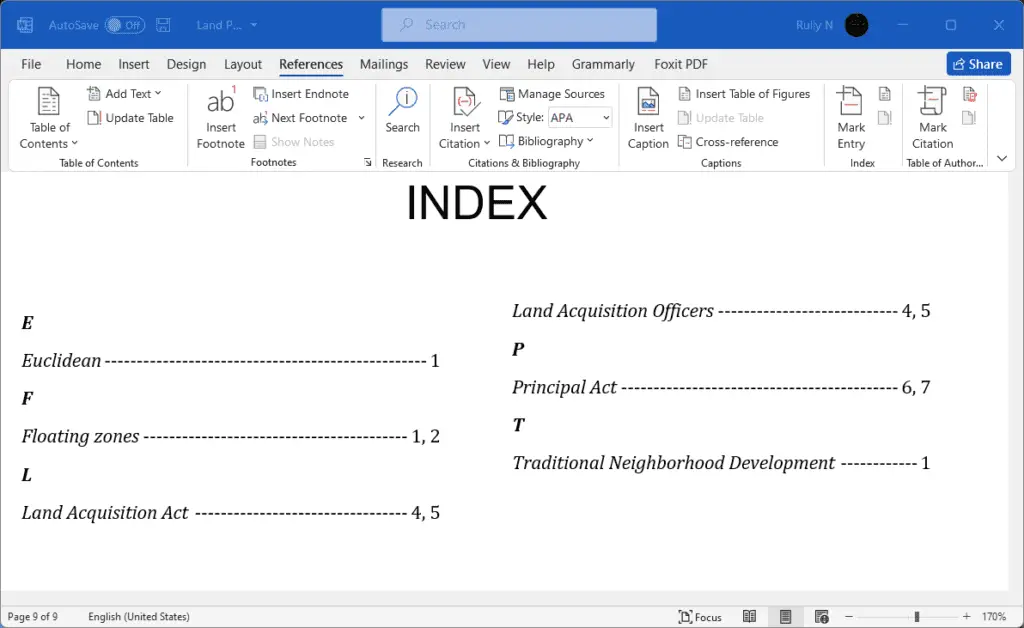
For a first-timer, I’d recommend starting with a simple format like "Classic" and a two-column layout. Click OK, and voilà! Your index should magically appear. See all those bolded words and page numbers? That’s your work, beautifully organized.
The Art of Refinement: Making Your Index Even Better
Now that you’ve got a basic index, you might be thinking, "This is good, but it could be better." And you’d be right! An index is a living, breathing thing that can evolve with your document.
Subentries: The Secret Weapon for Detailed Indexes
Remember those subentries I mentioned? They’re incredibly powerful. Let’s go back to Bartholomew. Instead of just having "Bartholomew" listed, you might want specific things about him. For example:
- Bartholomew
- Napping habits
- Favorite toys
- Disdain for vacuum cleaners
To do this, you’ll need to go back to marking entries. When the "Mark Index Entry" dialog box pops up:
In the "Main entry" field, type "Bartholomew".
In the "Subentry" field, type "Napping habits".
Click Mark.
Now, when you see Bartholomew mentioned again and want to add "Favorite toys," you'd mark that instance, put "Bartholomew" in "Main entry" and "Favorite toys" in "Subentry."
When you regenerate your index (just click Update Index on the References tab), you’ll see Bartholomew with those subentries neatly listed underneath. It’s like organizing your library by genre and then by author within each genre. So satisfying.
Cross-References: Guiding Your Readers
Cross-references are like little breadcrumbs for your readers. They’re essential for when you’ve mentioned a topic in multiple ways or when one topic is closely related to another.
Let’s say you’ve written a section about Bartholomew’s “unusual sleeping positions.” You’ve marked this under "Bartholomew" as a main entry. But you also have a section about his “cat naps.” You want to make sure people who look up "cat naps" know to also check "Bartholomew" for more info.
When marking "cat naps," in the "Mark Index Entry" dialog box:
In the "Main entry" field, type "cat naps".
In the "Options" area, choose Cross-reference to:.
In the field next to it, type "Bartholomew".
Click Mark.
Now, in your index, under "cat naps," you'll see something like "See Bartholomew". This is a really helpful way to ensure readers find all relevant information, even if they don't use the exact keywords you initially anticipated.
The Magic of Updating (Don't Forget This!)
Here's the crucial part, the bit I always forget and then have to go back and fix. If you make any changes to your document – add more text, delete sections, or even move things around – your index will not update automatically. You have to tell it to!
This is super simple. When you’ve finished making edits and are ready to see the updated index, just click anywhere within your existing index. You’ll then see an Update Index button appear in the References > Index group. Click it, and Word will recompile everything based on your latest edits.
Think of it as giving your index a little pep talk. "Hey index, time to get back to work!" It's a small step, but it's vital for keeping your index accurate and useful.
The Final Frontier: Hiding Those Pesky Field Codes
So, we’ve marked our entries, inserted our index, and refined our subentries. We’re practically index-making pros! But what about those little dotted boxes (or whatever symbol Word is showing you) that are scattered throughout your text? They’re called field codes, and while they're essential for Word to do its magic, you probably don't want them cluttering up your final printout.
You have a couple of options here:
Option 1: Toggle Field Codes Off
This is the easiest way to see what your document will look like without the field codes. On your keyboard, press Alt + F9. This toggles all field codes in your document on or off. Press it again to turn them back on if you need to edit your entries.
This is great for reviewing your document before printing or saving as a PDF, as it shows you the final appearance without the hidden technical stuff.
Option 2: Print Settings
When you go to print your document, you can control whether field codes are printed. Go to File > Options > Display. Under "Always show these formatting marks on screen" (this is for on screen), you'll see an option for "Field codes." Make sure this is unchecked if you don't want to see them while you're working. Then, under "Printing options," you can specifically choose whether to "Print field codes." Uncheck this for your final print job.
This is probably the most foolproof way to ensure they don't show up when you actually need a physical copy or a clean PDF. You've done the hard work of marking; now let Word handle the presentation.
A Word to the Wise (And the Slightly Overwhelmed)
Creating an index might seem like a bit of a chore at first, especially if you’ve never done it before. It requires a conscious effort to identify and mark the key elements of your text. But I can’t stress this enough: the reward is immense.
Think back to my grandad’s memoir. If he’d had an index, his incredible stories would have been so much more accessible to his family and friends. It’s an act of generosity to your reader, showing them you value their time and want them to easily find the treasures within your words.
So, the next time you’re staring down a lengthy document, don’t despair. Grab your Word index-making hat, take a deep breath, and start marking. You’ll be creating navigable masterpieces in no time, and future readers (including your future self!) will thank you for it. Happy indexing!