How To Make A Smudge Stick Sage
Hey there, coffee lover! So, you've been hearing all about smudge sticks, right? Like, they're the hot new thing for clearing out bad vibes and making your place smell amazing. And honestly, who doesn't want that? It's like a mini spa day for your house, but way more mystical.
But then you see the price tag at the crystal shop, and you're like, "Whoa, buddy! My wallet just did a dramatic faint." And I get it. I really do. It’s totally understandable to think, "Can I actually make one of these myself?"
Spoiler alert: You absolutely can! And it's way easier than you think. Seriously, it’s less about ancient rituals (though we can totally sprinkle some of that in!) and more about a little bit of twine and some dried-up greenery. Pretty cool, huh?
Must Read
So, grab your favorite mug, settle in, and let’s chat about how to whip up your very own, totally custom, energy-clearing smudge stick. Think of me as your virtual bestie, guiding you through this magical craft session. No pressure, just fun!
The "Why" Behind the Smoke
Before we dive into the nitty-gritty, let's just touch on why people even bother with this whole smudging thing. Is it just a trend? Is it really going to zap away that awkward energy from when your ex accidentally liked an old photo of yours? (Oof, been there.)
Well, in many indigenous cultures, especially Native American traditions, burning sacred herbs like sage is a really important practice. It's about purification. Like a spiritual deep clean, you know? They’ve been doing this for centuries, way before it was a Pinterest trend. So, it’s good to have a little respect for that history.
The idea is that the smoke carries away negative energy, bad vibes, and even unwanted spirits. Think of it like opening up all the windows after a really, really stuffy day. You just want that fresh air to come rushing in, right? Smudging is kind of like that for your energy field and your living space.
And let's be honest, the smell? It's gorgeous. It's earthy, it's clean, and it makes your home feel instantly more grounded. It’s like wrapping yourself in a cozy, aromatic blanket. So, even if you’re a total skeptic, you can’t deny the power of a good scent to shift your mood. Plus, it smells way better than whatever mysterious odor is lurking in the back of your fridge. Just saying.
So, the "why" is multifaceted. It’s about history, spirituality, and a good old-fashioned refresh. And making your own? That adds a whole extra layer of intention and personal power to the whole process. Pretty neat, right?
What You'll Need: The Smudge Stick Shopping List (Don't Panic!)
Okay, so you’re convinced. You’re ready to embrace your inner herb alchemist. But what do you actually need? Is it a secret list of ingredients whispered by ancient shamans under a full moon? Nope! It’s much more down-to-earth.
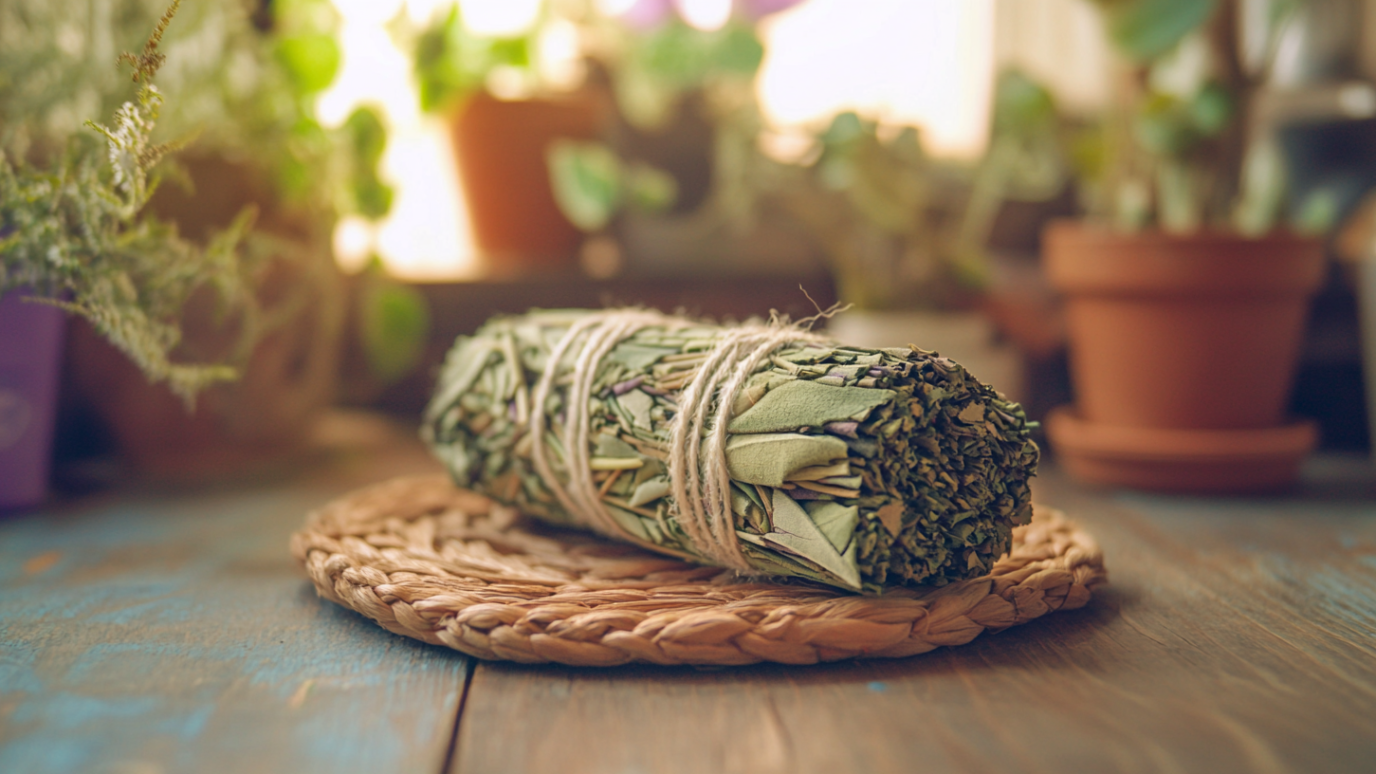
First things first: Sage. Duh! But not just any sage from your garden that might have been munched on by a rogue squirrel. We're talking about culinary sage, or ideally, smudge sage (also known as white sage or desert sage). You can find this at most metaphysical shops, herb stores, or even online. Look for dried bundles – they’re usually already pretty well put together.
Why white sage specifically? Well, it’s got a long history of use in cleansing rituals. It’s considered super potent for clearing out stagnant energy. Plus, it smells divine. If you can’t get your hands on white sage, other herbs work too! We’ll get to that in a sec. Don't fret if your options are limited. The intention is the most important part, remember?
Next up, we need something to hold it all together. Think of this as the hug for your herbs. You’ll need some natural twine or string. Cotton or hemp twine is your best bet. Avoid anything synthetic, like yarn that might melt or plastic string that… well, it’s plastic. We’re going for earthy, remember? Something that feels good in your hands and doesn't mess with the vibes. A nice, neutral color is great, but if you want to go wild with a colorful twine, who am I to judge? Your smudge stick, your rules!
And that’s pretty much it for the bare essentials! See? Not so scary, right? It's like making a bouquet, but with more spiritual pizzazz.
The "Extras" to Elevate Your Smudge Game
Now, while sage is the star of the show, you can totally jazz things up. Think of these as the fun accessories for your smudge stick. They add extra intention and aroma.
You can absolutely add other dried herbs to your smudge stick. This is where you can get really creative. Some popular choices include:
- Lavender: For peace, calm, and sweet dreams. Who doesn't need more of that?
- Rosemary: For purification, protection, and remembrance. It’s like a little bit of sunshine in herb form.
- Cedar: For wisdom, strength, and grounding. It smells sooooo good.
- Eucalyptus: For clearing, healing, and protection. It's like a breath of fresh air, literally.
- Mugwort: For intuition, psychic awareness, and protection. This one is a bit more potent, so use it sparingly if you’re new to it.
You can buy these dried herbs pre-packaged, or if you’re feeling super ambitious, you could even dry your own! Imagine the satisfaction! Just make sure they are completely dry before you bundle them up. Soggy herbs are a smudging fail, and nobody wants that.
Some people also like to add dried flowers, like rose petals or calendula. They just add a touch of beauty and intention. Again, make sure they’re dried. Wet flowers and smoke don’t mix well, trust me.
And that’s it! You’ve got your core ingredients and some fun optional add-ins. We’re halfway to smoky bliss, my friend!

Let's Get Our Hands Dirty: The Smudging Process
Alright, the moment of truth! Time to actually make this thing. Don't overthink it. It’s more about the doing than the perfection.
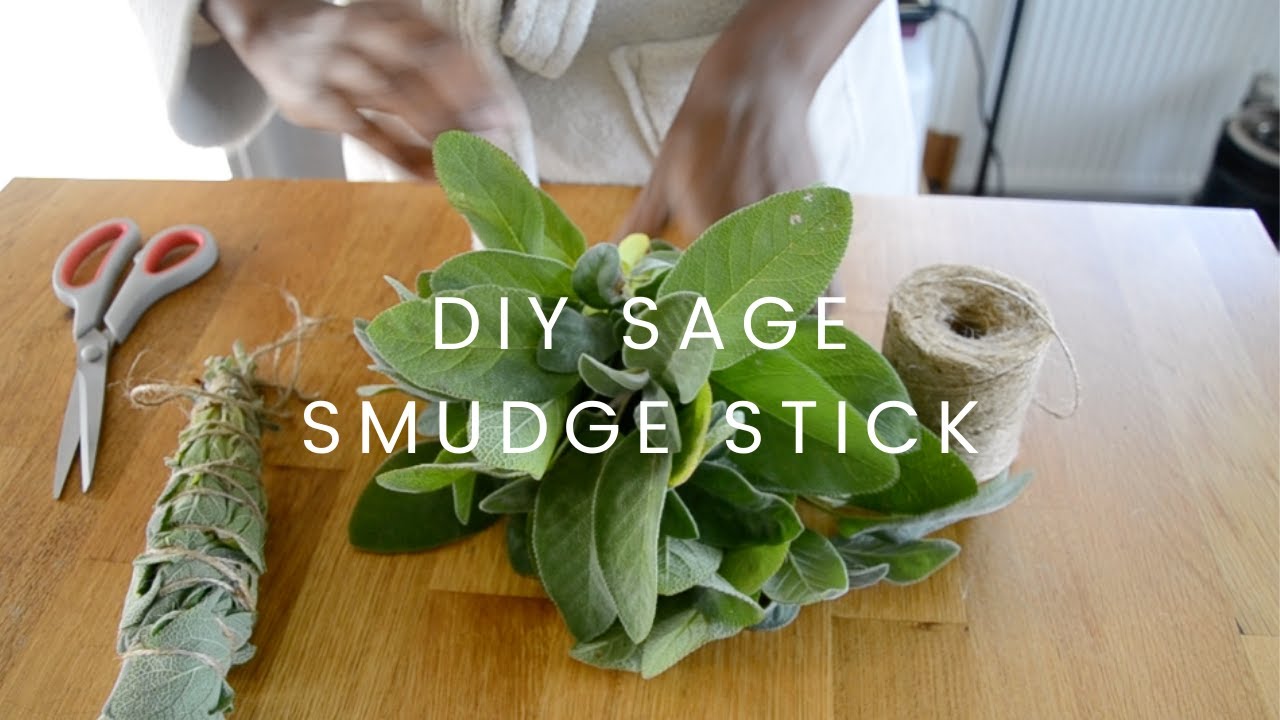
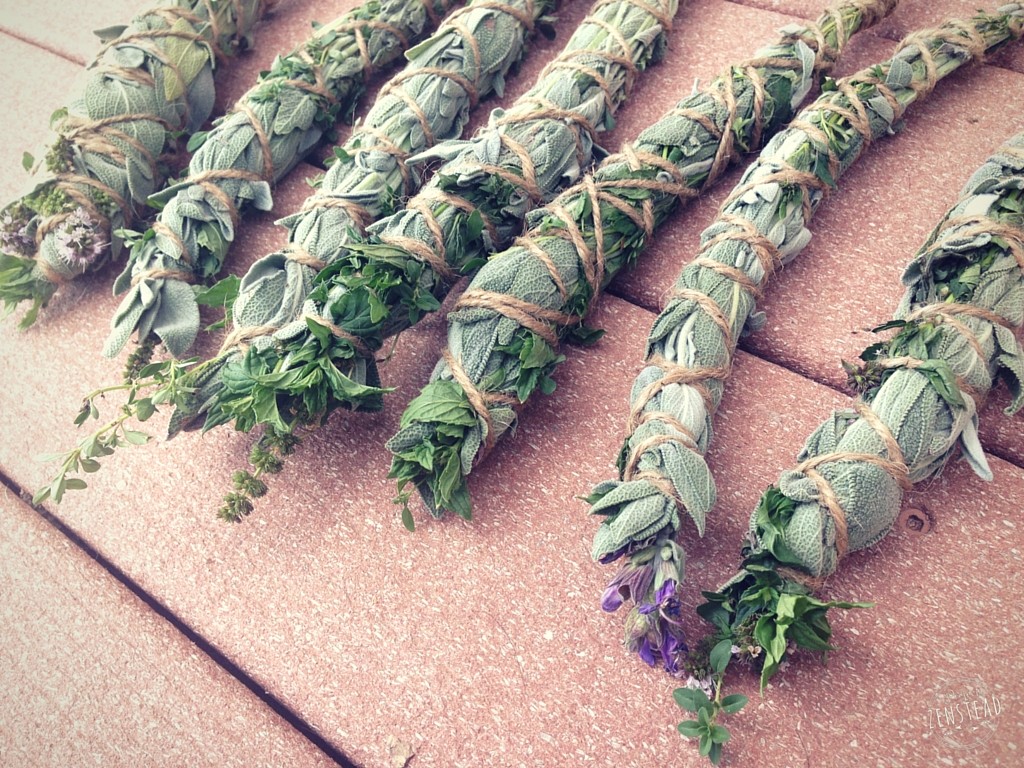
First, take your dried sage (and any other herbs you’re using). If they’re in a big bundle, you might want to break off smaller sprigs. You want them to be roughly the same length, so your smudge stick looks nice and tidy. Think of it like arranging flowers – you want a good shape.
Lay them out on a clean surface. I like to use a wooden cutting board or just a clean countertop. It feels more natural that way. Now, arrange them in the way you want them to be bundled. You can have a big bunch of sage, or you can intersperse your lavender or rosemary throughout. Play around with it! This is your creation. What feels good to you?
Once you have your desired arrangement, hold them together firmly. This is where the twine comes in. Take a good long piece of your natural twine. You’ll need enough to wrap around several times and tie off securely. Don’t be stingy with the twine – you want it to hold, not fall apart mid-smudge.
Starting at one end of your herb bundle (usually the stem end), begin to tightly wrap the twine around the herbs. Go round and round, making sure to keep the herbs snug. You want to create a tight grip so they don't fall out when you're burning it. Imagine you're giving your herbs a really firm, loving hug with the twine.
Keep wrapping, working your way down the bundle. You can wrap all the way to the top of the leaves, or leave a little bit of the leafy ends exposed. It’s really up to you! Some people like a fully bound stick, others prefer a more natural look.
When you’ve wrapped as much as you want, tie a secure knot. Double knot it, triple knot it – whatever makes you feel confident that it won’t unravel. You can leave the ends of the twine dangling, or you can trim them. Totally your call!
And there you have it! You’ve just made a smudge stick. Give yourself a pat on the back! It might look a little rustic, a little imperfect, and that’s exactly how it should be. It’s handmade, with love and intention. It’s not supposed to be a perfectly uniform product from a factory. It’s got character, just like you!

Drying Your Masterpiece
Now, here’s a crucial step. If your herbs were fresh when you bundled them, or even if they were just a little bit damp from humidity, you need to let them dry completely. This is super important for burning. Wet herbs don’t burn well, and they tend to just smolder sadly.
Find a dry, airy place to hang your smudge stick. A closet, a pantry, or even just a corner of your room away from direct sunlight and moisture can work. You can hang them upside down by the twine. This helps the herbs dry evenly and keeps them from getting flat on one side. Think of it as a little herb spa retreat for drying!
How long does it take? It varies, but usually, anywhere from a week to a few weeks. You’ll know they’re ready when the leaves are brittle and crumbly. You can gently pinch a leaf to test. If it snaps easily, it’s good to go. If it bends, it needs more time. Patience, my friend, patience! Good things come to those who wait (and have a properly dried smudge stick).
Once they're completely dry, you can give them another little squeeze with the twine to make sure they're still snug. You're almost ready for your first ceremonial smoke!
Using Your Smudge Stick: The "How-To" of the Smoke Signals
Okay, you’ve made it! You have your beautiful, handmade smudge stick, dried to perfection. Now, the fun part: using it!
First, you’ll need a way to catch the ash. A heat-resistant dish, a small ceramic bowl, or even an abalone shell (if you happen to have one!) works perfectly. Just make sure it's something that won't burn or melt. Safety first, always!
Take your lighter or a match. Light the tip of your smudge stick. Hold the flame to it for about 15-30 seconds, until you see a nice, steady flame. Then, gently blow it out. You should see a beautiful plume of smoke rising. Ahh, that’s the good stuff!
Now, here’s where the intention comes in. As you wave the smoke around your space, think about what you want to clear. Are you getting rid of the stress from a long workday? Are you banishing the lingering energy of a disagreement? Are you just wanting to bring in some fresh, positive vibes? Focus your thoughts on that intention. Visualize the smoke carrying away anything negative and filling the space with light and peace.

You can walk around your home, letting the smoke drift into corners, closets, and even under furniture. Some people like to open a window a little bit to let the smoke (and the negative energy) escape. It's like a little smoky exit strategy.
When you're finished smudging, or when the smoke starts to die down, you can gently tap the smoldering end of the stick into your heat-resistant dish to extinguish it. Alternatively, you can press the burning end firmly into the dish until the ember is out. Make sure it's completely out before leaving it unattended. We don't want any accidental fiery situations, do we? No thanks!
A Few Extra Tips for Your Smudging Journey
Be mindful of your intention: As I said, this is probably the most important part. What you’re thinking and feeling while you smudge matters. So, set a clear intention before you begin.
Don't overdo it: You don't need to smudge your entire house every day. A quick smudge after a stressful event or when you feel the energy is a bit "off" is usually enough.
Ventilation is key: While the smoke is cleansing, it can also be a bit much for some people (and pets!). Make sure to have some fresh air circulating.
Respect the tradition: Remember that smudging has deep roots in indigenous cultures. Be mindful and respectful of its origins. If you’re making it for yourself, that’s great! If you’re selling them, do your research and be ethical.
Storage: Store your dried smudge sticks in a cool, dry place, away from direct sunlight. They should last for a good while if stored properly.
And there you have it! Your very own, handmade smudge stick. It’s a little bit of magic, a whole lot of nature, and a whole lot of personal power, all rolled up into one beautiful bundle. How cool is that? Now go forth and smudge, my friend! And maybe, just maybe, your ex will stop liking those old photos. A girl can dream, right?