How To Install A Towel Bar Without A Drill

So, you’ve just stepped out of a wonderfully steamy shower, feeling all refreshed and ready to conquer the world, right? But then… disaster strikes! You reach for your fluffy towel and… oops. It’s still in the hamper. Or worse, it’s just a damp heap on the floor. The horror!
And what’s the usual culprit behind this towel tragedy? A stubbornly absent, or worse, a stubbornly misplaced towel bar. Now, I know what you’re thinking. “Installing a towel bar? That sounds like a job for a drill, a spirit level, and possibly a small construction crew.” But fear not, my friend! What if I told you that you can banish the damp towel blues without ever having to fire up a power tool?
Yep, you heard me. No drilling required. Zero holes in your pristine walls. This is the kind of DIY magic that makes you feel like a home improvement superhero. And honestly, who wouldn't want a little more of that in their life? It’s about empowering yourself, one hangable towel at a time!
Must Read
The Case of the Un-Drilled Towel Bar: Why Bother?
Let’s be real. Sometimes, the idea of drilling into walls feels… permanent. What if you change your mind about the placement? What if you’re renting and your landlord has a strict “no drilling” policy? Or maybe, just maybe, you’re like me and the thought of a runaway drill bit sends a tiny shiver down your spine. Whatever your reason, embracing the drill-free approach opens up a whole new world of easy decorating and organization. It’s about flexibility, about making your space work for you without the commitment of permanent fixtures. Plus, it’s incredibly satisfying to achieve a functional and stylish outcome with a little cleverness, wouldn't you agree?
Think of all the possibilities! A perfectly placed towel bar in the kitchen for those handy dish towels. A temporary one in the laundry room for airing out damp clothes. Or even a stylish hook for your favorite robe in the bedroom. The humble towel bar, when installed with a little ingenuity, becomes a tiny but mighty hero of everyday convenience. And the best part? You can do it yourself, probably with stuff you already have lying around!
Meet Your New Best Friends: The Drill-Free Heroes
So, how do we achieve this miraculous drill-free installation? It all comes down to clever adhesive solutions. Forget those flimsy sticky strips that give up the ghost after a week. We’re talking about the heavy-duty, the reliable, the can-hold-a-wet-towel-and-then-some kind of stuff. Here are your main players:
Adhesive Hooks: The Classic Comeback
Ah, the humble adhesive hook. You might remember these from your college days, tasked with holding up posters. But modern adhesive hooks are a whole different beast! They come in all shapes and sizes, and many are designed specifically for bathrooms and kitchens, meaning they’re built to withstand humidity and temperature changes. Look for ones that boast a “heavy-duty” or “max weight” rating. You’ll want to make sure they can handle the weight of a wet towel, which can be surprisingly substantial. Trust me on this one!
The beauty of these is their sheer simplicity. You peel off the backing, press them firmly onto a clean, dry surface, and give them a good amount of time to set. This “setting time” is crucial. Don't be tempted to hang that towel immediately! The adhesive needs to bond properly. Think of it as giving your hook a little pre-party before the main event. Read the instructions carefully, as some recommend waiting 24 hours. Patience, my friend, is a virtue, especially in the world of drill-free decorating.
Command Strips: The Wall-Saving Wonders
These are the rockstars of the adhesive world, and for good reason! Command strips are designed to hold strong but remove cleanly, without damaging your walls. They’re essentially a two-part system: a strip that adheres to your towel bar or hook, and another that sticks to the wall. You line them up, press them together, and voilà! You’ve got yourself a securely mounted item.

The real magic of Command strips lies in their removal. When you’re ready to take it down, you simply stretch the strip downwards, and it releases with a satisfyingly gentle peel. No gouges, no paint damage, just a clean surface. This makes them absolutely perfect for renters or anyone who likes to redecorate frequently. Plus, they often come with multiple sizes and weight capacities, so you can find the perfect fit for your towel bar project.
Suction Cups: The Temporary Titans
For those truly temporary situations, or if you have a smooth, non-porous surface like tile or glass, suction cup towel bars are your go-to. These are the ultimate in drill-free convenience. You simply press them firmly onto the surface, and the vacuum seal holds them in place. No adhesives, no residue, just pure suction power!
While they might not be as strong as some of the heavy-duty adhesive options for permanently holding heavy, wet towels, they are fantastic for lighter-duty needs, like hanging a hand towel or a dishcloth. They’re also incredibly easy to reposition, which is a huge bonus if you’re still figuring out the perfect spot. Just make sure the surface is perfectly clean and dry before you apply them. A little bit of moisture can be the enemy of a good suction cup, so be thorough!
Let’s Get Hanging: The Step-by-Step (No Drill!) Guide
Alright, you’ve got your drill-free hanging solution of choice. Now, let’s get down to business. This is where the fun really begins!
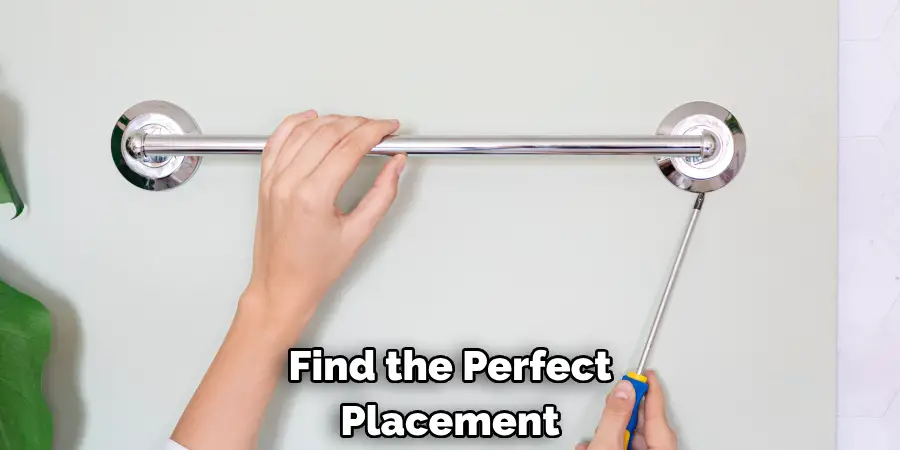
Step 1: Choose Your Location Wisely
This is probably the most important step, so give it some thought! Where do you actually want that towel bar? Near the shower? Next to the sink? Consider the height and accessibility. You don’t want to be doing a yoga pose just to reach your towel. Also, think about the surface. Most adhesive solutions work best on smooth, clean, and dry surfaces like painted drywall, tile, or glass. Avoid textured walls or wallpaper if you can, as they might not provide a good enough grip.
Step 2: Cleanliness is Next to Hang-ability
This cannot be stressed enough! Your chosen surface needs to be immaculately clean and dry. Use a good all-purpose cleaner or rubbing alcohol to wipe down the area where the adhesive will be applied. Any dirt, dust, or grease will seriously compromise the bond. Give it a good scrub and then let it dry completely. Completely. I’m talking bone dry.
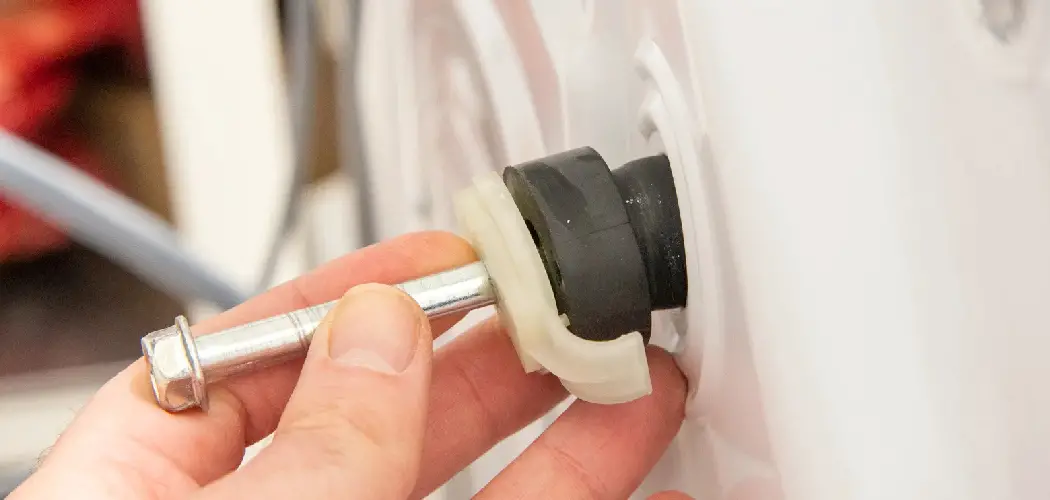
Step 3: Prepare Your Towel Bar
Most drill-free towel bars come with pre-attached adhesive backing or are designed to work with specific adhesive strips (like Command strips). If you're using a towel bar that requires separate adhesive strips, follow the manufacturer’s instructions precisely. Make sure you’re applying the strips to a clean, dry towel bar as well.

Step 4: The Moment of Truth: Application!
Now for the exciting part. Carefully peel the backing off your adhesive strips or the towel bar itself. Align it precisely with where you want it on the wall. Once you’re happy with the placement, press it firmly against the wall. For adhesive strips, this usually means holding it in place for a good 30 seconds to ensure a strong bond. For suction cups, it's a firm press to expel the air.
Step 5: The Waiting Game (It’s Worth It!)
This is where your patience will be rewarded. Resist the urge to hang that towel immediately! As mentioned earlier, most adhesives need time to cure and reach their full strength. Check the packaging for the recommended waiting time. It might be a few hours, or it might be 24 hours. Trust the process! This waiting period is the difference between a towel bar that stays put and one that ends up on the floor with your towel.
And Now, A Word of Encouragement
See? It’s not rocket science! In fact, it’s probably easier than assembling that flat-pack furniture you’ve been avoiding. You’ve just conquered the drill-free towel bar installation, a small but mighty victory in the world of home improvement. You’ve empowered yourself, saved your walls, and, most importantly, ensured that your towels will be readily available for all your post-shower needs.
This is just the beginning of your drill-free decorating journey. Think of all the other things you can hang! Pictures, organizers, decorative shelves – the possibilities are endless. Every successful drill-free project builds your confidence and expands your DIY horizons. So, go forth and conquer! You’ve got this, and the world of easy, stylish home upgrades awaits you!