How To Grow Thanksgiving Cactus From Cuttings
Hey there, plant pals! Ever look at those gorgeous Thanksgiving cacti and think, "Man, I wish I had more of those"? Well, guess what? You totally can! And it’s way easier than you think. We're talking about Thanksgiving cactus cuttings. Yep, those bendy, segmented arms are practically begging to become new plants. It’s like a botanical magic trick, but without the puffy sleeves and questionable card games.
Why is this so much fun? Because it’s like growing your own little cactus army! Imagine, one plant can become dozens. It’s a gift that keeps on giving, literally. Plus, it’s a fantastic way to snag a piece of a friend's prize-winning bloomer. "Oh, that's pretty! Can I have a little piece?" Boom. Instant plant parent, no expensive nursery trip required.
Let’s get down to business. This isn't rocket science. It's more like… slightly advanced gardening. But with way less chance of blowing anything up. Unless you count your friend’s mind when you show up with a whole new plant you grew yourself. That's an explosion of awesomeness.
Must Read
Operation: Cactus Commando!
First things first, you gotta get your hands on some cuttings. How? Easy. Ask a friend who has a fabulous Thanksgiving cactus. They're usually super happy to share. Or, if you’re feeling brave, you can take a little snip from your own existing plant. Just make sure it’s a healthy-looking segment.
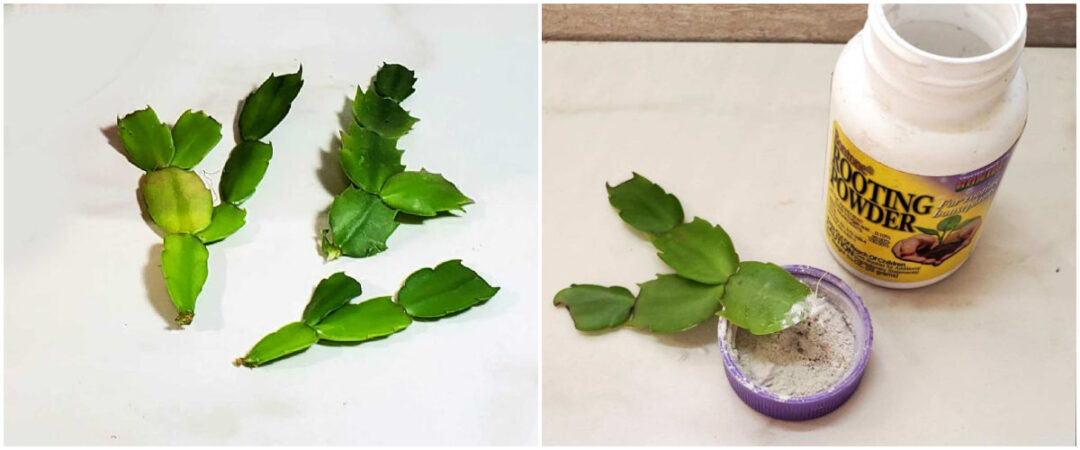
What makes a good cutting? Think of it like picking a winning lottery ticket. You want a segment that’s nice and plump, not dried out or mushy. A segment with at least two or three "links" is ideal. It’s like the plant's little backbone. More backbone, more chance of success!
Here’s a quirky fact for you: Thanksgiving cacti aren’t true cacti in the desert-dwelling, prickly-all-over sense. They’re actually jungle dwellers! They like it a bit more humid and a bit less scorching than their desert cousins. So, you're basically propagating a tropical rockstar. Pretty cool, right?
The Art of the Snip
When you’re ready to snip, use something clean and sharp. A clean knife, scissors, or even a razor blade works. You want a nice, clean cut. Think of it as a surgical procedure, but with significantly less crying. Twist or snap a segment off gently. You don't want to tear it.

Imagine you’re carefully detaching a Lego brick. That kind of precision, but with living tissue. And try not to make a mess. Unless you’re going for that ‘artistically disheveled’ look, which, let’s be honest, is a vibe.
Now, for the crucial step: letting it callus. This is where the magic starts to happen before the magic even happens. You’ve got a fresh cut, right? That little wound needs to dry out and seal itself up. Think of it as the cactus putting on a little Band-Aid. This prevents rot when you eventually stick it in dirt.
Leave your cuttings on a dry surface, out of direct sunlight, for a few days. Anywhere from 2 to 7 days should do the trick. You’ll see the cut end turn a little dry and whitish. That’s your cue. It’s ready for its next adventure.
Why is this important? Because putting a wet, open wound into moist soil is basically inviting all sorts of nasty little fungi to a party. And nobody wants that. So, be patient. This little drying period is a game-changer.
Planting Your Little Wonders
Alright, your cuttings are callused and ready to rock. Now, where do they go? You’ve got a few options, and each is pretty fun in its own way.
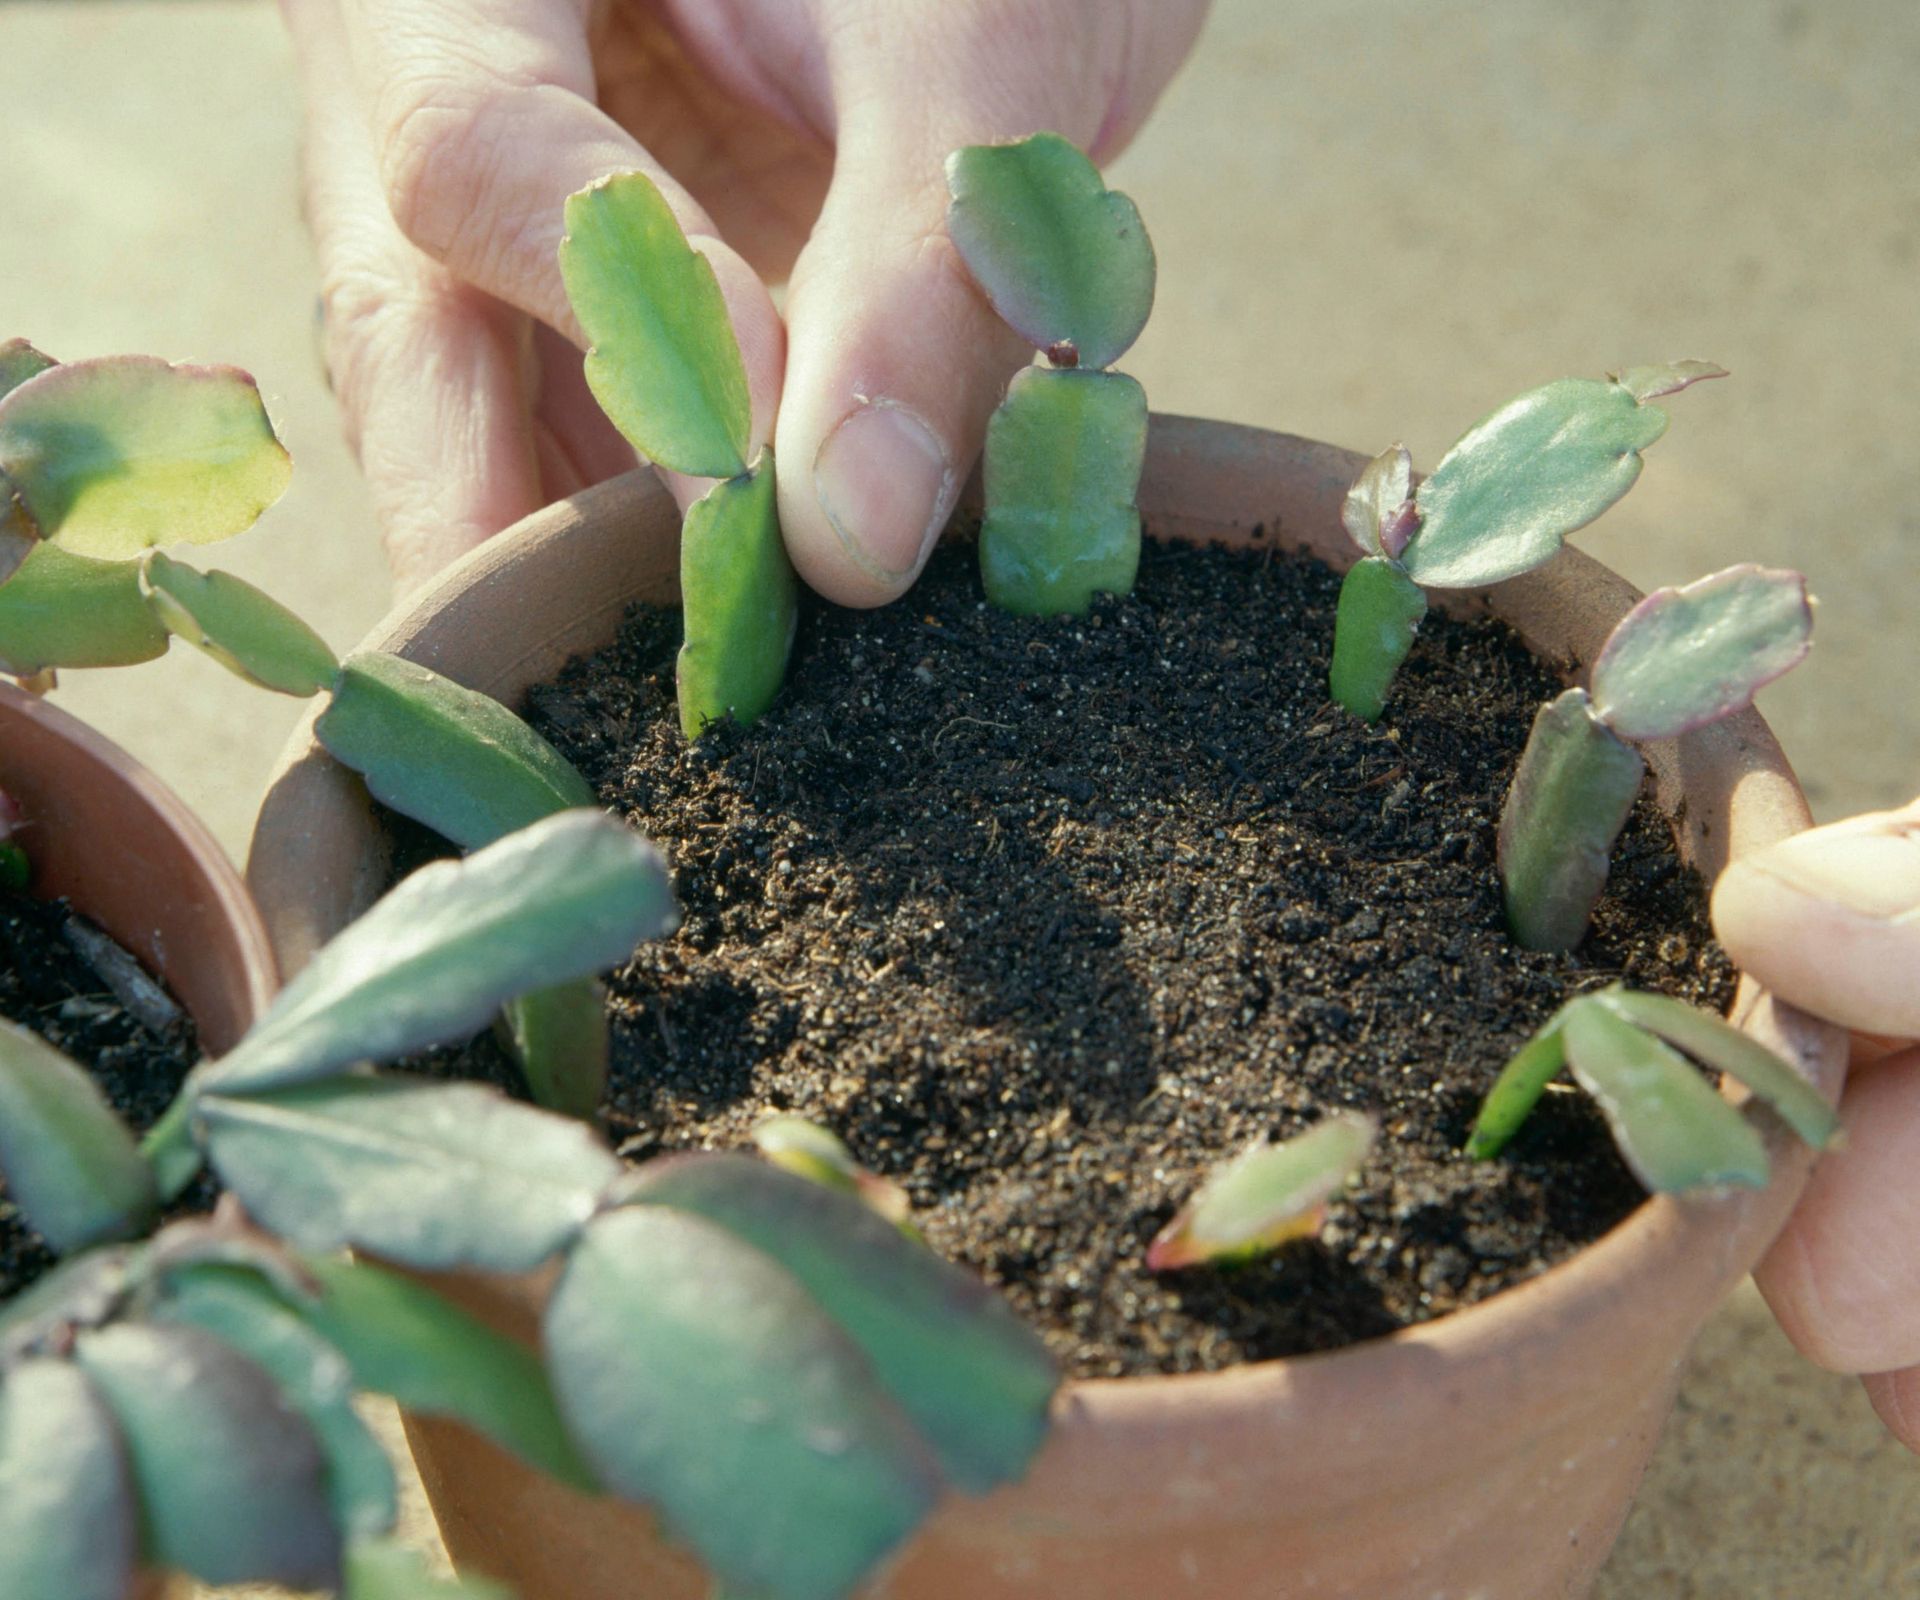
Option 1: The "Just Stick It In" Method. This is my personal favorite for its sheer simplicity. Grab a pot with drainage holes. Seriously, drainage holes are non-negotiable. Nobody likes soggy feet, especially plants. Fill it with a well-draining potting mix. Cactus/succulent mix is perfect, or you can mix some perlite or sand into regular potting soil.
Now, take your callused cutting and gently push the cut end about an inch or so into the soil. Just nestle it in there. Don't pack the soil down too hard. We want happy roots, not claustrophobic ones.
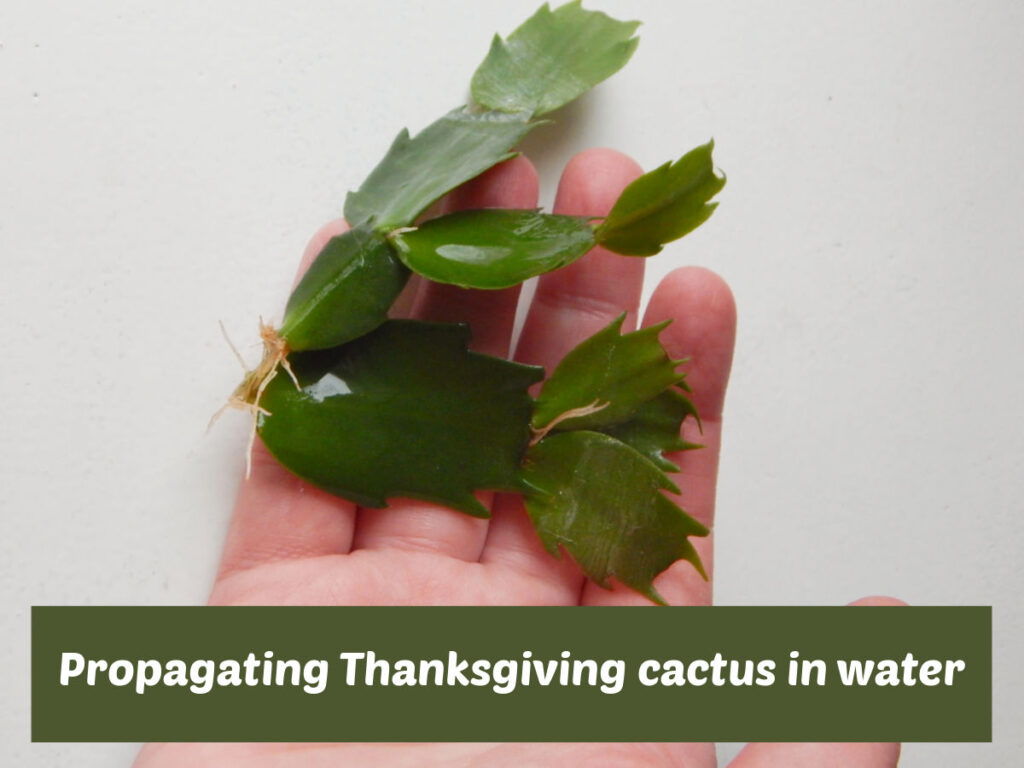
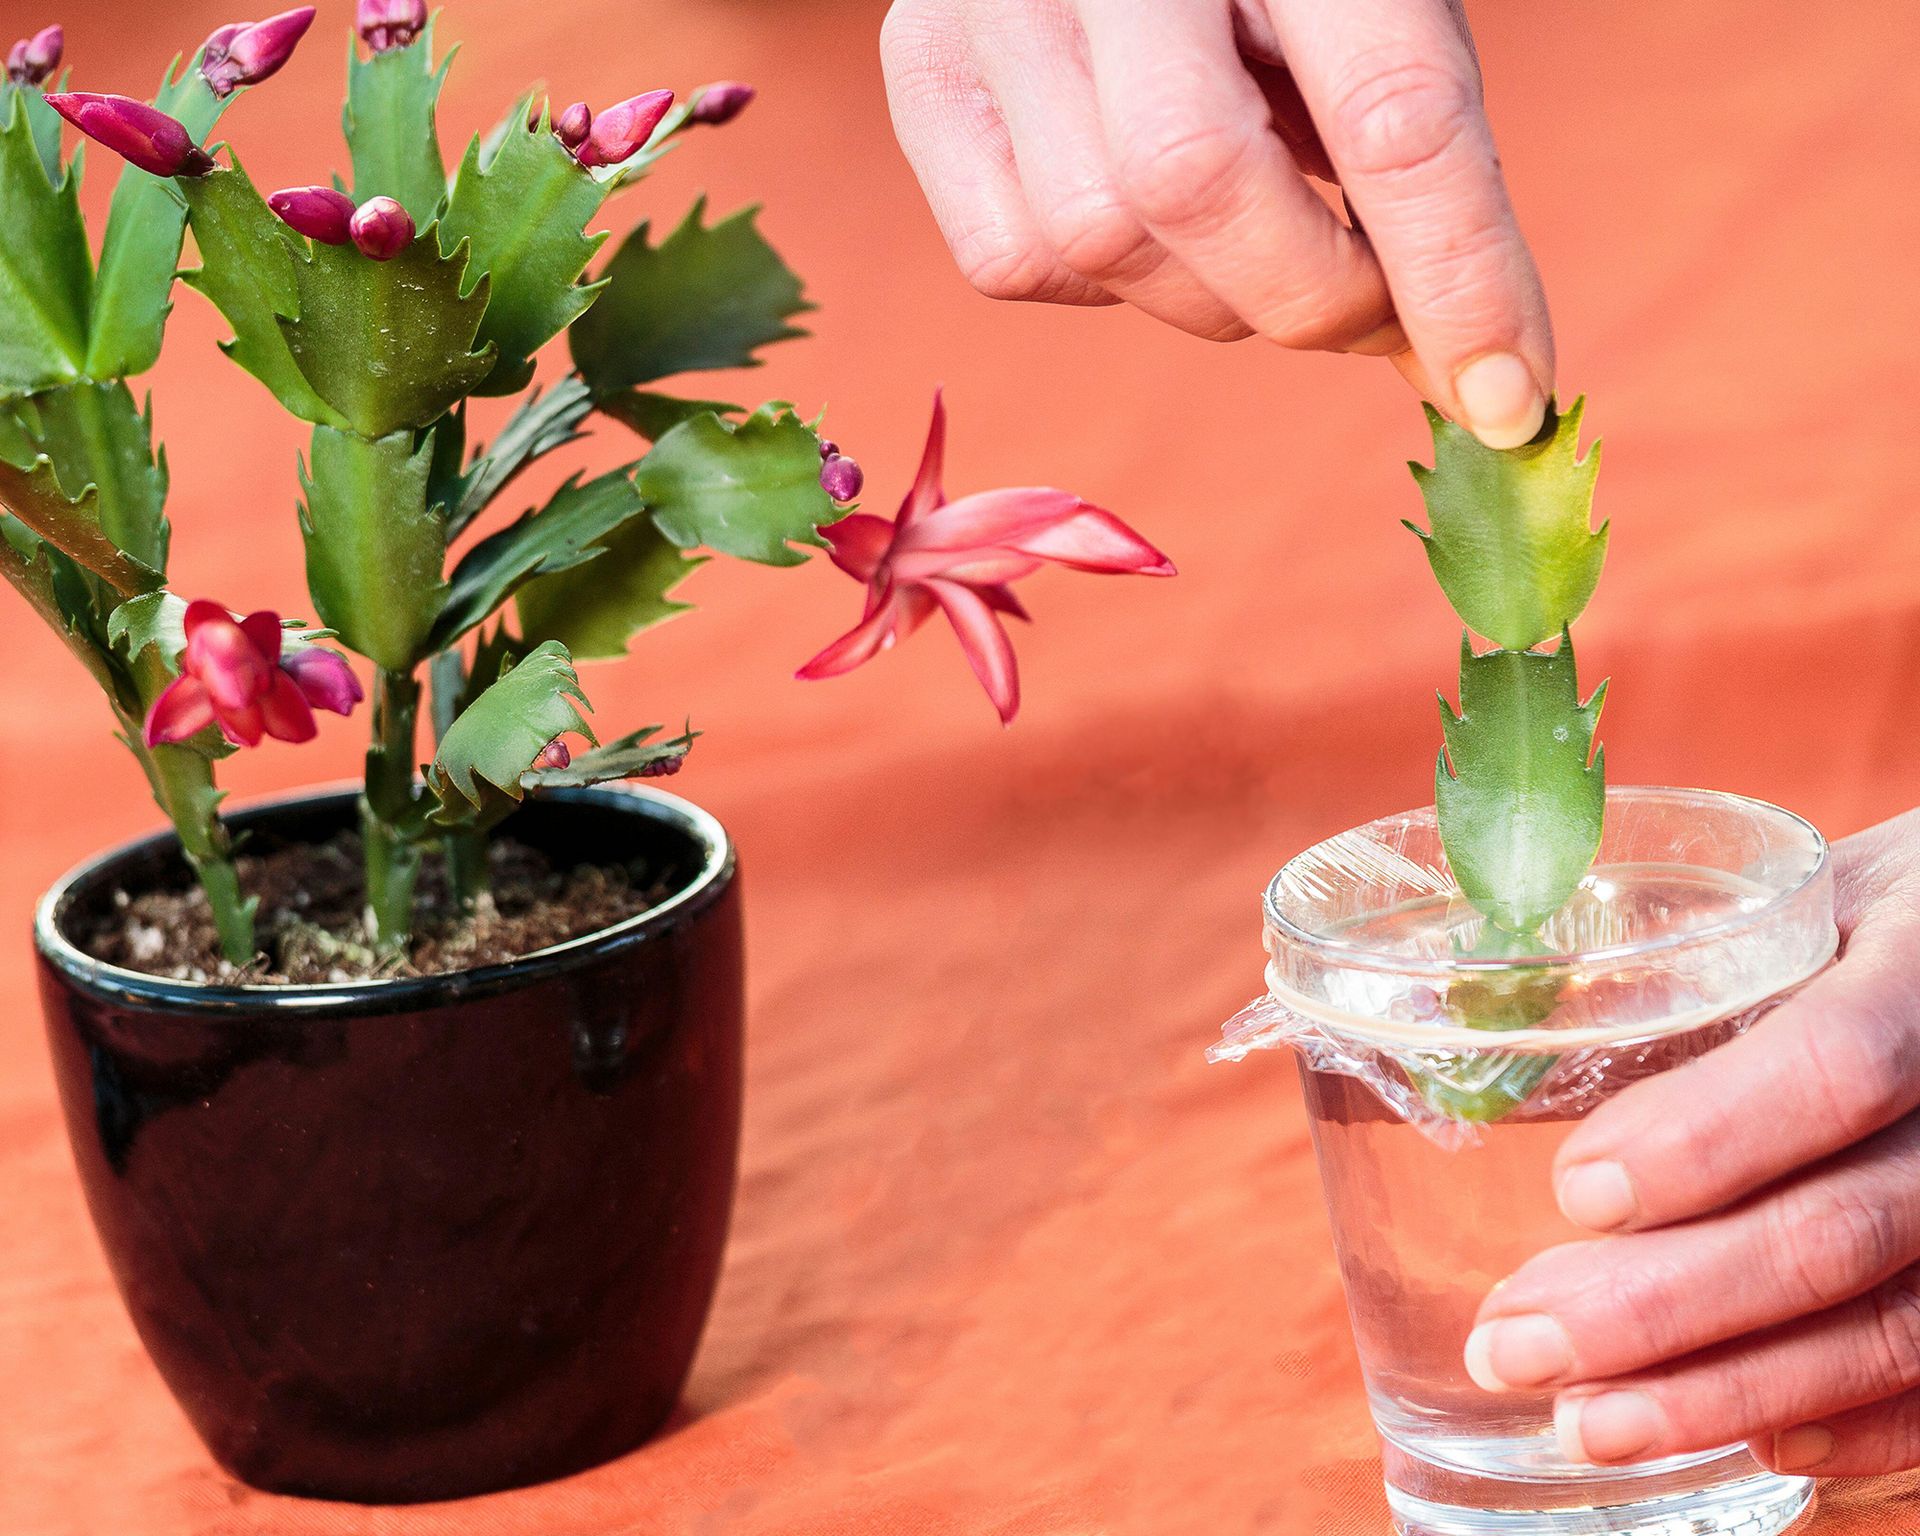
Option 2: The "Let's See Some Roots First" Method. This is for the impatient among us, or those who like to peek. Get a small glass or jar and fill it with a little bit of water. Place the callused end of your cutting into the water, making sure no leaves are submerged. You just want the cut end touching the water.
Place this little setup in a bright spot, but out of direct sun. Change the water every few days to keep it fresh. In a few weeks, you should start to see little white roots emerge. It’s like watching a tiny underwater forest grow. Once those roots are about an inch long, you can transplant your cutting into soil using the method above.

Both methods work! The water method gives you visual proof of root development, which can be super satisfying. The soil method is faster if you're looking to get them established quickly.
The Sweet Spot for Success
Where should you put your newly planted cuttings? They like bright, indirect light. Think of a sunny window that gets morning sun but is shaded in the hot afternoon. Too much direct sun can scorch them, and too little light will make them leggy and sad.
Watering is key, but it's also where people tend to go wrong. When you first plant them in soil, give them a light watering. You want the soil to be slightly moist, not soaked. After that, let the soil dry out between waterings. It's better to underwater than to overwater. Remember, they're cacti, they can handle a little thirst!
The trick with watering new cuttings is to be gentle. You don’t want to disturb those brand-new roots. A light misting or a gentle pour around the base is usually sufficient.
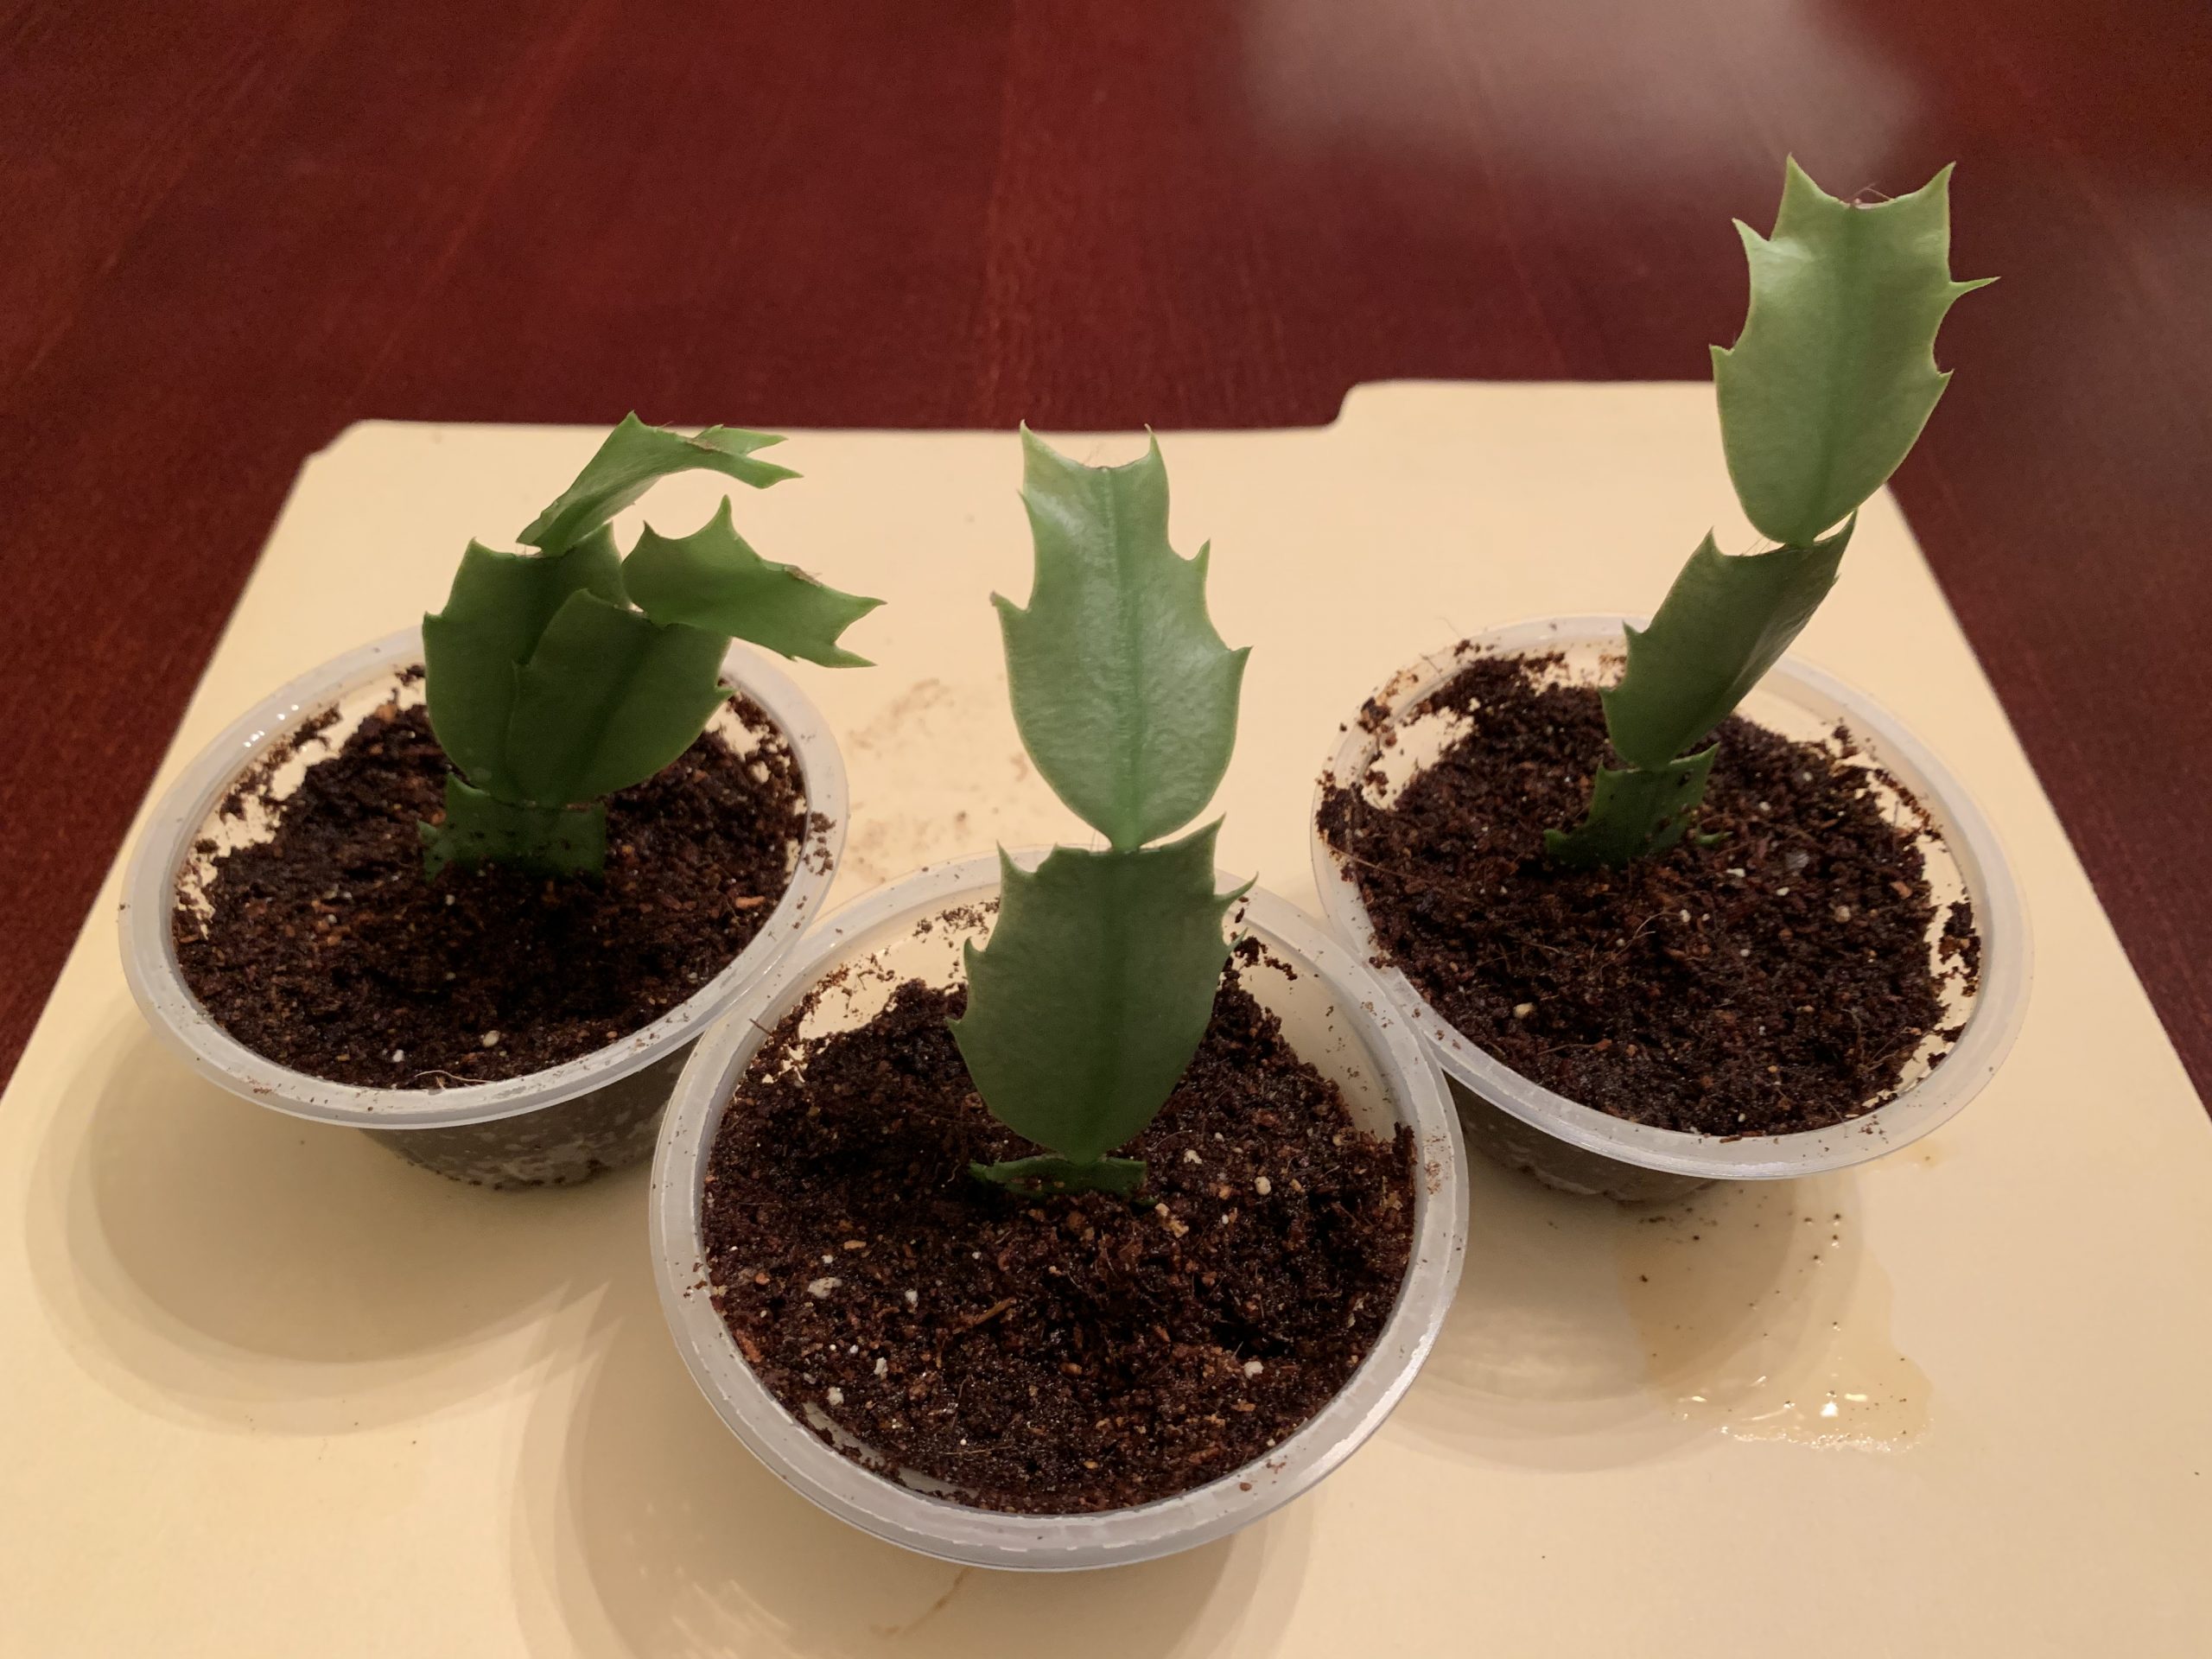
Give them time. This isn’t an overnight sensation. It takes weeks, sometimes months, for them to really establish themselves. You might even see a new segment start to grow. That's the ultimate sign of success! It's like the plant is giving you a little high-five.
Why This is Just Plain Fun
Beyond the joy of multiplying your plant collection, propagating Thanksgiving cacti is just plain fun. It’s a tangible way to engage with nature. You're literally taking a piece of life and nurturing it into something new.
It's also a fantastic conversation starter. Imagine bringing a pot full of tiny, budding Thanksgiving cacti to a holiday gathering. "Oh, these? I grew them myself from cuttings!" Instant bragging rights, and a chance to share your newfound plant-parenting skills.
And let’s not forget the quirky beauty of Thanksgiving cacti themselves. Their blooms are like little explosions of color right when you need them most – during those chilly fall and winter months. They’re often referred to as "Christmas cactus" or "Easter cactus" depending on when they bloom, which adds to their mystique. But the ones with the flatter, more segmented leaves and pointed segments are typically the Thanksgiving variety.
So, go ahead. Snip, sniff (just kidding, don't sniff them), and plant. You’ve got this. You're on your way to a jungle of your own, one happy little cutting at a time. Happy propagating, plant champions!