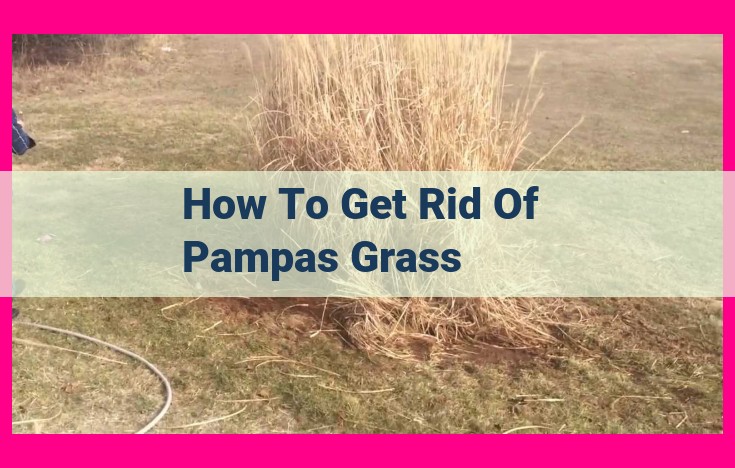
How To Get Rid Of Pampas Grass

Ah, pampas grass. That majestic, feathery giant that once graced your backyard with its… presence. You know the one. The one you thought looked so chic and bohemian when you first planted it, envisioning elegant plumes swaying gently in the breeze. Fast forward a few years, and it’s less “chic bohemian” and more “overgrown, thorny beast that’s trying to swallow your patio whole.” Sound familiar? If your pampas grass has gone from garden goddess to garden Godzilla, you're not alone. This stuff is practically the Energizer Bunny of the plant world – it just keeps going, and going, and going.
Let's be honest, getting rid of pampas grass can feel like trying to wrestle a particularly stubborn badger out of a particularly thorny hedge. It’s not for the faint of heart, or those who cherish their delicate manicure. But fear not, fellow plant wranglers! With a bit of grit, some sensible precautions, and perhaps a slightly grim determination, we can reclaim our backyards from the feathery clutches of these formidable flora.
The "Why Am I Doing This To Myself?" Stage
Before we even think about wielding a shovel, it’s important to acknowledge the sheer tenacity of pampas grass. This isn't your average dandelion you can just pluck out with a casual tug. Oh no. Pampas grass has roots that are apparently designed by a secret government agency to withstand nuclear fallout. They dive deep, spread wide, and seem to actively resent any attempt at relocation. It’s the plant equivalent of a grumpy old man who refuses to move from his favourite armchair, even if the house is on fire.
Must Read
You might recall planting that first little clump with such optimism. "It'll look so lovely!" you'd exclaim to your bewildered spouse or a passing squirrel. Now, that optimistic seedling has morphed into a monstrous clump that seems to be actively plotting your demise. The plumes, once a source of pride, now resemble enormous, fluffy dust bunnies that have decided to take up permanent residence, shedding their fluffy progeny with reckless abandon. Every time the wind blows, it’s like a tiny, feathery invasion of your personal space. You find them in your hair, in your coffee, and probably nestled amongst your very soul.
Operation: De-Plume and Conquer
So, where do we begin this epic quest? First, we need to tackle those magnificent, yet menacing, plumes. Think of this as the pampas grass’s “big hair” phase. It’s got to go. And by “go,” I mean it needs to be decimated. You’ll want to do this before the seed heads fully mature and start scattering their offspring like confetti at a very aggressive wedding. The best time is usually late winter or early spring, before the new growth really kicks off.
Now, for the tools. Forget your dainty garden trowel. You’re going to need something with a bit more… oomph. A good, sturdy pair of loppers or pruning shears is your best friend here. Think of them as your very own plant-slaying swords. You might even consider a small chainsaw if you’re feeling particularly adventurous and have the appropriate safety gear (and your neighbours don't mind the occasional chainsaw symphony). Just kidding… mostly. But seriously, sharp tools are key. Dull tools will just shred the leaves and make them more likely to cause irritation.
When you start cutting, be prepared for a bit of a fight. The leaves of pampas grass are famously serrated, meaning they have tiny, sharp edges. They’re like nature’s own tiny razor blades. If you’re not wearing thick gardening gloves, you’ll end up with a hundred tiny paper cuts that feel suspiciously like they were inflicted by a tiny, vengeful fairy. So, gloves are non-negotiable. Seriously, buy the industrial-strength ones. The kind you’d imagine a medieval knight wearing into battle. Your hands will thank you. And don’t forget eye protection. Those sharp leaf edges can launch themselves with surprising velocity. Nobody wants a rogue pampas grass leaf in their eye; that’s a story that ends with a trip to the ER and a very awkward explanation.
When you’re cutting, aim to get as low to the ground as possible. The goal is to remove all those feathery bits and as much of the old, dead foliage as you can. Imagine you’re giving the beast a very, very severe haircut. A haircut that signals the end of its reign. You’ll want to bag up all this material – don’t just leave it lying around. Pampas grass is remarkably good at regenerating from seemingly insignificant bits and pieces. It’s like that horror movie villain who always comes back for a sequel.
The Root of the Problem (Literally)
Once the fluffy menace has been de-plumed, it’s time to face the true adversary: the roots. This is where the real work begins, and where you might start questioning your life choices. Digging out pampas grass roots is less like gardening and more like an archaeological dig for a particularly stubborn and aggressive civilization.
You’ll need a good spade, preferably one with a strong, sharp edge. A mattock or a digging fork can also be incredibly helpful for breaking up that dense root ball. Again, think about the kind of tools that can handle a serious workout. You’re not just digging; you’re excavating. You’re trying to unearth a plant that has basically cemented itself into your soil.
Start by digging around the base of the clump. You want to loosen it up. Imagine you're trying to pry a stubborn lid off a jar. You’ll need to get your spade underneath the root ball and try to lever it upwards. This is where it gets tough. Those roots are intertwined and deep. You might get a few inches of movement, feel a surge of triumphant hope, and then… nothing. It’s like playing tug-of-war with a tree. A very grumpy, leafy tree.
Persistence is key. Keep digging, keep loosening. You’ll want to remove as much of the root system as possible. Any little bits you leave behind are like tiny seeds of future pampas grass domination. They will sprout. They will mock you. So, be ruthless. Think of yourself as a horticultural bounty hunter, and those roots are your bounty.
If the clump is particularly massive, you might need to tackle it in sections. It’s like trying to eat an elephant – you do it one bite at a time. Use your spade to chop through thicker roots. This is where those sturdy tools really earn their keep. It’s a strenuous process, so take breaks. Hydrate. Listen to some motivational music. Perhaps a playlist titled "Triumphs Over Nature’s Stubbornness."
The "Is It Over Yet?" Phase
Once you've managed to wrestle the majority of the root ball out of the ground, the battle isn't quite won. You’ll likely find smaller roots and rhizomes still clinging to the soil. You need to be vigilant about removing these. A good rake can help uncover hidden bits. And then, the dreaded weed killer. Some people are vehemently against it, and I get that. But for pampas grass, sometimes it’s the most practical solution for those persistent root fragments that are determined to sprout anew.
If you choose to go the chemical route, follow the instructions meticulously. You don’t want to accidentally nuke your entire garden or create a mutant plant species. Often, a concentrated glyphosate solution can be applied directly to freshly cut stumps or exposed roots. It’s like a targeted strike, a horticultural special forces operation. You can also paint it directly onto any regrowth you see. This is your last line of defense, your nuclear option, your “end of days” for pampas grass.
Another method, if you’re patient and don’t mind a bit of an ongoing battle, is to repeatedly dig out any new shoots that appear. Every time you see a little green sprout emerging from where the pampas used to be, attack it with your spade. This starves the root system of energy, and eventually, it will weaken and die. It’s a war of attrition, a slow, steady victory. Think of it as a gardening marathon, not a sprint.
Disposal: The Final Frontier
So, you've conquered the beast. You've hacked, you've dug, you've sweated. Now what do you do with all this… stuff? Don't just chuck it in your regular bin and hope for the best. Pampas grass, in its infinite determination, can sometimes survive decomposition processes, especially if you’re just leaving bits to rot. Check with your local council or waste management service for specific guidelines on disposing of invasive plants or large garden waste. Some areas have specific green waste collection days, or you might need to take it to a designated garden waste drop-off site.

Burning used to be an option in some areas, but it’s often banned now due to fire risks. Plus, trying to burn a giant clump of pampas grass is like trying to light a damp log – it just smolders and smokes ominously. You’d probably end up with more smoke inhalation than actual combustion.
Consider shredding the material if you have access to a chipper. This can break it down into smaller pieces, making it easier to compost (if your composting system can handle it) or dispose of. Just be sure to wear a mask and eye protection when operating a chipper – those fluffy bits can get everywhere and become airborne.
Moving On: Reclaiming Your Domain
Once the pampas is truly gone, celebrate! You’ve achieved a significant gardening victory. Take a moment to admire the… space. The actual, unadulterated space. It might feel a bit empty at first, like a celebrity who’s just left the stage. But soon, you'll realize the freedom. The freedom to plant things that don’t require a tactical team to manage. The freedom from the constant feathery invasion.
When you're ready to replant, consider what you want to put there. Perhaps something less… aggressive. A nice flowering shrub, some colourful perennials, or even just a patch of well-maintained lawn. Whatever you choose, it will likely be a welcome change from the tyranny of the pampas. Remember this feeling, this sense of accomplishment. You’ve stared down a gardening Goliath and emerged victorious. You’ve proven that with a bit of elbow grease and a healthy dose of stubbornness, you can indeed get rid of pampas grass. Now, go have a well-deserved cup of tea. You’ve earned it.