How To Date Minus Date In Excel

So, you’ve found yourself staring at a spreadsheet, maybe for work, maybe for a personal project, and you’re wondering… how do I get Excel to understand dates? It seems so simple, right? Just type in "January 15th, 2024." But then Excel throws a fit, or worse, it just treats it like… text. Uh oh. We’ve all been there, haven't we? That moment of mild panic when your trusty digital assistant just isn't being very helpful. But fear not, my spreadsheet-savvy friends! Today, we're going to dive into the wonderful world of "dating minus the actual 'Date' function," and discover some seriously cool, and dare I say, fun ways to manage your dates without getting bogged down in the nitty-gritty of specific Excel functions. It’s all about understanding how Excel sees dates, and then working with that vision. Pretty neat, huh?
Think of Excel like a really organized, but sometimes a little literal, librarian. You can ask for a book by its title, its author, or even its Dewey Decimal number. Dates are a bit like that. Excel has its own internal system for understanding what a date is, and when you feed it something it doesn't quite recognize, it gets confused. It’s like handing the librarian a grocery list when they’re expecting a book title. They’re both pieces of information, but they’re meant for different purposes.
But here’s the cool part: Excel is actually pretty good at interpreting what you mean, even if you don’t explicitly tell it you’re giving it a date. It does this through something called date serialization. Basically, Excel assigns a unique serial number to each date. January 1, 1900, is serial number 1. January 2, 1900, is serial number 2, and so on. So, when you type in something that looks like a date, Excel tries to convert it into one of these magic numbers. The trick is to give it enough clues so it knows it’s a date and not just a random string of characters.
Must Read
The "Looks Like a Date" Method
This is where the magic happens, or rather, where you leverage Excel’s inherent smarts. The simplest way to "date minus Date" is to just type your dates in a format that Excel recognizes naturally. We're talking about those familiar patterns:
- MM/DD/YYYY: Like 01/15/2024. This is super common, especially in the US.
- DD/MM/YYYY: Like 15/01/2024. This is more common in other parts of the world.
- YYYY-MM-DD: Like 2024-01-15. This is the ISO standard and is fantastic because it's unambiguous. No confusion between August 9th (08/09/2024) and September 8th (09/08/2024)!
When you type these in, and your Excel's regional settings are set up correctly, Excel should automatically recognize them as dates. You'll see them align to the right side of the cell, just like numbers. This is a good indicator that Excel has done its job. If they stay on the left, they're probably still treated as text. A little nudge might be needed!

What if you type "January 15, 2024"? For the most part, Excel is smart enough to figure that out too! It's all about the context. The key is consistency. If you mix and match wildly – "Jan 15", "15th Jan", "2024-01-15" – Excel might get a bit dizzy trying to keep up.
The "Text to Columns" Trick: Your Date Detective
Sometimes, you might import data from another source, or a colleague might have entered dates in a way that Excel just can’t grok. It’s a jumbled mess of text and numbers that look like dates but are stubbornly clinging to their text identity. This is where the Text to Columns feature becomes your superhero cape.
Imagine you have a column of dates like "2024.01.15", "01-15-2024", or even "15 January 2024". Excel might just see these as plain old text. Here’s how you solve it without touching the `DATE` function:

- Select the column (or the cells) containing your "text-dates."
- Go to the Data tab on the Excel ribbon.
- Click on Text to Columns. A wizard will pop up!
- For the first step, choose Delimited if your dates use separators like slashes, hyphens, or periods. If they are all crammed together like "01152024", you might choose Fixed width, but that's less common for dates. Let's stick with Delimited for now.
- In the next step, uncheck all delimiters and choose None. This sounds weird, right? But we're not actually trying to split columns based on separators. We're using this wizard for its data format capabilities.
- Here comes the crucial step: On the final screen of the wizard, under "Column data format," choose Date. Then, in the dropdown next to it, select the format that most closely matches how your dates are currently written. So, if you have "01/15/2024", choose "MDY". If you have "15/01/2024", choose "DMY". If you have "2024-01-15", choose "YMD".
- Click Finish.
Voila! Excel will now reinterpret those text strings as actual dates. It’s like giving the librarian a clear instruction manual for your book collection. This is a lifesaver when dealing with data from external sources. You're not writing a complex formula; you're just using Excel's built-in tools to help it understand.
The "Force It to Be a Date" Method (with a little nudge)
Sometimes, even the "looks like a date" method needs a little extra encouragement. What if Excel just stubbornly refuses to convert? Don't despair! We can give it a gentle shove.
One common technique is to use a simple multiplication by 1. It sounds bizarre, I know. If you have a column of text that looks like dates, you can:

- In an empty cell, type the number 1.
- Copy that cell (Ctrl+C or Cmd+C).
- Select the column of text-dates you want to convert.
- Right-click and choose Paste Special.
- Under "Paste Special," in the "Operation" section, choose Multiply.
- Click OK.
What happens? Excel takes each text-date, treats it as a number (which is what dates are internally), and multiplies it by 1. This operation forces Excel to re-evaluate the content. Since it’s already in a date-like format, Excel will likely convert it into its serial number representation, effectively turning it into a date. It's a bit like a magic spell that makes Excel see things clearly!
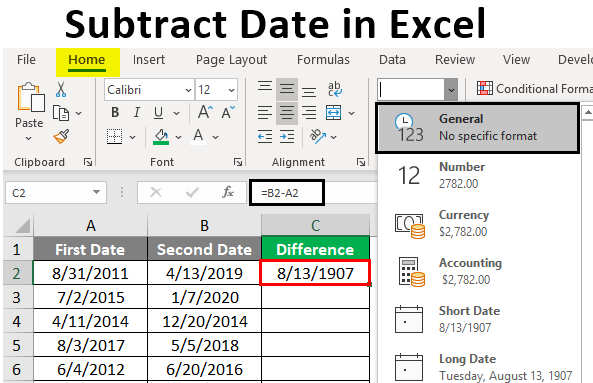
Another subtle nudge can be done by changing the cell's number format. If you see numbers in your cells that you know are supposed to be dates (e.g., 45310, which is January 15, 2024), just select those cells, go to the Home tab, and change the "Number Format" from "General" or "Number" to "Short Date" or "Long Date." Excel will then display the serial number as a readable date.
Why Bother with "Date Minus Date"?
You might be thinking, "Why go through all this trouble when I can just use the `DATE` function?" And that’s a fair question! The `DATE` function, like `DATE(2024, 1, 15)`, is fantastic for constructing dates from year, month, and day components. But sometimes, you're not constructing dates from scratch; you're dealing with existing data that should be dates but isn't quite there yet.
The beauty of these "minus Date" methods is that they are often faster for bulk operations. Typing `DATE(year, month, day)` for hundreds of rows would be incredibly tedious. Using "Text to Columns" or the "Multiply by 1" trick can convert an entire column in seconds. It's about efficiency!
Plus, it builds your understanding of how Excel thinks. When you see those numbers align to the right, you know Excel is treating them as numerical values, which is the foundation of its date system. This knowledge empowers you to tackle other data challenges. It’s like learning the secret handshake of Excel.
And honestly, it's a bit of a clever hack, isn't it? Using seemingly unrelated features to achieve a specific outcome. It makes you feel like a spreadsheet ninja, subtly manipulating the software to do your bidding. Embrace the curiosity, explore these methods, and you'll find yourself navigating your date data with newfound confidence and a touch more swagger. Happy spreadsheeting!