How To Carve A Rib Of Beef
Alright, my culinary adventurers! Gather ‘round, because today we’re tackling a topic that might sound a little intimidating, but trust me, it’s more about fun and flair than fancy footwork. We're talking about carving a glorious rib of beef. Yes, that magnificent, golden-brown centerpiece that graced your table and sent waves of delicious aromas through your home. Don't worry, you won't need a butcher's apron or a degree in advanced trigonometry. This is all about celebrating your cooking triumph and serving it with the confidence of a seasoned pro!
Think about it: you’ve spent hours coaxing that beautiful piece of meat to perfection. It’s rested, it’s juicy, and it’s practically begging to be sliced and devoured. Carving is the grand finale, the triumphant moment where you get to showcase your hard work and delight your guests (or just yourself, no judgment here!). It’s not just about cutting meat; it’s about presentation and making that meal an experience.
Why Bother With the Carving Ritual?
You might be thinking, "Can't I just hack into it?" And while technically, yes, you could, where’s the joy in that? Carving a rib of beef with a little finesse is like adding the cherry on top of an already amazing sundae. It elevates the whole meal from just "dinner" to a memorable occasion. Plus, it shows you've put in that extra little bit of effort, and people notice that. It’s a subtle flex, a quiet acknowledgment of your culinary prowess. And let's be honest, who doesn't love a good flex?
Must Read
It’s also about respecting the meat. You wouldn’t toss a priceless painting into a blender, would you? Okay, maybe that’s a bit dramatic, but you get the idea. Proper carving ensures that each slice is as tender and delicious as the last, maximizing the enjoyment for everyone. No one wants a tough, awkwardly cut piece of beef, right?
Your Essential Carving Arsenal
Before we dive in, let's talk tools. You don't need a whole blacksmith's shop, just a couple of key players:
- A Good Carving Knife: This is your star player. It should be sharp, long, and relatively thin. Think of it as an extension of your hand. If your knife is dull, it's like trying to paint a masterpiece with a crayon – frustrating and not very effective!
- A Carving Fork: This beauty has those two handy prongs to steady the roast while you work your magic. It’s your trusty sidekick, keeping everything stable.
- A Sturdy Cutting Board: A nice, big one is ideal. You want plenty of room to maneuver without sending bits of beef flying across the kitchen. Non-slip is a bonus!
- A Serving Platter: This is where your beautifully carved slices will reside, looking utterly irresistible.
Seriously, investing in a decent carving knife can be a game-changer. It makes the whole process smoother, safer, and frankly, a lot more satisfying. It's one of those kitchen tools that you'll reach for again and again, not just for beef, but for roasts of all kinds. Chop chop!
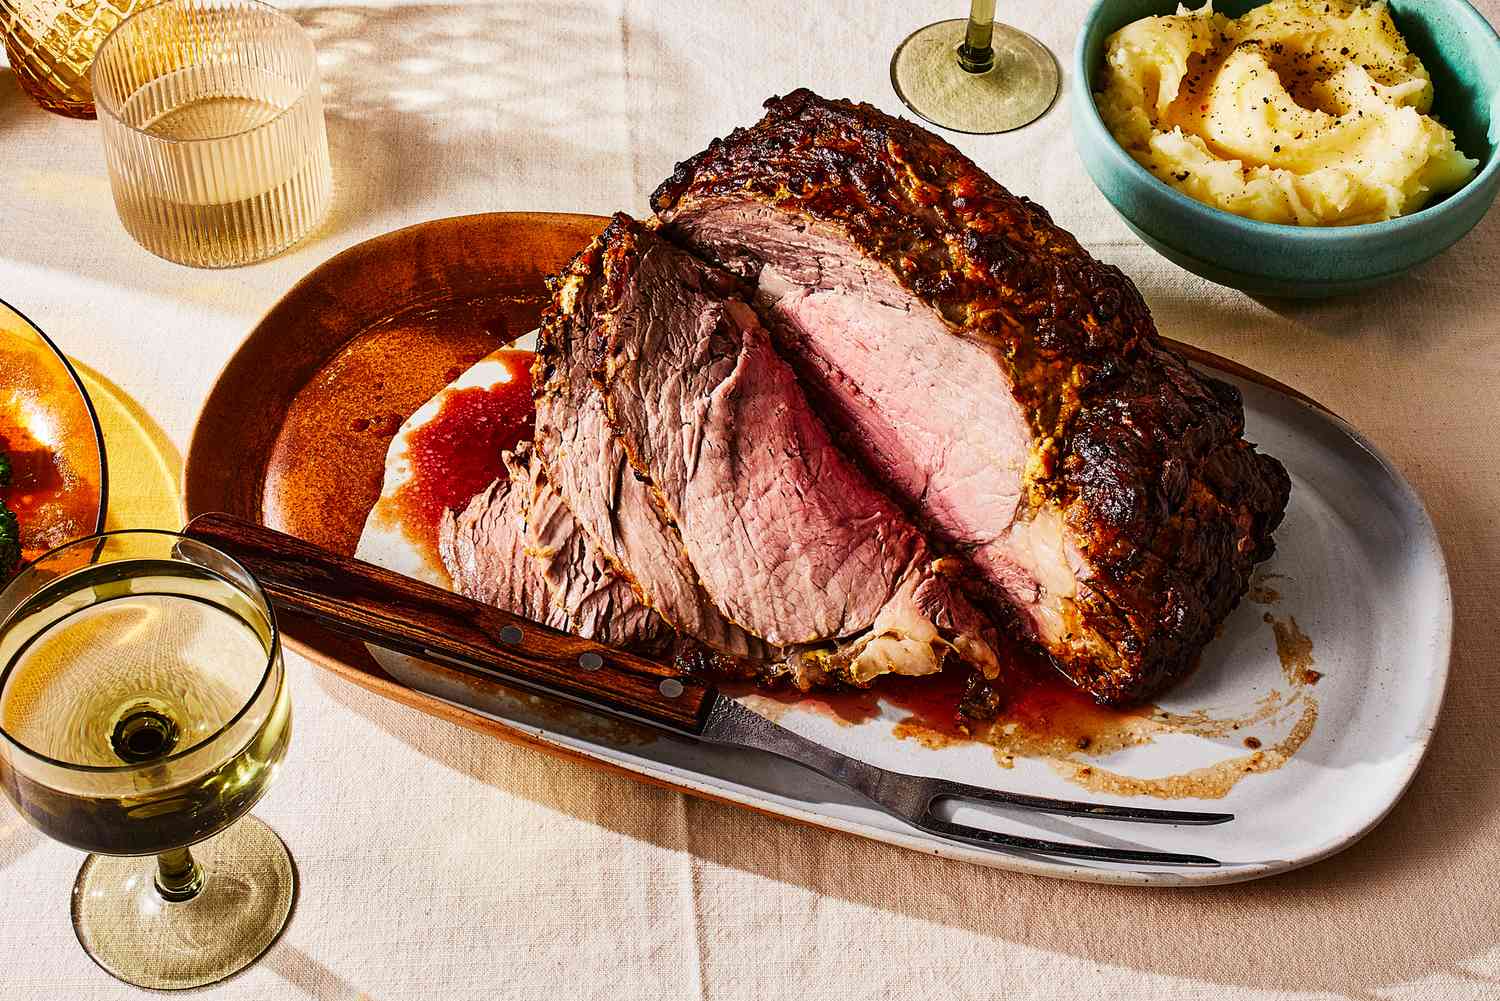
The Grand Unveiling: Let's Get Carving!
Okay, the roast is out of the oven, it’s had a good rest (crucial step, remember that!), and you’re feeling that surge of anticipation. Here’s the game plan:
Step 1: Position is Everything
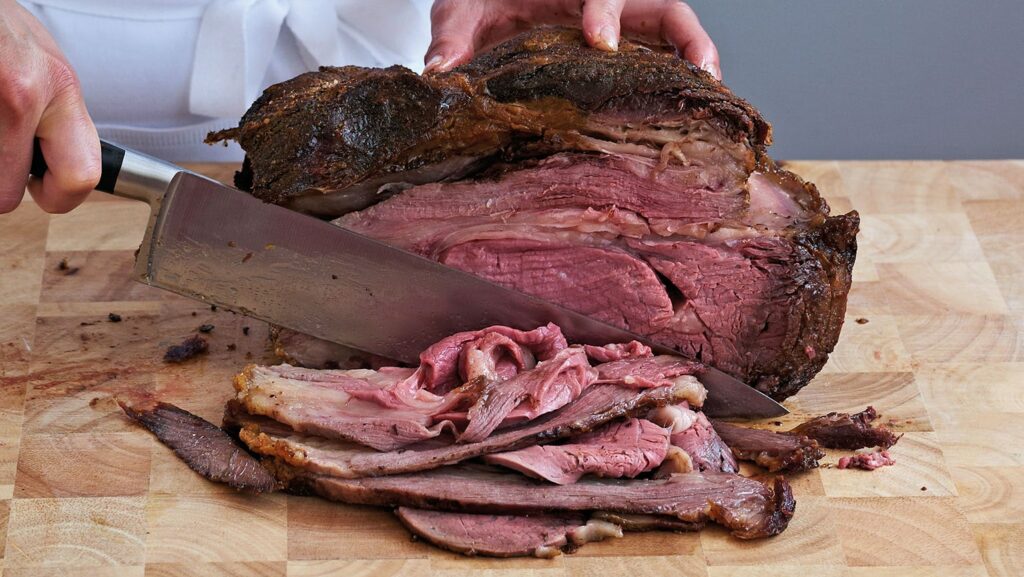
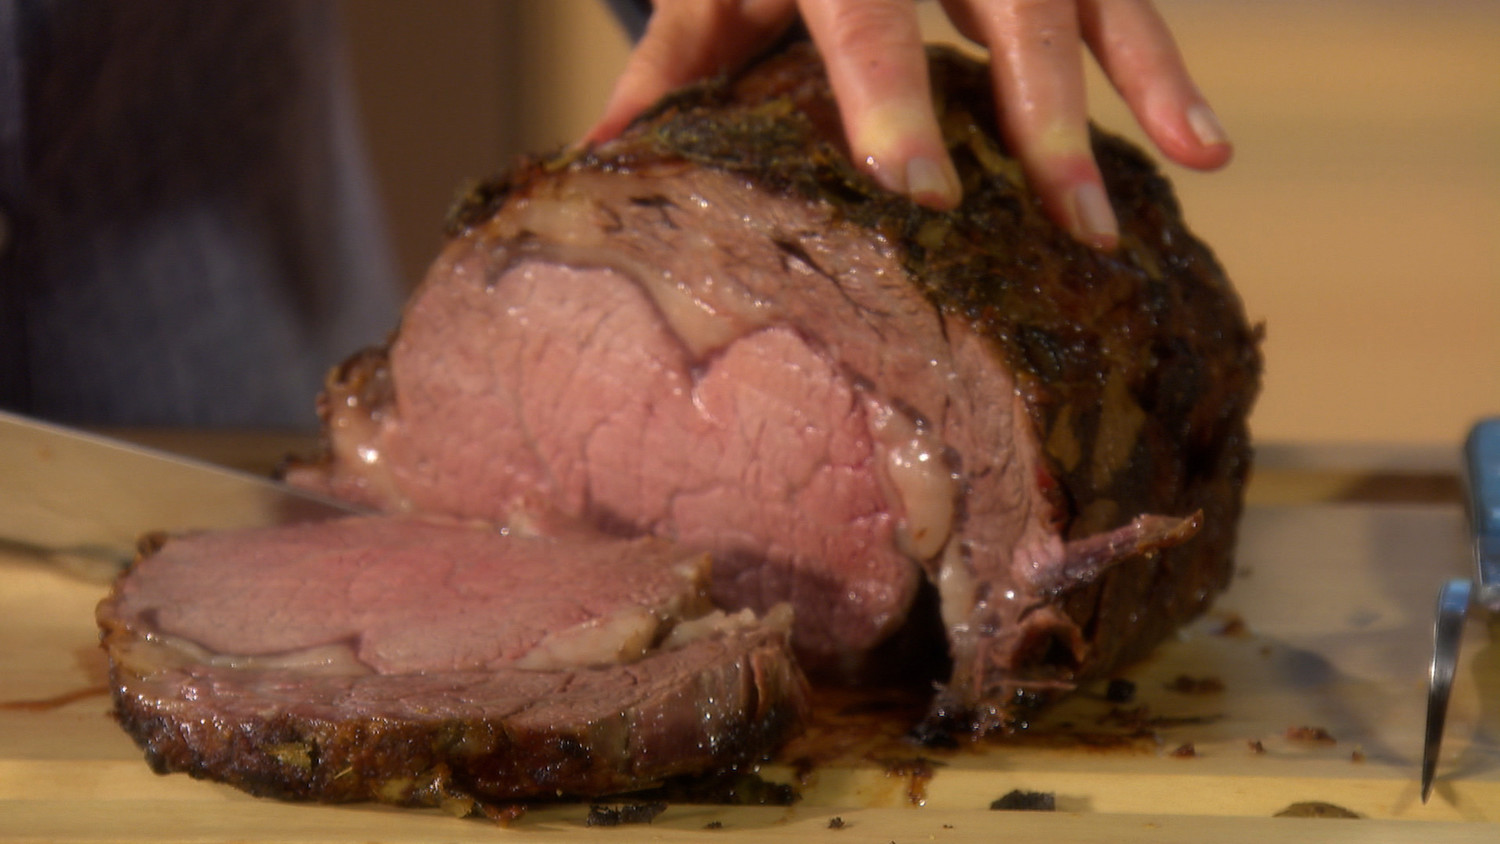
Place your rib of beef on the cutting board. You'll want to orient it so the bones are facing you, or if it’s boneless, so the grain of the meat is running away from you. This is a super important tip: always carve against the grain. Think of it like following the natural lines of the muscle. This is what makes your slices tender and easy to chew. If you go with the grain, you’re basically fighting the meat, and nobody wins that battle!
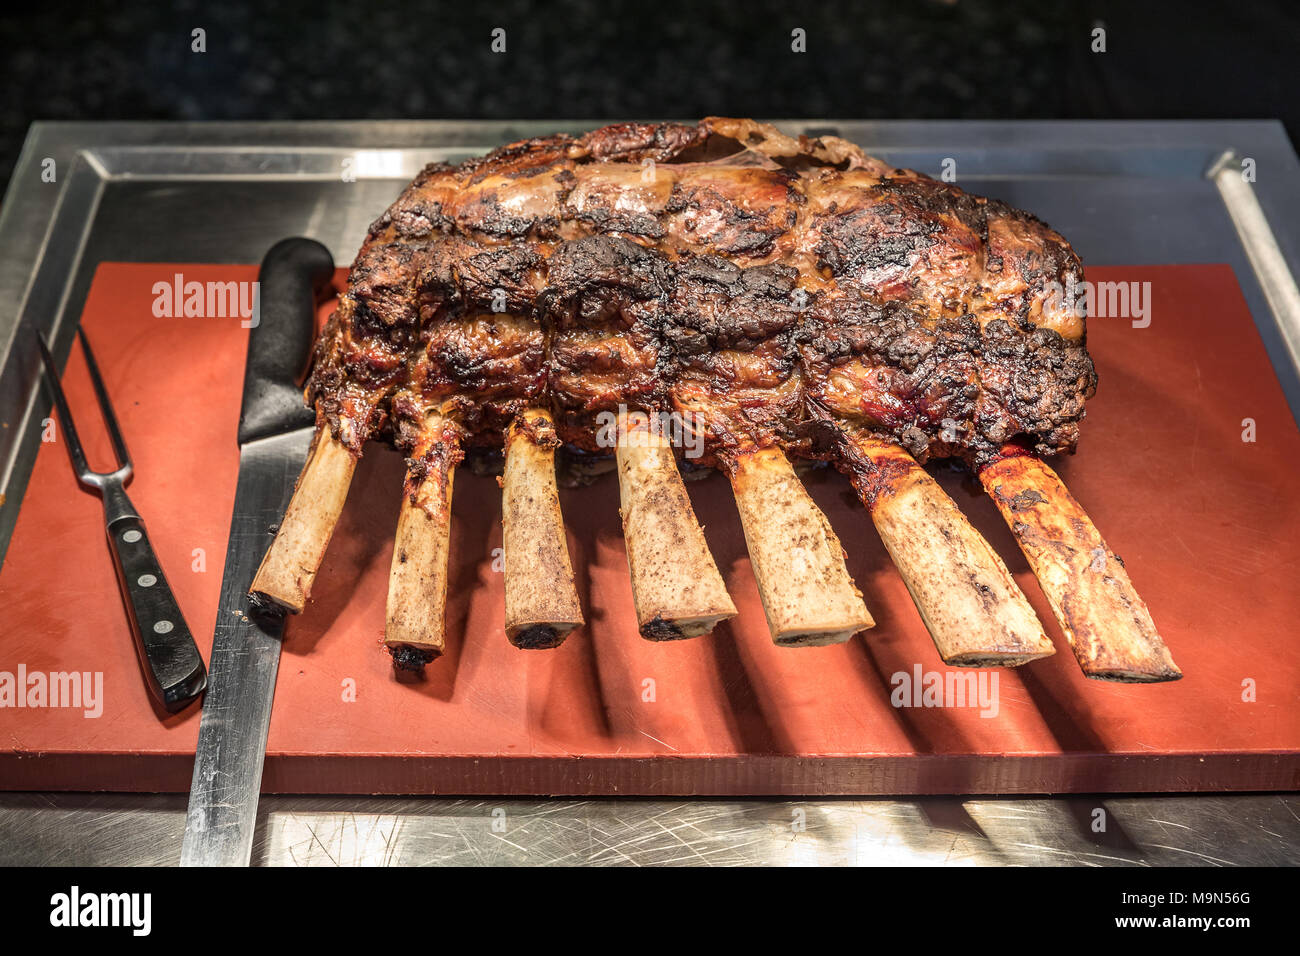
Step 2: The Initial Cut (The "Undercut")
Take your carving fork and gently but firmly pierce the roast to hold it steady. Now, position your carving knife. You want to slide it between the bones and the meat, if your roast is bone-in. If it's boneless, imagine where the main muscle fibers are going. Make a long, smooth slicing motion, aiming to go as deep as you can without going all the way through the bottom. This "undercut" creates a guide for your next slices.

Don't be afraid to use the full length of your knife. Long, even strokes are key here. You're not sawing; you're gliding. Whisper-quiet precision!
Step 3: Slicing Like a Pro
Now, the fun part! With your undercut made, you can start slicing. Angle your knife slightly downwards. Again, aim for long, smooth strokes, cutting against the grain. The thickness of your slices is entirely up to you and your guests' preferences. Some people like them super thin, others prefer a more substantial slice. There's no "right" or "wrong" here, just deliciousness!
If you have a bone-in roast, you’ll notice that after your undercut, you can often detach whole sections of meat. You can then place these larger pieces on their side and slice them more easily against the grain. See? It’s all about working smarter, not harder!

Keep slicing until you’ve carved as much as you need. You can always leave the remaining roast to carve later. It will hold its moisture beautifully.
Step 4: Presentation Perfection
Arrange those beautifully carved slices artfully on your serving platter. Don't just plonk them down. Overlap them slightly, let them cascade a bit. A little sprinkle of sea salt, a few fresh herbs, maybe a drizzle of the pan juices – suddenly, you’ve got a masterpiece. This is where that visual appeal really shines!
And that, my friends, is all there is to it! You’ve just conquered the rib of beef carving challenge. Take a moment. Admire your handiwork. Feel that sense of accomplishment. You did that!

It’s More Than Just Food, It’s a Feeling
Carving a rib of beef isn't just about feeding yourself and your loved ones. It's about the ceremony, the satisfaction, and the sheer pleasure of creating something wonderful. It’s about turning a meal into a moment that will be remembered. When you’ve got that perfectly carved slice of juicy beef on your plate, you’re not just eating; you’re savoring.
So, the next time you’re faced with a magnificent roast, don’t shy away from the carving. Embrace it! It’s a skill that will serve you well, and it’s a genuinely enjoyable part of the cooking process. It's a little act of culinary artistry that makes a big difference. Give it a try, and you might just surprise yourself with how much you enjoy it.
Keep practicing, keep experimenting, and most importantly, keep enjoying the delicious journey. You've got this, and the world of delightful roasts is yours to explore. Happy carving!