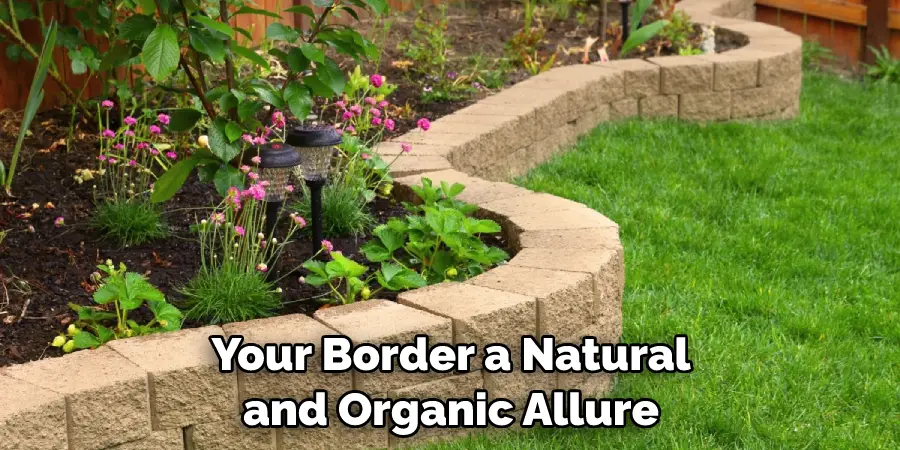
How To Build A Stacked Stone Garden Border

Ever look at your garden and think, "This needs a little… oomph?" Like, your prize-winning petunias are lovely, sure, but they’re just… sitting there. No pizazz. No definition. It’s like a great movie without a killer soundtrack. Enter the humble, yet mighty, stacked stone garden border. Think of it as the fancy frame for your botanical masterpiece, or, if we’re being honest, the visual equivalent of finally putting on pants after a long day on the couch. Suddenly, everything looks a whole lot more intentional, right?
I remember my first attempt at a garden border. It was less "charming rustic fence" and more "what happens when a toddler attacks a pile of twigs." My petunias still looked good, but they felt a bit… lost. Like they’d wandered off the path and were hoping someone would notice. So, I decided to get serious. And by "serious," I mean I watched a few YouTube videos while simultaneously trying to prevent my dog from eating the patio cushions. The goal was a stacked stone border, something that looked like it belonged, something that said, "Yes, I meant to do this, and I’m rather pleased with myself."
Let’s face it, building anything can feel a bit daunting. It’s like trying to assemble IKEA furniture without the instructions, except instead of tiny Allen wrenches, you’re dealing with… well, rocks. But fear not, my fellow garden enthusiasts! This isn't about becoming a master mason overnight. This is about a chill, weekend project that can transform your outdoor space from "meh" to "wowza!" It’s about giving your flowerbeds a hug, a gentle nudge that says, "You belong here, and you look fantastic."
Must Read
So, You Want to Stack Some Rocks? Let's Get Our Hands Dirty (Figuratively and Literally).
First things first: planning. This is where you channel your inner architect, but without the tiny blueprints and the existential dread. Think about where your border will go. Is it going to hug a flowerbed? Define a pathway? Act as a gentle barrier between your perfectly manicured lawn and the wild kingdom of your vegetable patch? Grab a hose and spray paint, or even just a stick, and sketch out your design. Imagine it. Pretend you’re a landscape designer on a budget. Spoiler alert: You are.
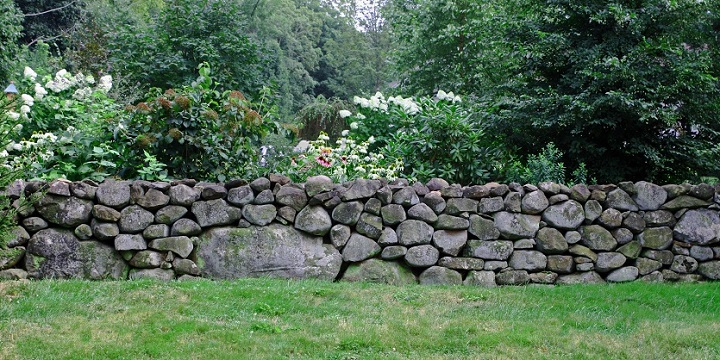
Consider the height. Do you want a subtle, low-profile look, like a whispered secret between plants? Or do you want something more dramatic, a stone wall that says, "Here I stand, guarding these precious blooms from the marauding slugs!"? For a beginner-friendly stacked stone border, I’d recommend keeping it relatively low, maybe one or two feet high. Anything more can get a bit… wobbly, like a Jenga tower with one too many pieces removed.
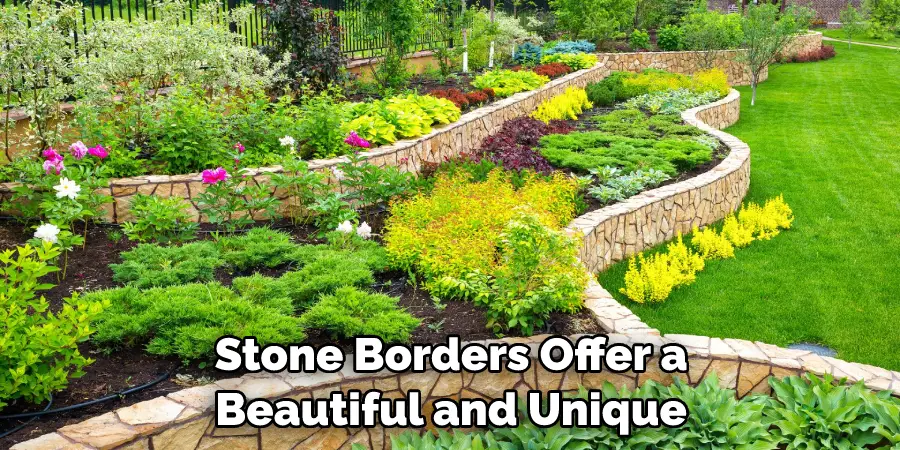
And the shape. Straight lines are classic, no doubt. But sometimes, a gentle curve can add a touch of elegance, like a graceful dancer instead of a stiff soldier. Don't be afraid to let your garden inspire the shape. If your flowerbed is already a bit free-form, embrace it! Think of your border as a playful dance partner for your plants.
Choosing Your Stones: The Fun Part (Or the Slightly Heavy Part).
Now for the stars of the show: the stones themselves. This is where things get interesting. You’ve got options, my friends! You can go for the all-natural, found-on-the-side-of-the-road look. This is great if you’re on a budget and have a penchant for adventure. Just be sure you’re allowed to take them! Nobody wants to be known as the "garden gnome who stole from the county."
Alternatively, you can visit your local garden center or landscape supply yard. This is where you'll find a more curated selection, from smooth river rocks to rugged, angular pieces. Think of it as going to a fancy buffet – you can pick and choose exactly what you want. Just be prepared for the sheer volume of choices. It can be overwhelming, like trying to pick a Netflix show when you're tired. Just close your eyes and point, or grab what looks nice. You can't go too wrong.
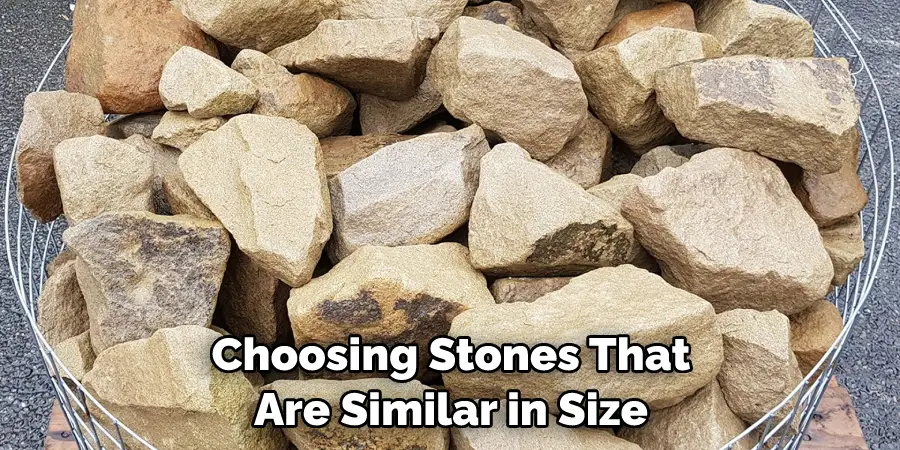
When selecting stones, think about size and shape. You’ll want a variety. Some larger, flatter stones for the base, which will be your anchors. Then, you’ll want a mix of medium-sized stones to build upwards, and then some smaller ones to fill in the gaps and add that charming, slightly imperfect look. It’s like a puzzle, but with rocks. And the best part? If a piece doesn't fit, you can just try another one. No glue involved (usually!).
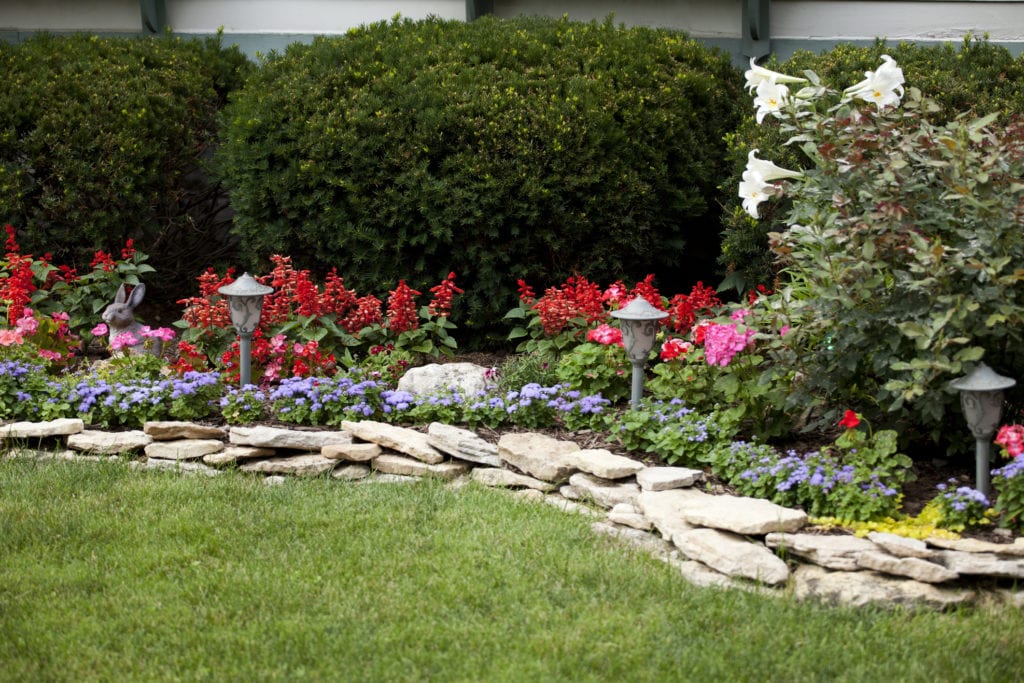
Don't forget to consider the color and texture. Do you want something uniform and sleek, or a more eclectic mix that tells a story? A blend of grays, tans, and even a hint of earthy red can add a lot of visual interest. It’s like a good potluck – the more variety, the better it is!
The Groundwork: Setting the Stage for Stone-y Success.
Before you start stacking, you need to prepare the ground. This is crucial, folks. Think of it as laying the foundation for your culinary masterpiece. You wouldn't bake a cake on a wobbly table, would you? Neither would you build a stone border on uneven ground.
Start by clearing the area. Remove any grass, weeds, or other unruly inhabitants. This is your chance to be the boss of your garden. Tell them, "You shall not pass!" Dig down a few inches to create a nice, flat base. This will help prevent your border from shifting and looking like it’s trying to escape.
Next, it’s time to create a solid foundation. You can lay down a layer of gravel or crushed stone. This acts as a drainage layer and provides a stable base for your first row of rocks. It's like giving your stones a little spa treatment before they start their big job.
Some people like to use a layer of landscape fabric underneath the gravel to prevent weeds from popping up later. This is totally optional, but it can save you some future weeding headaches. Think of it as a preemptive strike against rogue dandelions. If you do use it, make sure to overlap the edges so you don’t create any sneaky entry points.
Stacking the Stones: Where the Magic (and Maybe a Little Grunting) Happens.
Alright, the moment of truth! It’s time to stack. Start with your largest, flattest stones for the base course. These are your foundation. Lay them firmly into the gravel base, making sure they’re level and stable. You want this first layer to be as solid as your commitment to eating pizza every Friday. Wiggle them a bit to make sure they’re not going anywhere. If a stone feels loose, it’s like a loose tooth – better to deal with it now.
Now, move on to the next layer. Overlap your stones. Think of it like building a brick wall, but with more character. You don’t want your joints to line up perfectly, as this can weaken the structure. Place the stones so that they bridge the gaps in the layer below. This is where you start to see your border take shape. It’s like watching a sculptor at work, but with fewer marble chips and more dirt under your fingernails.
As you build upwards, try to find stones that fit snugly against each other. If there are small gaps, don’t worry too much! You can use smaller stones or even a bit of soil to fill them in. This is where you add that rustic, organic charm. It’s like adding the finishing touches to a cake – a little swirl of frosting here, a sprinkle of edible glitter there.
Don't be afraid to experiment. If a stone just isn't cooperating, set it aside and try another. It's a bit like dating – sometimes you have to kiss a few frogs before you find your prince (or, in this case, your perfectly shaped boulder). Take your time. This isn't a race. It's about creating something beautiful.
Fill in the gaps as you go. This is important for stability. You don’t want any big, gaping holes that could let your precious soil (or worse, your neighbor’s cat) escape. Use smaller stones, pebbles, or even a bit of the soil you excavated to pack in tightly. This helps to lock the stones in place.
Step back and assess regularly. Does it look balanced? Is it leaning precariously? You’re the artist here. Trust your gut. If something looks off, adjust it. This is the beauty of working with natural materials – they’re forgiving.
The Finishing Touches: Making it Yours.
Once you’ve reached your desired height, it's time for the finishing touches. Take a step back and admire your handiwork. You’ve wrestled with rocks, embraced gravity, and created something tangible. Give yourself a pat on the back. Maybe even a little dance of victory.
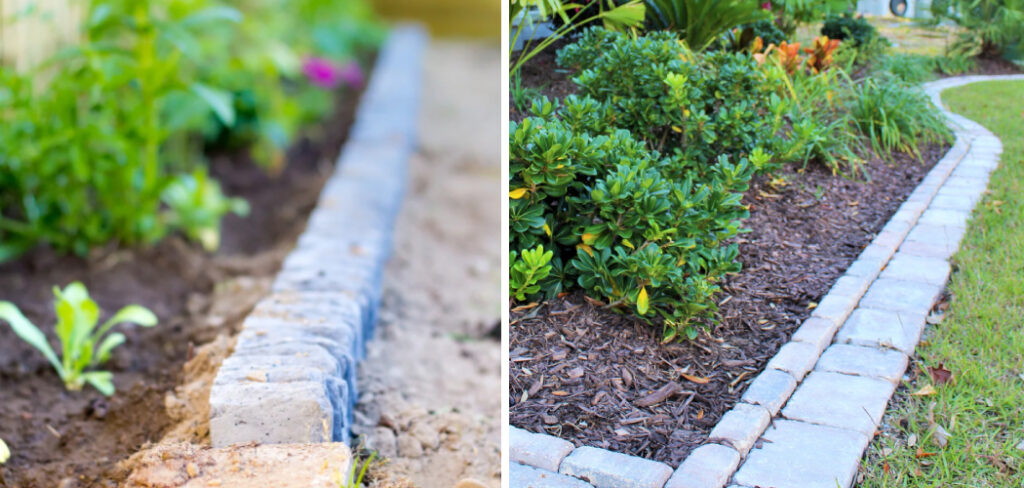
You can tuck in any loose stones or fill any remaining small gaps. This makes the border look more finished and also adds to its stability. It's like ironing your clothes before you go out – it just makes everything look better.
Consider adding a bit of soil to the inside of the border, right up to the stones. This will help to hold them in place and also create a beautiful bed for your plants. And, of course, you’ll want to add your beautiful plants!
This is where your garden truly comes alive. Plant your favorite flowers, herbs, or even some low-growing shrubs. The stone border will not only define the space but also add a sense of depth and texture. It’s like giving your plants a little red carpet to stroll down.
And there you have it! A stacked stone garden border that’s both beautiful and functional. It’s a testament to your hard work, your patience, and your willingness to get a little bit dirty. So go ahead, water those plants, sit back, and admire your handiwork. You’ve earned it. And who knows, maybe next weekend you'll tackle that wobbly bird bath. One rock-solid project at a time!