How To Adjust A Husqvarna Chainsaw Carburetor

Ah, the Husqvarna. That iconic orange and silver beast that hums with the promise of conquering unruly branches and shaping your backyard into a masterpiece. You love it. We get it. It's more than just a tool; it's a partner in your outdoor adventures, a symbol of can-do spirit. But even the most reliable companions need a little TLC now and then. And when your trusty chainsaw starts acting a bit… off, like it’s running on lukewarm coffee instead of premium fuel, it's usually time to chat with its heart: the carburetor.
Don't let the word "carburetor" send you scrambling for a mechanic. Think of it less like a complex piece of alien technology and more like the chainsaw's digestive system. It’s where the magic happens, blending air and fuel to give your saw the pep it needs. And sometimes, just like us, it needs a little fine-tuning to get back to its peak performance. This isn't rocket surgery, folks. It's more like giving your favorite pair of jeans a quick iron. Manageable, satisfying, and makes everything look and feel so much better.
So, let's dive in, shall we? We're going to walk through adjusting your Husqvarna chainsaw carburetor with a relaxed vibe, a healthy dose of practical advice, and maybe a few tidbits to keep things interesting. Grab a cold beverage, put on some chill tunes – maybe some folk music that evokes the smell of pine needles – and let's get your saw singing again.
Must Read
Why Bother Tinkering? The Sweet Symphony of a Well-Tuned Saw
Before we get our hands dirty, let's talk about why this is even important. A carburetor out of whack is like a bad Wi-Fi connection – it’s frustrating, inefficient, and just plain annoying. You might notice a few tell-tale signs:
- Sluggish performance: It’s not revving up like it used to. Feels like it’s wading through molasses.
- Hard starting: You’re pulling that starter cord with the enthusiasm of someone trying to wake a grumpy teenager.
- Rough idling: It’s sputtering and coughing when it’s supposed to be purring.
- Poor acceleration: You squeeze the trigger, and it hesitates like it’s having an existential crisis.
- Excessive smoke: More smoke than a rock concert on fire.
- Fuel economy woes: It’s guzzling gas like a celebrity on a private jet.
These aren’t just minor inconveniences. A poorly adjusted carburetor can lead to premature wear and tear on your engine. Think of it as letting your car run on slightly stale gas. It'll work, but it's not ideal for the long haul. Plus, a smoothly running saw is a safer saw. Less bogging down means more control, and who doesn’t want more control when you’re wielding a sharp, fast-moving blade?
It’s also incredibly satisfying, isn’t it? There’s a certain primal joy in understanding and maintaining your tools. It connects you to the machine, and frankly, it’s a skill that feels empowering. Like knowing how to fix a leaky faucet or bake a decent sourdough loaf. It’s the modern equivalent of being a skilled artisan of old, just with more orange plastic.
The Anatomy of a Carburetor: A Quick (and Painless) Primer
Okay, deep breaths. We’re not going to delve into Bernoulli’s principle or the intricate dance of diaphragms and needles. For our purposes, let’s focus on the essentials: the adjustment screws. Most modern Husqvarna chainsaws, especially the homeowner and prosumer models, utilize carburetors with two primary adjustment screws:
- The Low-Speed (L) Screw: This little guy controls the fuel mixture when the engine is idling and at low RPMs. Think of it as setting the mood for slow dancing.
- The High-Speed (H) Screw: This one dictates the fuel mixture at higher RPMs, when you’re really giving it the beans. It's for the energetic polka.
There’s often a third screw, the idle speed screw, which physically adjusts how open the throttle plate is at idle. But we’ll get to that. For now, just know that L and H are your main characters in this performance.

It's worth noting that some newer, more advanced Husqvarna saws might have automatic or electronically controlled carburetors. If your saw has a digital display or you don't see obvious adjustment screws, you might have one of these. In that case, you're probably in manual territory, and a visit to your authorized dealer might be the best bet. But for the vast majority of us with good old-fashioned mechanical carburetors, we’re in business!
Getting Ready: Your Toolkit and Safety First!
Before you even think about touching those screws, let’s get ourselves prepped. This isn’t a high-stakes mission, but preparedness is key to a smooth operation. You’ll need:
- A small flathead screwdriver: Usually a 3mm or 4mm size is what you'll need for those L and H screws.
- Your owner's manual: This is your Bible. Seriously, it has the specific recommendations for your model. Don't skip this step! It’s like trying to follow a recipe without reading it first.
- A clean rag: For wiping away any accidental spills or just for that satisfying feeling of cleanliness.
- Safety glasses: Non-negotiable. Sawdust, fuel, and fiddly bits are not your friends in the eyes.
- Gloves: To keep your hands clean and provide a better grip.
- A tachometer (optional but recommended): If you're serious about getting it just right, a small digital tachometer can be a game-changer. It's how the pros dial it in.
Safety Note: Always ensure the saw is turned off and the spark plug wire is disconnected before making any adjustments to prevent accidental starting. This is the chainsaw equivalent of putting on your seatbelt. Always.
The Adjustment Process: Let’s Get This Show on the Road!
Alright, the moment of truth. We’re going to follow a general procedure here, but always consult your owner's manual for the exact specifications for your Husqvarna model. Think of this as a helpful guide, not a rigid script.
Step 1: Finding the Screws
Pop open the air filter cover. Usually, it’s a quick-release latch or a couple of screws. Inside, you’ll see your air filter. Remove that. Now, you should be able to see the carburetor. Look for the two small screws, typically labeled ‘L’ and ‘H’. They might be brass or black. If you see a third, fatter screw, that's likely your idle speed adjustment.
Step 2: Setting the Base – The "Lean" Position
This is where we establish a starting point. With the engine off and the spark plug wire disconnected, gently turn both the L and H screws clockwise until they lightly seat. Don't force them! Just until you feel a tiny bit of resistance. This is your "all the way in" position.

Now, back each screw out counter-clockwise by the number of turns specified in your owner’s manual. This is your baseline. It’s like setting the initial rhythm before the music starts. If your manual doesn't give a specific number, a common starting point is 1.5 turns out for both L and H screws. But again, the manual is your friend here!
Step 3: The Initial Start-Up and Idle Test
Reconnect the spark plug wire. Give your saw a few pulls to get it started. It might be a bit rough initially. Let it idle for about 30 seconds to a minute. Listen to it. Does it sound smooth, or is it sputtering? If it's dying, you might need to adjust the idle speed screw slightly (usually clockwise to increase idle speed). A good idle speed means the chain just stops moving or moves very slowly.
Step 4: Adjusting the Low-Speed (L) Screw – The Subtle Art of Idling
Now, let’s fine-tune the idle. With the engine running and at idle, slowly turn the L screw clockwise or counter-clockwise in small increments (like 1/8th of a turn at a time). Listen carefully. You're looking for the point where the engine runs the smoothest and has the highest idle speed without the RPMs getting too high. You want a nice, stable idle.
A common symptom of a lean low-speed mixture (too much air, not enough fuel) is the engine bogging down when you briefly blip the throttle. If you blip the throttle and it sputters or dies, you're likely too lean on the L screw. Try turning it out (counter-clockwise) a little bit. If it's running too rich (too much fuel, not enough air), it might sound sluggish and produce a lot of black smoke at idle. In that case, turn the L screw in (clockwise) a bit.
Fun Fact: The carburetor works on the Venturi effect, a principle first described by Italian physicist Giovanni Venturi. As air rushes through a constricted part of the carburetor, its speed increases, and its pressure drops, drawing fuel into the airstream. It’s like a miniature wind tunnel in your saw!
Step 5: Adjusting the High-Speed (H) Screw – Power and Performance
This is where your saw gets its muscle. With the engine running, and your safety glasses firmly in place, carefully and briefly squeeze the throttle to wide-open throttle (WOT). Listen to the engine’s response. Ideally, it should accelerate cleanly and smoothly and sound like it’s revving at its maximum potential.
Symptoms of a lean H mixture: The engine will sound like it's "chattering" or "pinging" at high RPMs, or it might lose power as you hold the throttle open. This is serious and can damage your engine. If you hear this, immediately back the H screw out (counter-clockwise) a little bit to richen the mixture. Think of it as adding more octane to its blood.
Symptoms of a rich H mixture: The engine will sound "bogged down" or "four-stroking" at WOT. It might not reach its full RPM potential and will likely produce more smoke. If this is the case, turn the H screw in (clockwise) a little bit to lean out the mixture.
The goal is to find the sweet spot where the engine accelerates cleanly, pulls hard at WOT, and doesn't sound like it's struggling or about to throw a rod. This often involves a bit of back-and-forth. Make a small adjustment, test it, observe, and repeat. If you have a tachometer, you can use it to find the maximum RPM at WOT (consult your manual for the recommended RPM range) and then slightly richen it (turn the H screw out about 1/8th of a turn) to ensure it’s not running too lean.
Cultural Reference: Think of tuning a carburetor like tuning a guitar. You’re trying to get each string to resonate at the perfect pitch. A little adjustment here, a slight tweak there, until the whole instrument sounds harmonious. Your chainsaw is no different!
Step 6: The Final Test and Idle Speed Check
Once you feel you've got the H and L screws dialed in, let the saw idle again. Check the idle speed. It should be consistent and the chain should not be spinning, or spinning only very slowly. If it’s too fast, use the idle speed screw (usually a black plastic screw that physically pushes against the throttle linkage) to slow it down. Turn it clockwise to increase idle speed, and counter-clockwise to decrease it. The goal is to have the chain just stop.

Now, test it out! Give it some throttle, let it rev, and see how it feels. Does it respond crisply? Does it have power? Take it for a spin on a small piece of wood. It should feel like the chainsaw you know and love, only better.
Pro Tip: The optimal carburetor settings can vary slightly depending on altitude and air temperature. If you’re adjusting your saw at sea level and then taking it to a mountain cabin, you might need to make minor adjustments. Altitude makes the air thinner, meaning less oxygen, so you often need to lean out the mixture (turn screws clockwise) at higher altitudes.
Troubleshooting Common Gremlins
What if it’s still acting up? Don't despair. Here are a few other things to check:
- Dirty Air Filter: The most common culprit! A clogged air filter starves the engine of air, making it run rich. Clean or replace it.
- Clogged Fuel Filter: Similar to the air filter, a clogged fuel filter restricts fuel flow.
- Old Fuel: Gasoline degrades over time, especially if it contains ethanol. Use fresh fuel and consider a fuel stabilizer.
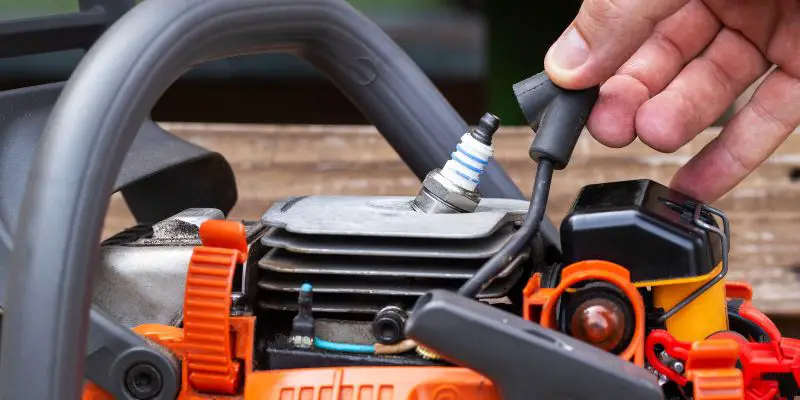
- Spark Plug: A fouled or worn-out spark plug can cause all sorts of running issues. Check its condition and gap, or replace it.
- Intake Leaks: Cracks in the intake manifold or loose connections can let unmetered air into the engine, causing it to run lean and hot.
If you’ve gone through all these steps and your saw is still misbehaving, it might be time to look at more complex issues like a worn carburetor diaphragm or internal engine problems. In that case, seeking professional help is wise. But for most of us, a little carburetor adjustment is all it takes.
A Moment of Reflection: The Zen of Maintenance
There’s a quiet satisfaction that comes from understanding and tending to the tools that help us shape our world. Adjusting a chainsaw carburetor isn't just about fixing a mechanical problem; it's a small act of self-sufficiency, a connection to the tangible, and a way to appreciate the ingenuity that goes into these powerful machines.
In our fast-paced, often disconnected digital lives, there’s a grounding effect in working with our hands, in diagnosing and solving problems that have a clear, physical solution. It’s a reminder that, sometimes, the best way to get things running smoothly is to understand the fundamentals, be patient, and make those small, precise adjustments. Just like in life, when we pay attention to the little things, the bigger picture often falls into place beautifully.