How To Add A Stitch To Knitting

So, you've been happily knitting away, maybe making a cozy scarf or a super soft blanket, and then BAM! You realize you've somehow, magically, lost a stitch. Or perhaps you're working on a pattern and it specifically tells you to "increase by one stitch." Either way, you're staring at your needles, feeling a tiny bit of panic, wondering, "How on earth do I add a stitch back into this perfectly good fabric?"
Don't sweat it! This is actually one of those super handy skills to have in your knitting arsenal. Think of it like learning to change a tire on your bike – a little daunting at first, but once you know how, it’s a game-changer. Adding a stitch isn't about fixing a mistake; it's about intentionally creating more fabric. It's how you make your knitting get wider, how you shape things, and how you bring a project from "almost there" to "finished and fabulous."
Why is this even a thing? Well, knitting is all about creating a fabric from loops of yarn. Each stitch is a tiny building block. If you want a bigger building, you need more blocks, right? Increases are the knitting equivalent of adding more bricks to your wall. They’re essential for things like:
Must Read
- Making a triangular shawl wider and wider as it grows.
- Creating the rounded shape of a sleeve or the front of a sweater.
- Adding decorative elements or cables that require extra stitches.
- Fixing those oopsies where you might have dropped a stitch (we've all been there!).
There are a few different ways to add a stitch, and they all have their own little quirks and looks. It's kind of like having different types of glue – some are super strong and invisible, others are a bit more noticeable. The best one for you often depends on the pattern you're following and the look you're going for. But for now, let's dive into some of the most common and beginner-friendly methods!
The 'Make 1' (M1) Methods: Your New Best Friends
When most knitters talk about adding a stitch, they're often referring to the "Make 1" or M1 increase. It's a clever way to create a new stitch from the yarn between two existing stitches. The best part? It's usually pretty invisible, especially when you're working with stockinette stitch (that smooth, V-shaped stitch pattern). There are two main variations of M1, and they're named based on the direction the new stitch leans:
Make 1 Left (M1L)
Imagine you have two stitches on your left needle, and you want to create a new stitch between them. With M1L, the new stitch will lean to the left. Here's the lowdown:
First, you'll notice that little horizontal strand of yarn bridging the gap between the two stitches you're about to knit. Instead of ignoring it, we're going to use it! Pick up that little strand with your left needle, lifting it from front to back.

Now, here's the slightly tricky bit: you want to knit into that lifted strand, but you need to do it in a way that twists it. This twist is what prevents a hole from forming. So, insert the tip of your right needle into the back loop of that lifted strand (remember, we picked it up from front to back, so the back loop is now accessible). Then, knit as you normally would. Ta-da! You’ve just created a new stitch that leans to the left.
Think of it like grabbing a stray thread and weaving it back into your fabric, giving it a little tug to make it snug. It's a small action with a big impact!
Make 1 Right (M1R)
This one is the mirror image of M1L. The new stitch will lean to the right. It's almost identical, but the way you pick up and knit into that bridging strand is slightly different.
Again, you're looking at that horizontal strand of yarn between your stitches. This time, pick up that strand with your left needle, but lift it from back to front.
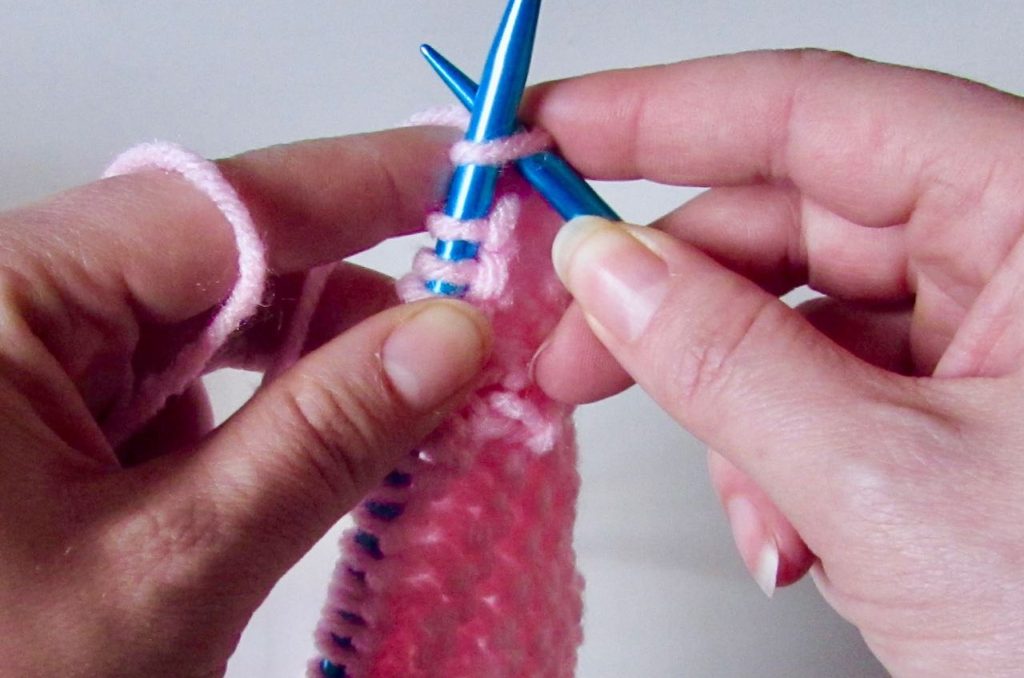
Now, just like before, we need to knit into it and twist it. Insert the tip of your right needle into the front loop of that lifted strand. Then, knit as usual. You'll see your new stitch pop into existence, leaning neatly to the right.
This is like giving your fabric a little nudge to the right, making it expand in that direction. It’s all about gentle manipulation and making the yarn work for you!
Why both left and right? Well, in patterns, you'll often see "M1L" and "M1R" right next to each other. This is how you create symmetrical increases, making your knitting grow evenly on both sides. It’s the secret sauce for creating those lovely, curved shapes!
The Knit Front and Back (KFB): A Little More Noticeable, But Super Easy!
This is another super popular way to add a stitch, and it’s arguably even simpler than the M1s. The Knit Front and Back (KFB) method is great because it's very straightforward and creates a definite little raised bar on your fabric, which can sometimes be desirable!

Here's how it works: you take one existing stitch and you're going to knit it twice. Yes, you read that right! You’re essentially getting two stitches out of one.
You start by knitting into the front of the stitch as you normally would. But, instead of sliding that stitch off your left needle, you keep it there.
Now, with the yarn still on your left needle, you're going to knit into the back of that same stitch. This is why it's called Knit Front and Back! You're treating the same loop of yarn as if it were two separate stitches to be worked.
After you knit into the back, then you slide the original stitch off your left needle. You've just turned one stitch into two, effectively adding one stitch to your row!

Think of KFB like giving one of your yarn stitches a little hug and then a high-five, turning it into two happy stitches. It's a very direct way to get that extra loop.
KFB is often used when you want a very clear, visible increase. You might see it in patterns for garments where you want the increases to be a bit more pronounced, or for decorative purposes. It's also super forgiving, which is always a win in my book!
Why is this so cool?
Beyond the practical "how-to," there's something truly magical about understanding how to add stitches. It transforms knitting from a purely linear process into a 3D art form. You're not just making rows; you're actively shaping and sculpting with yarn!
It’s like being a chef and realizing you can add a pinch of spice here or a swirl of cream there to completely change the flavor of your dish. With knitting, those "spices" are your increases, and they allow you to create all sorts of textures and forms.
So, the next time you find yourself needing to add a stitch, don't panic. Embrace it! Grab your needles, find that bridging yarn or that cozy stitch, and give it a go. You're not just adding a stitch; you're adding a bit of creativity and control to your project. Happy increasing!

