How Do You Set Up A Pool Table

So, you’ve decided to embark on the noble quest of pool table ownership. Congratulations! You’ve leveled up your entertainment game. Now comes the slightly less glamorous, but equally important, part: setting it up.
Forget everything you think you know about IKEA furniture. This is a different beast entirely. Think less "put tab A into slot B" and more "where did all these screws come from?!" It’s a journey, folks.
The Great Unboxing Adventure
First, you’ll likely encounter a box. A big one. Possibly the biggest box you’ve ever seen in your living room. Prepare for a wrestling match. This isn't a delicate operation; it’s an excavation.
Must Read
You'll need some serious unpacking prowess. Think of yourself as a treasure hunter, but instead of gold, you're uncovering slate, felt, and a baffling array of hardware. Have a designated area, or risk turning your home into a chaotic billiard-themed obstacle course.
Unboxing can be an event in itself. Clear the area. Get some help. And maybe some snacks. You’ll be there for a while.
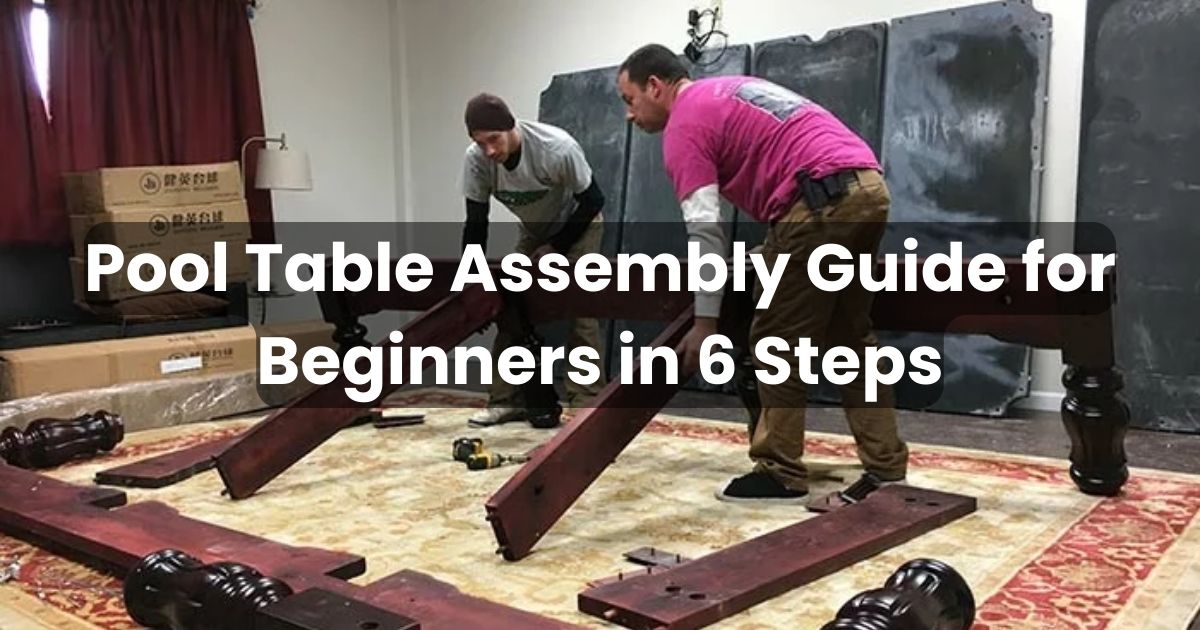
Legs? We Don't Need No Stinking Legs... Oh Wait, We Do.
Ah, the legs. These are crucial. They are the foundation of your future victories (and frustrating misses). Most tables come with them pre-attached, thankfully. But if yours don't, well, you're in for a bit of a workout.
Attaching the legs can feel like a very important architectural feat. You want them perfectly aligned. Uneven legs are the arch-nemesis of a good game of pool. They can make the simplest shot feel like a physics experiment gone wrong.
So, tighten those bolts. Make sure they’re snug. Give each leg a gentle (or not-so-gentle) nudge. You want stability, my friends. Stability is key.
The Slate: Heavy Lifting with a Side of Existential Dread
Now for the star of the show: the slate. This is the heavy, flat piece that makes the magic happen. And by "magic," I mean a smooth, true roll of the ball.
This is where your "I'll just do it myself" bravado might meet its match. Slate is heavy. Like, really heavy. We're talking multiple people heavy. Unless you’ve been secretly training as a competitive strongman, enlist reinforcements.
Carefully lower the slate onto the leg structure. This requires coordination. Think of it as a synchronized swimming routine, but with significantly more grunting and potential for dropped heavy objects. Precision is your friend here.
Centering the Universe (or Just the Slate)
Once the slate is in place, you'll need to center it. This is where things get slightly obsessive. You’ll be measuring. You’ll be eyeballing. You might even get out a laser level if you’re feeling particularly ambitious.

The goal is to ensure the playing surface is perfectly even. A tilted table can lead to some truly bizarre ball behavior. Balls will mysteriously drift towards the lower side, making you question your sanity and the laws of physics. Don't let this happen to you.
Take your time. Make small adjustments. You’re aiming for a perfectly balanced cosmic billiard experience. Or at least a table that doesn't actively fight against your shots.
Felt: The Glamorous (and Sometimes Frustrating) Finish
Ah, the felt. This is the luxurious carpet for your billiard balls. It’s what gives the game its satisfying thwack and smooth glide.
Attaching the felt is often the most visually rewarding part. It transforms the raw slate into a beautiful playing surface. It's like giving your table a stylish makeover.
However, this can also be a bit of a fiddly process. You’ll be pulling, stretching, and stapling (or gluing, depending on your table). The key is to get it as smooth and wrinkle-free as possible.

The Art of the Stretch and Staple
Imagine you're a tailor for a giant, rectangular creature. You want the fabric to lie perfectly flat. No bumps, no loose bits. These imperfections can affect ball roll, and nobody wants that.
You’ll need to work your way around the table, pulling the felt taut. Staple it down securely on the underside. Be generous with the staples; better too many than too few.
Then comes the tricky part: trimming the excess. You want a clean, professional look. This is where those sharp scissors (or utility knife) come in handy. Try not to cut too close to your perfectly stapled edge.
The Pockets: Where Balls Go to Live (Temporarily)
And then there are the pockets. These are the destinations for your errant shots and your triumphant winners.
Attaching the pockets usually involves a bit of screwing and aligning. Make sure they’re firmly attached. You don’t want a pocket falling off mid-game, creating a dramatic (and messy) ball escape.
Some pockets are leather, some are nets. Regardless, their purpose is singular: to capture those spherical wonders. They are the hungry mouths of your billiard beast.
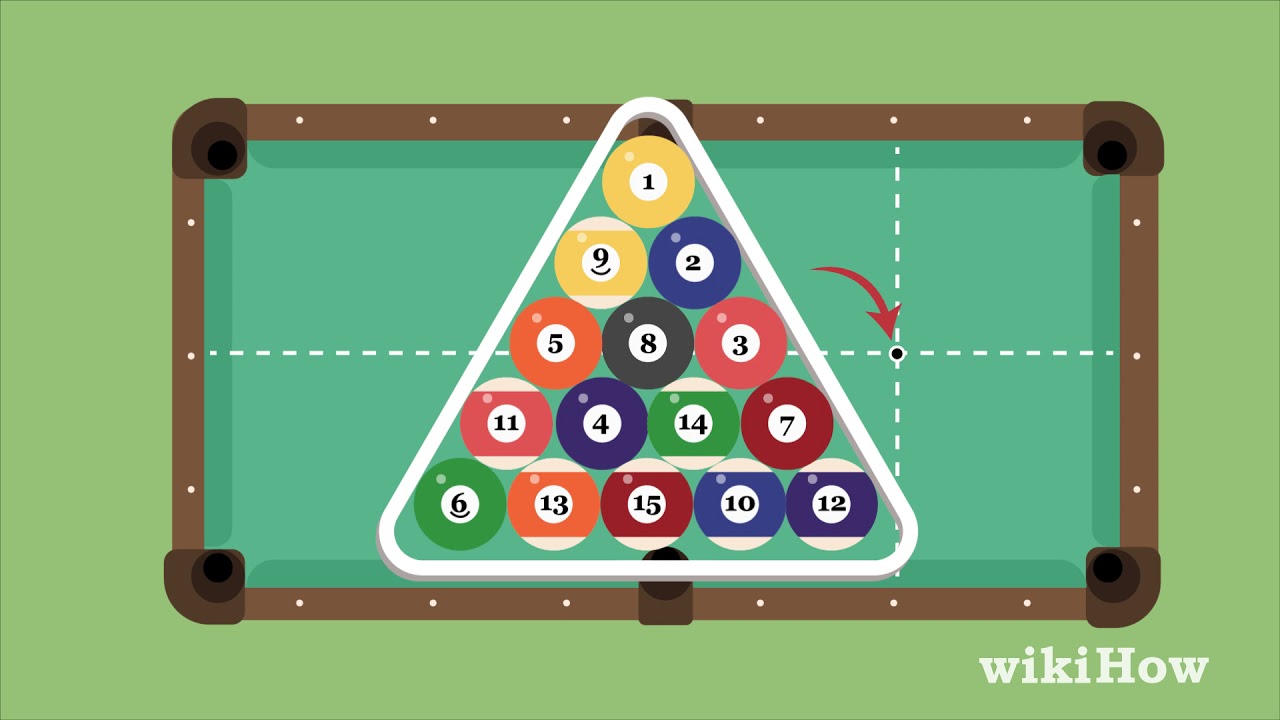
The Moment of Truth: Racking Up and Breaking Out
You've done it! You've conquered the beast! Now, for the ultimate test: the first rack.
Grab your pool balls. Arrange them in the triangle. Take a deep breath. You’ve earned this.
The break shot. The sound of the balls scattering. The anticipation. This is what it was all for. And if your table is a little wobbly, or the felt has a slight crease, well, that's just part of its charm, right?
It's a process, for sure. A bit of a puzzle, a bit of a workout, and a whole lot of anticipation. But the end result is pure, unadulterated fun. So go forth, enjoy your new kingdom of green felt and rolling spheres!