How Do You Seal A Shower Tray

Ah, the humble shower tray! It might not be the most glamorous part of your bathroom, but keeping it sealed is a bit like giving your bathroom a secret superpower: the power to stay dry and problem-free. Think of it as your bathroom's superhero cape, warding off the sneaky villains of leaks and water damage. It’s a DIY job that’s surprisingly satisfying, and once you’ve got it down, you’ll feel a little bit like a bathroom wizard.
So, why is sealing your shower tray such a big deal? Well, imagine this: your shower is your daily oasis, a place to relax and recharge. But what happens if that water decides to explore beyond its designated area? Cue the soggy carpets, the damaged subfloors, and the potential for mould to set up shop – nobody wants that! A properly sealed shower tray acts as the first line of defence, creating an impenetrable barrier that keeps water precisely where it belongs: in the tray and heading down the drain.
The benefits are pretty straightforward but incredibly important. Firstly, and most obviously, it prevents water damage. This means no more worrying about that mysterious damp patch appearing on your ceiling downstairs or the dreaded smell of mould. Secondly, it protects your bathroom’s structure. Water seeping into walls or floors can cause rot and compromise the integrity of your home over time, leading to expensive repairs. Thirdly, a well-sealed tray contributes to a healthier bathroom environment. By eliminating moisture ingress, you’re reducing the conditions that mould and mildew love to thrive in, keeping your air cleaner and your bathroom more hygienic. And let’s not forget the aesthetic appeal! A clean, well-maintained shower area just looks and feels so much better.
Must Read
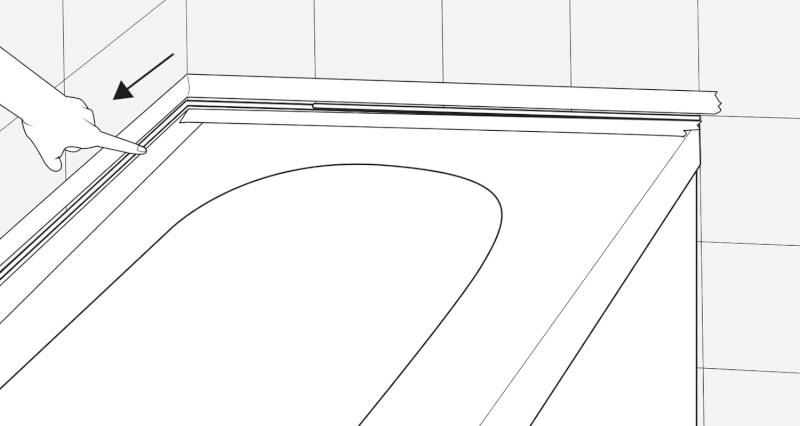
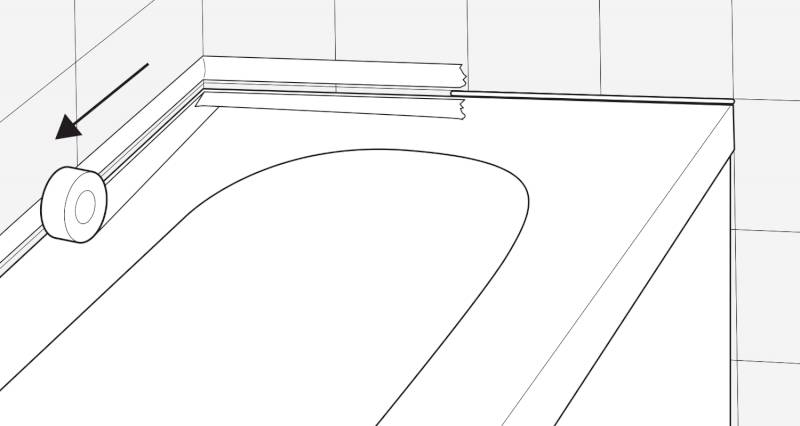
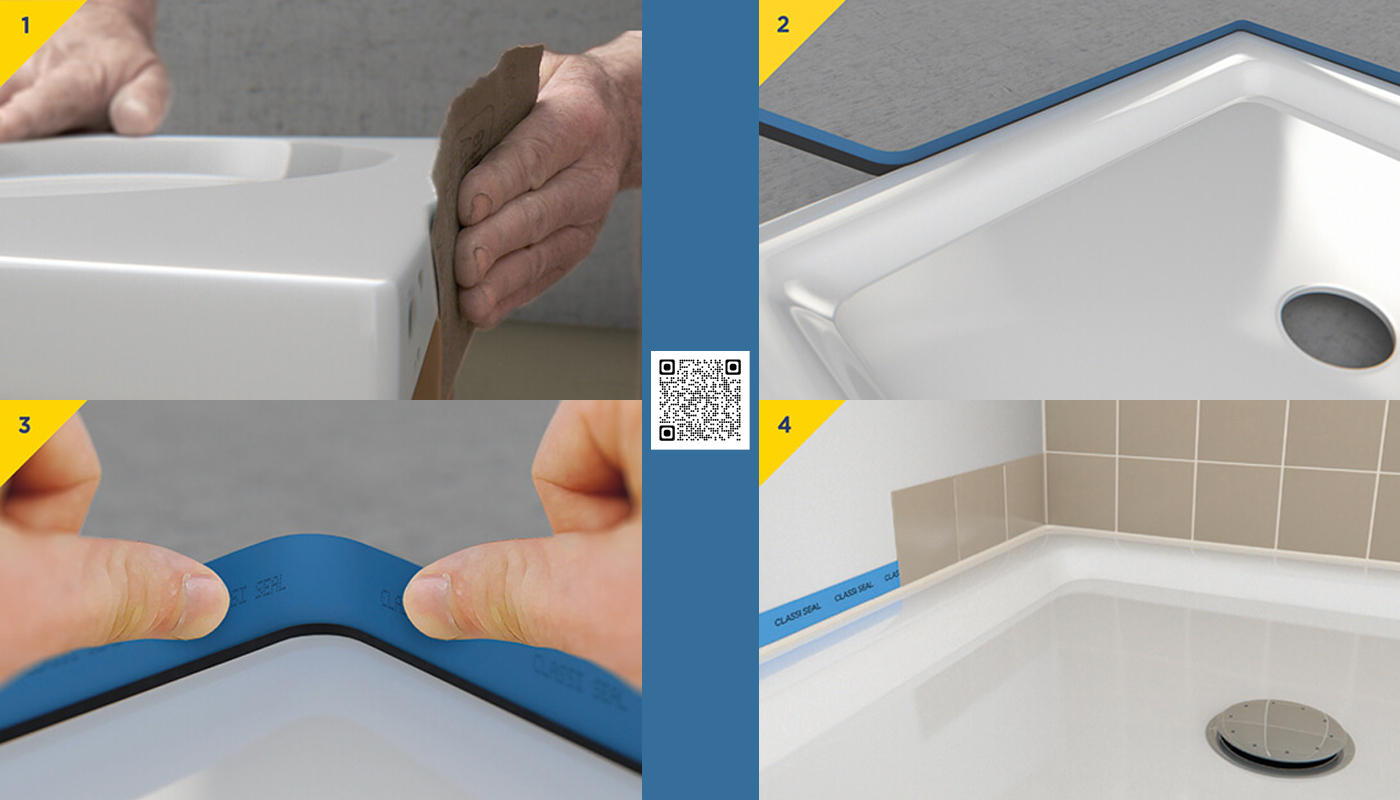
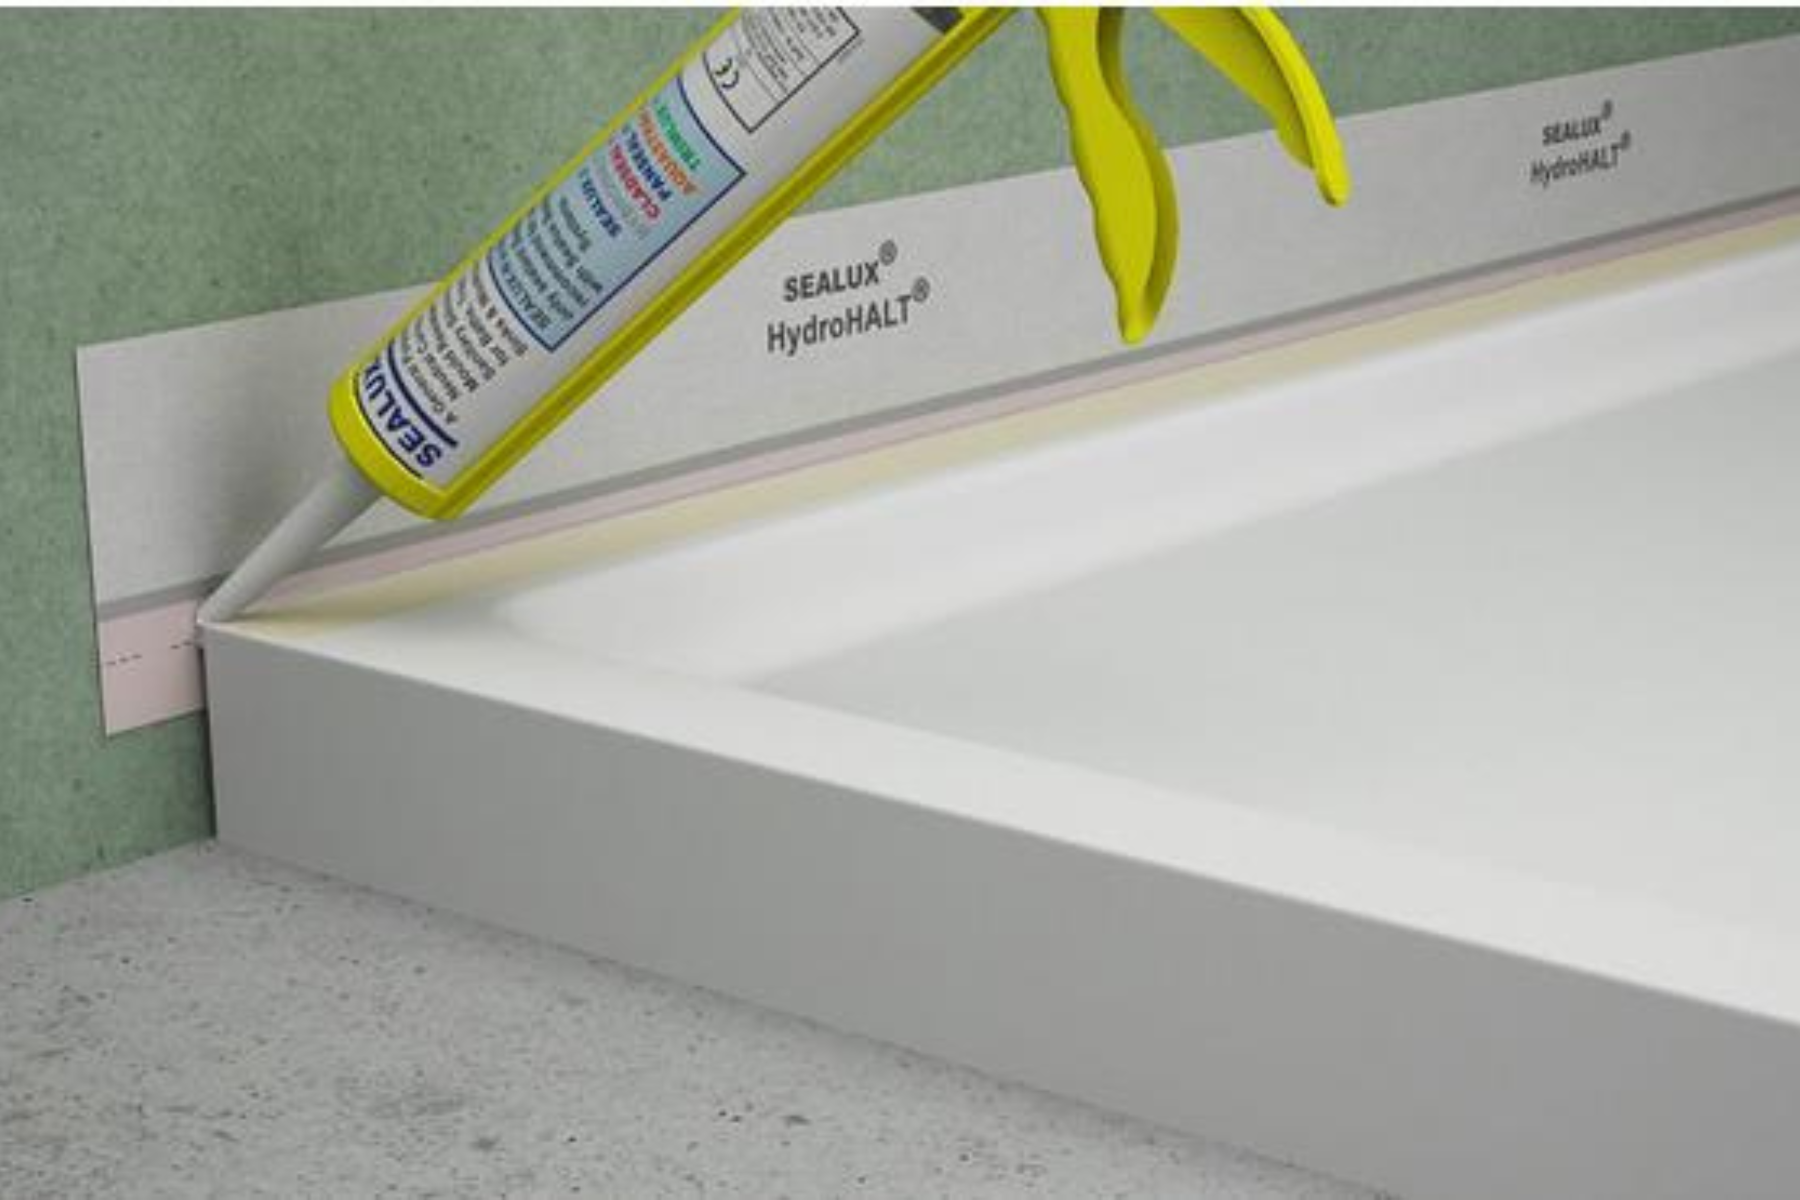
Now, let’s talk about the magical ingredient that makes all this happen: silicone sealant. This isn’t just any old glue; it’s a flexible, waterproof wonder-product specifically designed for wet environments. You’ll find it in a handy tube, ready to be squeezed and smoothed into those crucial gaps. The key areas you'll be focusing on are the junction where the shower tray meets the walls, and where the tray meets the floor (if it's not a fully tiled floor). These are the most common culprits for leaks, so giving them a thorough sealing is paramount.
Before you get your hands on the sealant, a little preparation goes a long way. You’ll want to make sure the area is spotlessly clean and dry. Any dust, soap scum, or old sealant needs to be removed. Think of it as creating a perfect canvas for your new seal. A scraper or a specialised sealant removal tool can be your best friends here. Once it’s clean, give it a good wipe down and allow it to dry completely. This is crucial – a damp surface will prevent the sealant from adhering properly.
The actual application is where the fun (yes, fun!) begins. You’ll need a caulking gun to operate the silicone tube. It’s quite simple: load the tube, cut the nozzle at an angle (a 45-degree angle is usually recommended for a nice, even bead), and then apply a continuous, steady bead of sealant along the gap. Don’t be shy, but don’t go overboard either. The goal is to fill the gap completely without too much excess.

Once you’ve applied the sealant, it’s time for the smoothing. This is where you transform that slightly messy bead into a neat, professional-looking finish. You can use a wet finger (dip it in water or a soapy solution) or a smoothing tool. Gently run your chosen tool along the bead of sealant, applying even pressure. This pushes the sealant into the gap and creates a smooth, concave surface that looks fantastic and, more importantly, seals effectively. Wipe away any excess sealant that squeezes out immediately with a damp cloth.
Different types of shower trays might have slightly different requirements, but the core principle remains the same. For example, a stone resin shower tray might feel very solid, while a lighter acrylic tray is also perfectly sealable. The important thing is the seal between the tray and the surrounding surfaces. And remember, patience is a virtue! Don’t rush the process. Take your time, get a good, even bead, and smooth it out beautifully. After you’re done, let the sealant cure completely according to the manufacturer's instructions – this usually takes at least 24 hours. Once it’s cured, you can enjoy your perfectly sealed shower tray, knowing you’ve just given your bathroom a significant upgrade in both protection and peace of mind. It's a small job with a big impact, and a truly rewarding DIY achievement!