How Do You Hide Rows In Excel

Oh, Excel. The magical land of spreadsheets where numbers dance and data tells tales. But sometimes, our data decides to throw a wild party, and suddenly we have a bunch of rows that are just... too much. Maybe they're for your eyes only, or perhaps they're just cluttering up the place like uninvited guests at a fancy dinner. Whatever the reason, fear not, my spreadsheet warrior! Hiding rows in Excel is easier than finding your keys on a Monday morning (okay, maybe not that easy, but close!).
Imagine you’ve got a giant spreadsheet filled with every single order your lemonade stand has ever taken. You want to show your parents how awesome business is, but you don't want them to see that one time you accidentally sold a cup of water for a dollar (don't judge, it was a hot day!). That’s where the magic of hiding rows swoops in to save the day. It's like giving those unwanted rows a little invisibility cloak. Poof! Gone.
Let's talk about the star of our show: the Hide Rows feature. It’s not some mystical incantation; it’s a super-powered button (or right-click option) that makes those rows disappear like a magician's rabbit. You won't be deleting them, oh no! Deleting is for when you've truly had enough. Hiding is for when you just need a little breathing room, a moment of peace from your data’s overexcitement.
Must Read
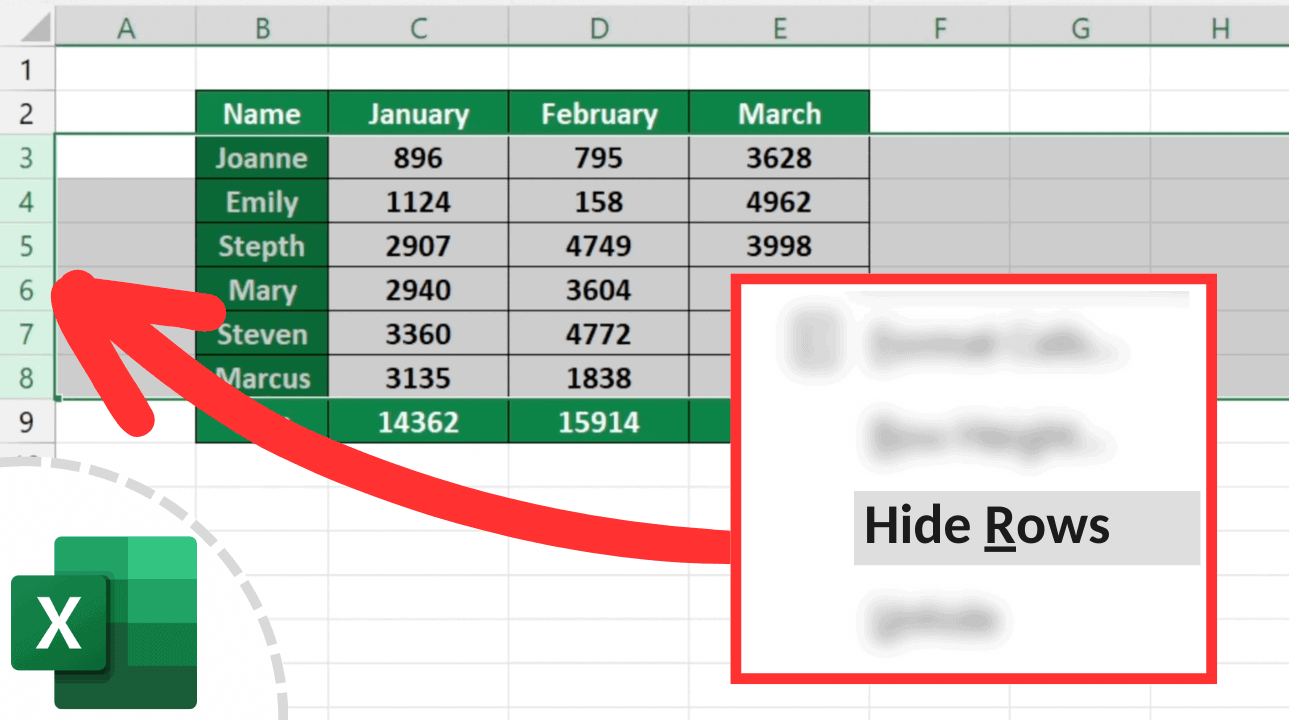
First things first, you need to tell Excel which rows are auditioning for the role of "invisible object." So, you'll grab your mouse and highlight the rows you want to send on a temporary vacation. Think of it like pointing at the kids you want to send to their rooms – just make sure you point at the right ones!
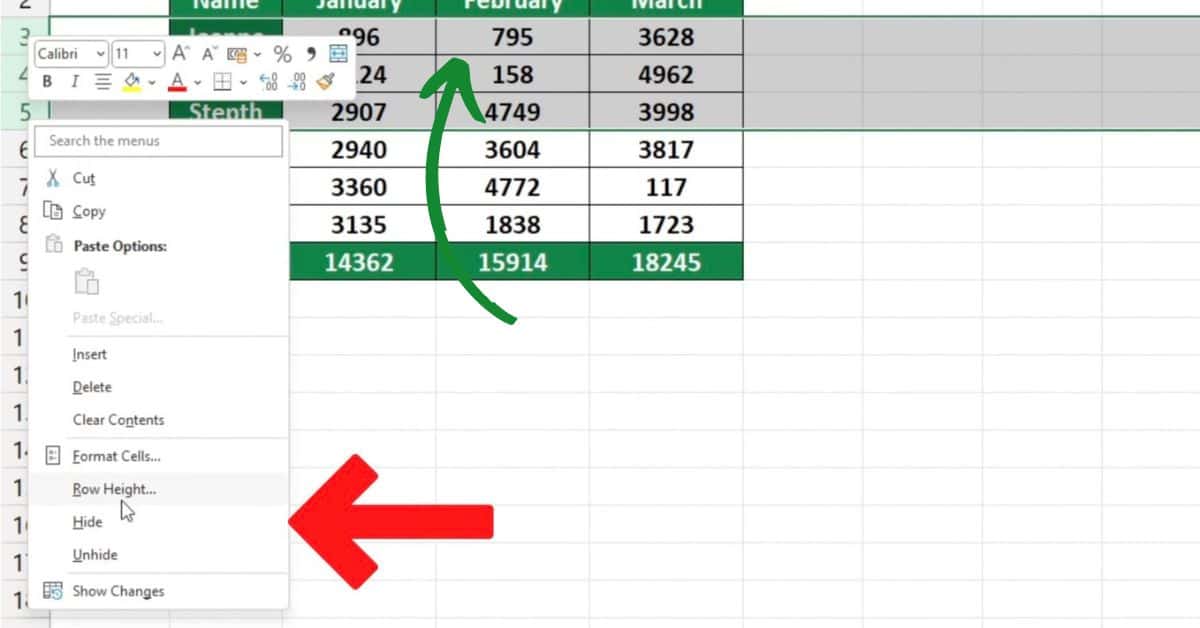
Once you’ve got your rows firmly in your sights, it’s time for the grand reveal (or rather, the grand concealment). The easiest way to get this done is with a trusty right-click. Yep, that little button on your mouse that you probably use to copy and paste is about to become your new best friend in the world of data discretion.
So, you’ve highlighted your rows. Now, take your mouse and hover over any part of those highlighted rows. Then, drumroll please, hit that right-click button. A magical menu will appear, a treasure trove of options, and somewhere in that delightful list, you'll find the glorious phrase: Hide.
Click on Hide, and just like that, those rows will vanish. They’re not gone forever, mind you. They’re just taking a little nap, waiting patiently for you to call them back from their slumber. It’s like they’ve stepped behind a velvet curtain at the theater, and only you know they’re still there.
Now, you might be wondering, "But how do I get them back? I can't just have my data disappearing forever!" Don't you worry your pretty little head about that. Bringing those hidden rows back to life is just as simple, and perhaps even more satisfying. It’s like the triumphant return of your favorite characters!

To unhide your rows, you need to tell Excel where to look for the missing stars. This is where you need to highlight the rows above and below the hidden ones. Think of it as creating a boundary, like saying, "Okay Excel, I know there’s something hiding in this section, go find it!"
So, you’ll click and drag your mouse to select the rows that are still visible, making sure you encompass the area where your secret rows are taking their siesta. Once you have that area highlighted, it’s time for another trusty right-click. Yes, that same magical mouse button is our hero again!
When that oh-so-familiar menu pops up, this time you're looking for a different option. It's the opposite of hiding, the grand re-emergence! You'll spot the word Unhide. It's like a beacon of hope for your data’s visibility!
Click on Unhide, and voila! Your hidden rows will reappear, blinking in the newfound light of your spreadsheet. They’re back, and ready to rejoin the data party, perhaps with a slightly more subdued attitude after their little break.
Another super-duper easy way to get this job done is by using those handy little row numbers on the left side of your spreadsheet. See those numbers? They’re your direct line to controlling the visibility of your rows. They’re like little control panels for each row’s appearance.

So, if you want to hide rows 5 through 10, you can click on the number 5, and then, while holding down the Shift key (your loyal sidekick for selections), click on the number 10. This selects all the rows from 5 to 10 in one swift move. It’s like using a giant lasso to round up your data herd.
Once those row numbers are highlighted, you can then right-click on any of the highlighted row numbers. That same magical menu will appear, and you know the drill: click on Hide. Easy peasy, lemon squeezy, data hiding breezy!
Unhiding using row numbers works in a similar fashion. You select the row numbers surrounding the hidden section, right-click, and choose Unhide. It’s like sending out a search party for your elusive data.
There's also a way to do this using the ribbon at the top of Excel. It’s a bit more of a… shall we say… formal approach, but still very effective. For those who like to explore the vast expanse of the ribbon, this one’s for you!
First, you select the rows you want to hide. Then, you navigate to the Home tab. On the Home tab, look for the Cells group. Within the Cells group, you'll find a button called Format. It’s like a little toolbox for your cells.

Click on Format, and another drop-down menu will appear. This is where the hiding magic truly unfolds. You’ll see options like Row Height, Hide & Unhide, and more. And there it is, the sweet, sweet Hide Rows option!
Clicking on Hide Rows will make your selected rows disappear faster than free donuts at the office. They're now officially out of sight, out of mind, until you decide to bring them back into the spotlight.
To unhide using the ribbon, you'll do the reverse. Select the rows above and below your hidden section. Go to the Home tab, then the Cells group, click Format, and then choose Unhide Rows. It’s like a data resurrection ceremony!
Let’s not forget about the keyboard shortcuts! For the speed demons of the spreadsheet world, these are your secret weapons. They're like cheat codes for Excel, allowing you to manipulate data with lightning speed.
If you’ve selected your rows, you can try a combination like Ctrl + 9 to hide them. This is a speedy way to make those rows vanish. It’s so fast, you might even miss them if you blink!

And to bring them back from the digital abyss? The unhide shortcut is often Ctrl + Shift + 9. It’s like waving a magic wand to bring them back. They’ll reappear, perhaps slightly bewildered but ready to work.
Just remember that these shortcuts can sometimes vary slightly depending on your version of Excel or your operating system. So, if Ctrl + 9 doesn't work immediately, don't panic! You can always resort to the trusty right-click method, which is as reliable as your morning coffee.
Hiding rows is fantastic for presenting clean, focused data. Imagine you’re showing your sales figures, but you don’t want to overwhelm your audience with every single transaction detail. Hiding those granular rows lets you present a polished summary. It’s like presenting the highlight reel instead of the entire game!
It's also brilliant for personal data management. Maybe you have a budget spreadsheet and you want to temporarily hide expenses from last year to focus on the current month. You can just tuck them away until you need them again. Out of sight, out of mind, until you say so!
So, there you have it! Hiding rows in Excel is not some daunting technical task. It’s a simple, effective, and downright fun way to manage your data. It’s your secret superpower for keeping your spreadsheets tidy and your presentations impactful. Go forth and hide those rows with confidence and a smile!