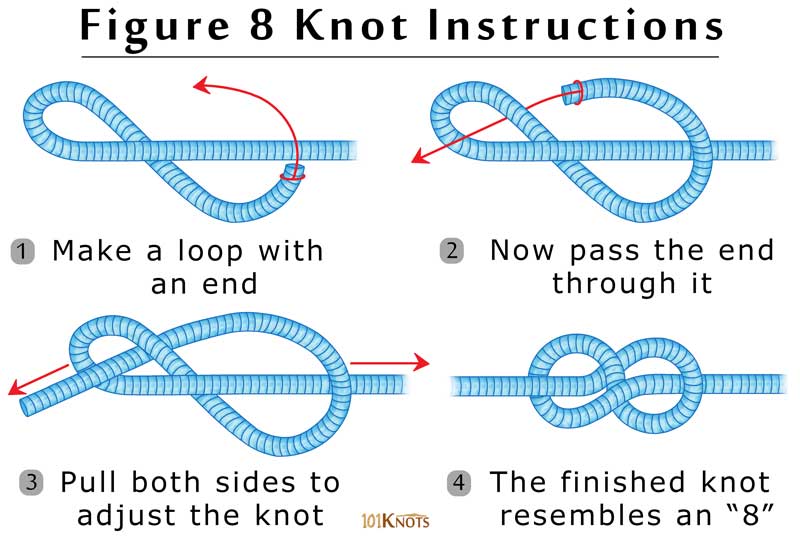
How Do I Tie A Figure 8 Knot

Ever found yourself needing to create a secure loop or a stopper that won't slip? Maybe you've seen someone else effortlessly tying one and wondered, "How do they do that?" Well, get ready to add a wonderfully useful skill to your repertoire, because we're diving into the simple magic of tying a figure 8 knot. It’s not just for seasoned climbers or sailors; learning this knot can be surprisingly practical and even a bit of fun!
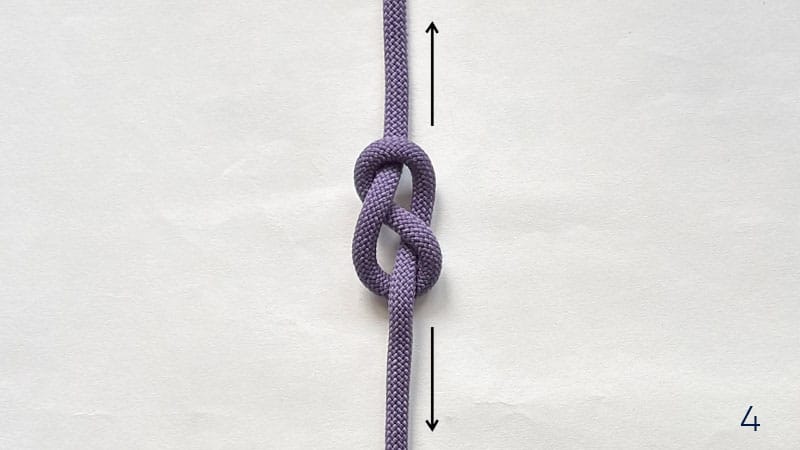
So, what exactly is a figure 8 knot and why bother? At its core, it's a strong and reliable knot that forms a loop or acts as a secure stopper at the end of a rope. Its beauty lies in its simplicity and its tendency not to jam tight under load, making it easier to untie later – a significant advantage over some other knots. Think of it as a dependable friend for your rope.
The benefits are numerous. For starters, it's incredibly easy to learn and recognize. Its distinctive "8" shape makes it simple to inspect, ensuring you've tied it correctly, which is crucial for safety. This visual check is a huge plus, especially when you're relying on the knot for something important. It's also remarkably strong without being impossible to undo once a load has been applied.
Must Read
Where might you encounter this nifty knot? In everyday life, it's a fantastic stopper knot for things like preventing the end of a shoelace from fraying or slipping through a lace lock. Imagine trying to tie up a package securely, or needing a temporary anchor point for something light – the figure 8 has you covered. In an educational setting, it's a staple for teaching basic knot tying, whether it's in outdoor education programs, scouting, or even a general science class demonstrating physics principles of friction and load distribution.
For those who venture into more adventurous activities, its role becomes even more pronounced. Rock climbers use it as a primary method for tying into their harnesses, creating a secure loop for their climbing rope. Sailors might use it to create a temporary loop on a sheet or halyard. Even in a more mundane context, if you're setting up a clothesline or securing a tarpaulin, a figure 8 can provide a strong, visual anchor point.
Ready to give it a whirl? The best way to learn is by doing. Grab a piece of rope – even a length of thick string or a discarded charging cable will do for practice. You can find countless step-by-step video tutorials online that show you exactly how to form that elegant "8." Look for ones that use slow, clear movements. Or, ask a friend who already knows! It's the kind of skill that’s often passed down. Practice tying it, then practice untying it. See how it behaves with a bit of tension. You'll be surprised at how quickly your fingers start to remember the motion. It's a small skill, but one that can bring a lot of confidence and capability to your everyday interactions with the world of ropes!