How Do I Repair A Door Frame
Ah, the door frame. That silent sentinel of our homes, the stoic guardian of our privacy (and the occasional surprise pizza delivery). We don't think much about them, do we? Until, of course, they decide to stage a dramatic protest against our existence. You know the drill. You're wrestling a rogue vacuum cleaner, or maybe that giant box of online impulse buys, and BAM! The corner of your door frame looks like it just got into a staring contest with a runaway shopping cart and lost. Or perhaps it’s that moment when you’re trying to gracefully exit a room, only to find yourself in an impromptu wrestling match with a door that’s decided it’s had enough of your antics and is sticking fast. Suddenly, this humble architectural feature becomes the star of your own personal domestic drama.
Don't you just love it when life throws you a curveball disguised as a slightly splintered piece of wood? It's like your house is trying to tell you, "Hey, remember me? I'm not just a place to hang your coat!" And while your first instinct might be to call in the cavalry – a contractor with a toolkit that probably costs more than your car – let's be honest, sometimes it's just a little… bump. A little scuff. Nothing that requires a full-blown home renovation intervention. It's the DIY equivalent of deciding to tackle that mountain of laundry yourself instead of admitting defeat and hiring a professional folding service (if such a thing even existed, which, frankly, it probably should). So, before you resign yourself to a perpetually dented door frame or that embarrassing creak every time you open the pantry, let's chat about how you can be the hero of your own home repair saga.
Think of your door frame as the entryway's best friend. It's the reliable buddy that supports the whole operation. Without it, doors would just… flop around like a marionette with severed strings. And when that buddy gets a little banged up, it’s a visual cue, a little ouchie that reminds you of past adventures. Maybe it was the time you tried to move that impossibly large sofa through a doorway designed for a chihuahua. Or that unforgettable Thanksgiving when Uncle Barry, after one too many glasses of eggnog, decided to use the doorframe as a backrest. We’ve all been there, or at least witnessed something equally… memorable. The point is, these little nicks and dings are part of the tapestry of home life. But they don't have to be permanent additions to your interior design scheme.
Must Read
So, Your Door Frame Has Seen Better Days?
Let’s break down what usually happens. You’ve got your basic door frame, right? It’s got a couple of main parts. You've got the jamb, which is the part that sticks out from the wall and the door actually hangs on. Then you have the stop, that little strip of wood that the door closes against. Think of the jamb as the sturdy shoulders of the frame, and the stop as its polite little lip. And then there’s the casing, which is the decorative trim that hides the seams between the jamb and the wall. It’s like the frame's stylish scarf. When these parts get damaged, it's usually the casing that takes the brunt of it. It's the most exposed, the most vulnerable. Like the extrovert of the frame family, always on the front lines.
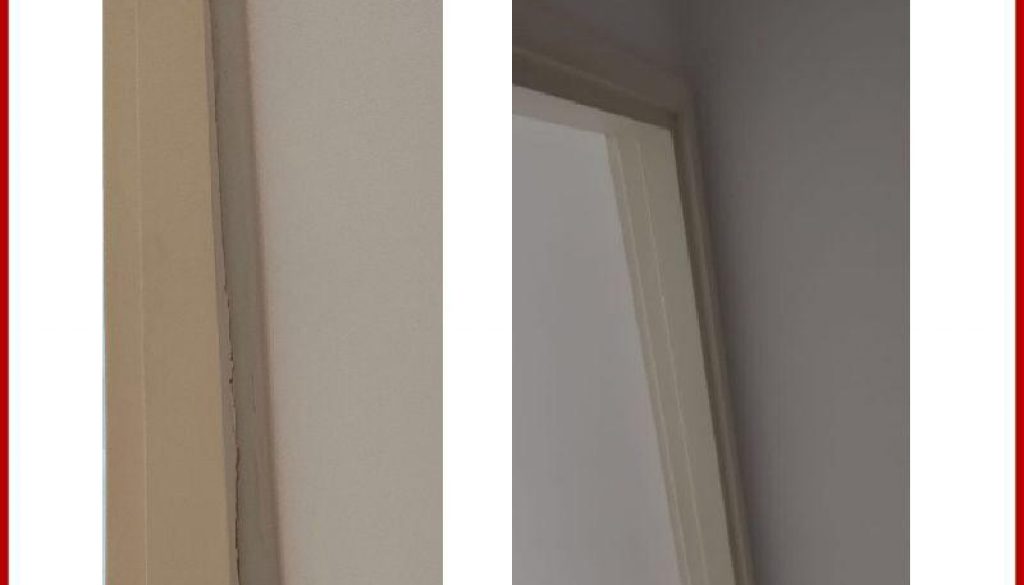
The most common culprits? A swift kick from a stray tennis ball, the enthusiastic greeting of a pet who forgot their manners, or, as mentioned, the relentless pursuit of fitting oversized furniture into confined spaces. It’s like a mini-battlefield right there in your hallway. You might see a dent, a scratch, or a tiny splinter that looks like it’s trying to escape. Sometimes, if things get really wild, you might even have a piece that’s genuinely broken off. It’s like your door frame is trying to tell you, "I've had enough! I need a spa day!"
Don't panic. This isn't the time to channel your inner demolition expert. We're talking about making things look good again, not necessarily rebuilding Rome. Most of these issues are cosmetic, like a tiny scar on your favorite pair of jeans. Annoying, yes, but usually fixable with a bit of elbow grease and the right tools.

Minor Scuffs and Dings: The "Oops, I Didn't See That" Edition
Let's start with the easy stuff, the everyday nicks and scratches. You know, the kind that make you sigh and think, "Well, that’s another thing on the 'eventually' list." For these little guys, you often don't need a whole workshop. A little wood filler is your best friend here. It's like a magic potion for small imperfections. You can get it in a putty form, which is great for filling small holes and dents. Or, if you're feeling particularly fancy, you might find it in a crayon-like stick form for even smaller scratches. It's surprisingly satisfying, like covering a zit with concealer, but for your house.
First, you’ll want to clean the area. Get rid of any loose splinters or dust. Think of it as prepping the skin for makeup. You can use a damp cloth for this. Then, grab your wood filler. If it’s a putty, you’ll just use a putty knife – a thin, flexible tool that’s brilliant for smoothing things out. Gently press the filler into the dent or scratch, making sure to pack it in there. You want it to fill the void completely. Overfill it just a tiny bit, because when it dries, it might shrink slightly. It’s like under-baking a cookie; you want that little bit of puff.
Once it’s filled, let it dry. The packaging will tell you how long, but generally, it’s not a super long wait. Think of it as a quick nap for your door frame. After it's dry, you'll need to sand it smooth. This is where the real magic happens. Grab some fine-grit sandpaper (like 120 or 150 grit is usually perfect for this). Gently sand the filled area until it’s flush with the surrounding wood. You're aiming for a surface so smooth you’d want to run your hand over it. No bumps, no ridges, just pure, unadulterated smoothness. It’s like buffing your nails; you want that perfect finish.
Now, for the pièce de résistance: paint or stain. If your door frame is painted, grab some paint that matches your existing trim. A small sample pot is often all you need. Use a small brush – an artist's brush or a detailing brush works wonders for these small areas. Apply the paint carefully, feathering the edges so it blends in seamlessly. If your frame is stained, you’ll need to find a stain that’s a close match. This can be a bit trickier, but wood stain pens are available and can be quite effective for touch-ups. The goal is for it to disappear. You want it to look so natural, people will wonder if you ever even had a dent there in the first place. It’s the ultimate illusion.
Splinters and Small Cracks: When Wood Decides to Get a Bit Frayed
So, you’ve got a splinter that’s threatening to stage a rebellion, or a tiny crack that looks like a lightning bolt on a miniature scale. For these, we're still in the realm of wood filler, but we might need a slightly different approach. If you have a loose splinter, the first thing you want to do is gently try to remove it. Don't yank it out like a stubborn weed; you might just make the problem worse. If it’s just sticking out, use a utility knife or a small pair of tweezers to carefully snip it off or pull it out. Think of it as a gentle trim, not an extraction.
Once that’s dealt with, you can use that trusty wood filler again. For cracks, you’ll want to use a flexible wood filler or even a wood glue first to help hold the crack together. Apply the glue into the crack with a thin applicator or a toothpick. Clamp it if possible, or just hold it firmly for a few minutes to let it set. Then, once that’s dry, you can fill any remaining gaps with wood filler. Again, apply it with a putty knife, pressing it firmly into the crack.
Sand it down smooth once it’s dry, and then move on to the painting or staining. The key here is patience. You’re basically retraining the wood to behave. It’s like teaching a toddler to share; it takes time and gentle persistence. The end result will be a crack that’s practically invisible, a testament to your woodworking prowess. You’ll be so pleased, you might just high-five yourself.
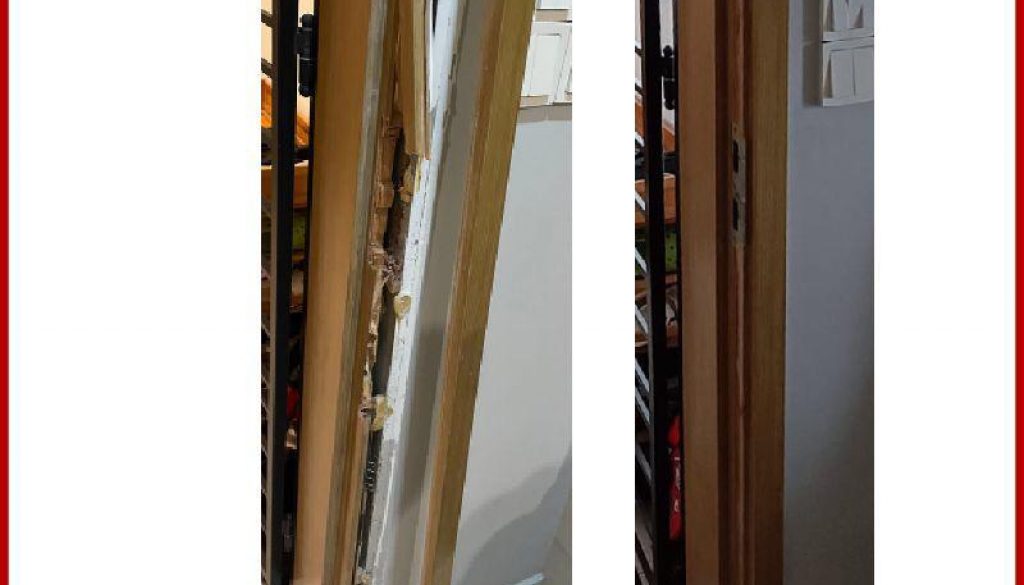
More Serious Damage: When the Frame Looks Like It Lost a Fight
Okay, so sometimes, the damage is a bit more… enthusiastic. Maybe a chunk of wood is missing, or the frame itself has a more significant crack. This is where things get a little more involved, but still, totally doable for the determined DIYer. If a piece of wood is truly gone, you’ll need to fill the void. You can use wood filler, but for larger gaps, you might need to build up layers of filler, allowing each layer to dry before applying the next. It’s like building a mini-sculpture.

Alternatively, if the damaged area is on a flat part of the frame and the wood is still somewhat intact, you might consider using a wood patch kit. These kits often come with a two-part epoxy that you mix together, and then you can mold it to fill the damaged area. Once it cures, it’s incredibly hard and can be sanded and painted just like wood. It’s like giving your door frame a little bit of a superhero implant.
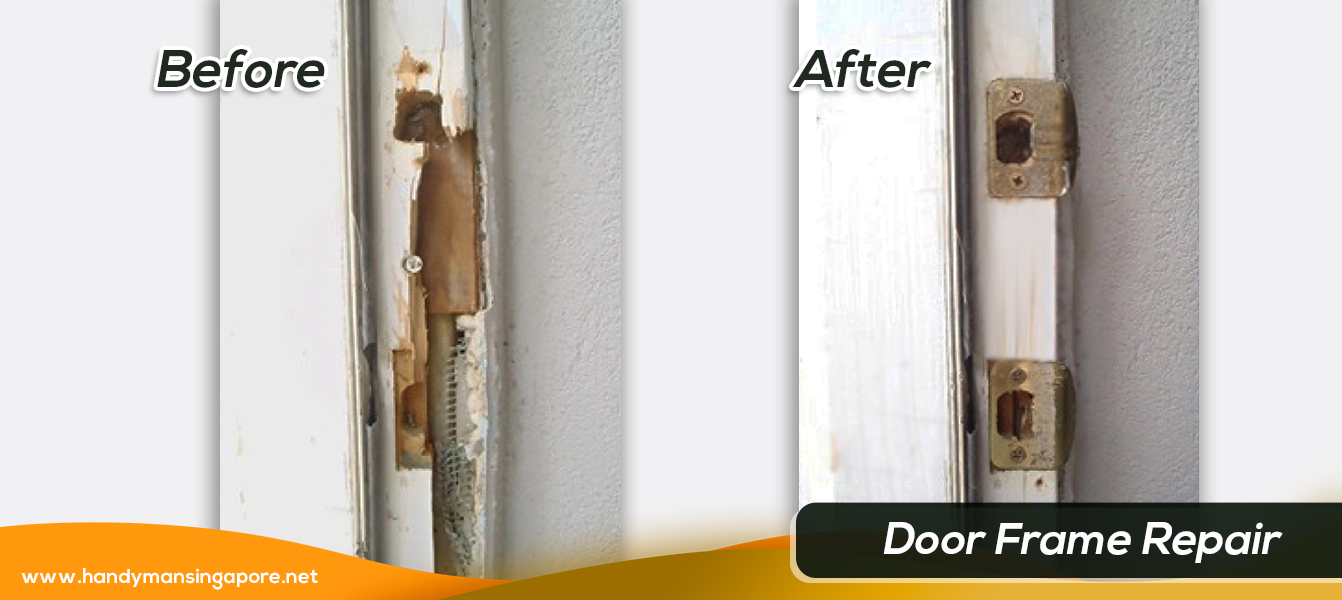
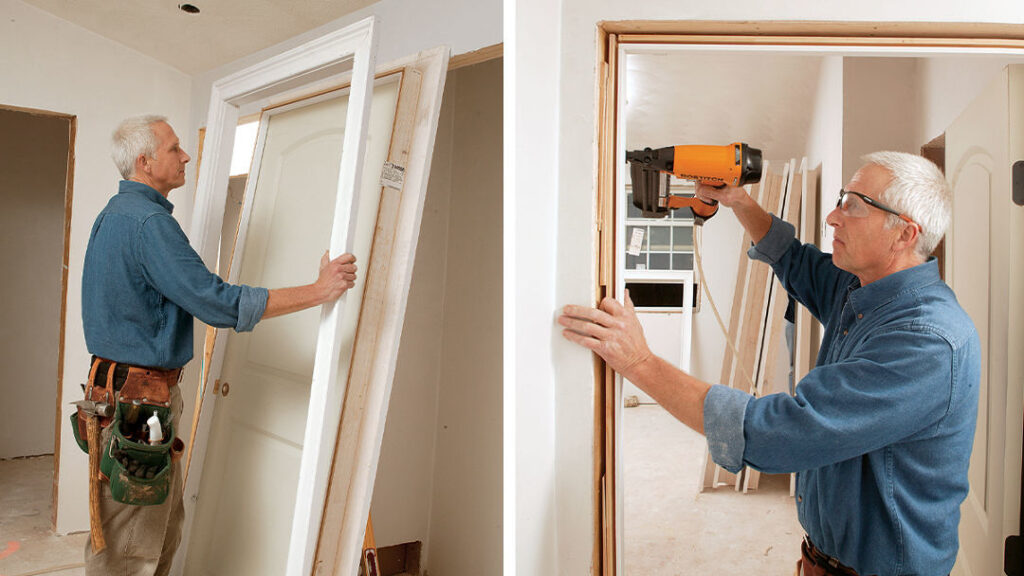
If the actual door jamb itself is damaged – the part the door hangs on – and it’s more than just a superficial ding, you might be looking at replacing a section of the jamb. This is a bit more advanced, and if you’re not comfortable with basic carpentry, this might be the time to call in a pro. But if you’re feeling adventurous, it involves carefully cutting out the damaged section, measuring and cutting a new piece of wood to fit, and then securing it in place with screws and wood glue. It’s like performing delicate surgery on your house.
For more serious cracks or splits in the jamb, you can try using a combination of wood glue and screws to reinforce the area. You'll want to drill pilot holes to prevent further splitting, then drive screws through the crack to pull the wood back together. This is a good option if the crack is not completely separating the wood. Think of it as giving your door frame a much-needed hug, a really strong, structural hug.
Tools of the Trade: Your DIY Arsenal
You don't need a professional carpenter’s chest to tackle these repairs. Here’s a basic rundown of what you’ll likely need:
- Wood Filler: Get it in a putty form for dents and holes, and maybe a wood filler stick for scratches.
- Putty Knife: A flexible one is best for spreading and smoothing.
- Sandpaper: Fine-grit (120-150) is usually sufficient for smoothing. You might want a sanding block to keep things even.
- Paintbrush: Small, good-quality brushes for detailed work.
- Primer: If you're painting over a different color or stained wood.
- Paint or Stain: Match your existing trim as closely as possible.
- Utility Knife or Tweezers: For removing splinters.
- Wood Glue: For minor cracks or reinforcing repairs.
- Safety Glasses: Always protect your eyes, especially when sanding!
- Dust Mask: For when you’re sanding. You don't want to inhale all that lovely wood dust.
And maybe a good playlist to keep you motivated. Home repairs are always more fun with a soundtrack, right? Imagine yourself as a DIY rockstar, harmonizing with the whir of the sander.
Prevention is Better Than Cure: Keeping Your Door Frames Shipshape
Once you’ve lovingly restored your door frame to its former glory, how do you keep it that way? Well, a little awareness goes a long way. Try to be mindful when moving large items. You know, that moment when you're squeezing that new armchair through the doorway and you're thinking, "Will it fit? Will it ever fit?" Maybe pause for a second and assess. Use a moving blanket or a piece of cardboard to protect the frame if you're struggling.
For pets, a bit of training can prevent those enthusiastic greetings from turning into door frame destruction. And for the clumsy among us (myself included!), simply being a bit more aware of our surroundings can save a lot of heartache. It’s like learning to walk without bumping into every piece of furniture in a dark room. It takes practice, but it’s worth it.
Ultimately, a little bit of care and attention can go a long way. Your door frames are part of the fabric of your home, the silent witnesses to your daily life. They deserve a little love, and with these simple fixes, you can keep them looking their best, ready to welcome guests, protect your privacy, and withstand the occasional eccentric Uncle Barry. So go forth, brave DIYer, and conquer those dings and dents! Your door frame will thank you. And who knows, you might even enjoy yourself along the way. Happy repairing!