How Do I Add Watermark In Excel
Alright, listen up, spreadsheet wizards and number crunchers! Ever feel like your brilliant Excel creations are just begging for a little personal flair? You’ve spent hours meticulously crafting that budget, that project plan, or maybe even that super-secret recipe list for grandma's famous cookies, and suddenly a little voice in your head whispers, “This needs a sign.” Well, fear not, for the mystical art of adding a watermark is about to become your new superpower!
Imagine this: you’ve just presented your masterpiece to the world (or at least to your boss), and someone goes, “Wow, that’s… familiar.” Uh oh! Before you start picturing your groundbreaking sales forecast plastered on a billboard in Times Square (okay, maybe a slight exaggeration, but you get the drift!), let’s slap a little digital signature on your work. It’s like a tiny, friendly ghost saying, “Yep, this came from my brilliant brain!”
The Secret Lair: Where the Magic Happens
So, where do we begin this grand adventure? Don’t worry, it’s not buried in some dusty, forgotten corner of Excel, guarded by dragons (though sometimes it feels like navigating Excel can be a dragon-slaying quest in itself!). We’re heading to the Page Layout tab. Yes, that’s right. Think of it as the VIP lounge for all things presentation-related. Just click on it, and a whole new world of possibilities will open up.
Must Read
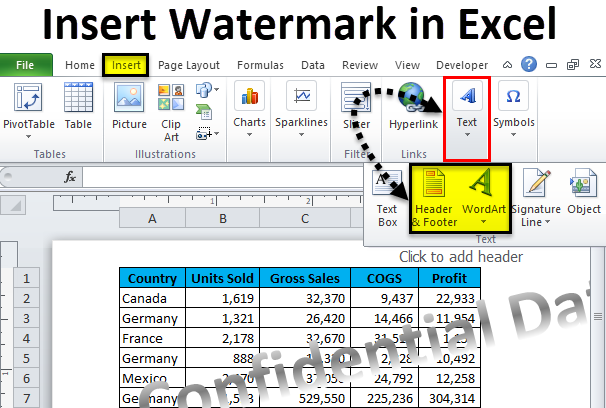
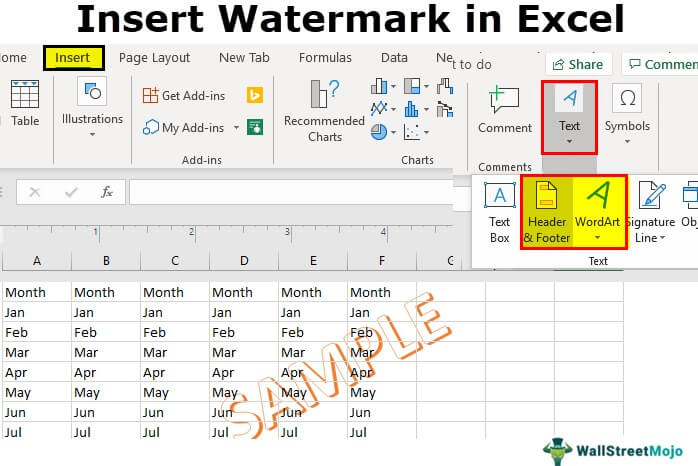
Summoning the Watermark Genie
Now, look around. You’re looking for something that sounds… well, watery. Ah ha! There it is, usually nestled under a header called Page Setup. You’ll see a little button that says Watermark. Give it a good, enthusiastic click. It’s like pressing the “Go!” button on a funfair ride. Get ready for some awesomeness!
When you click that magical button, a little menu will pop up. This is where the real fun begins. You have two glorious options: you can use a predefined watermark (think fancy, pre-packaged awesomeness) or you can get creative and make your own. Let’s dive into both, shall we?

Option 1: The Pre-Packaged Pizzazz
Sometimes, you just want something quick and effective, right? Like grabbing a delicious, ready-made sandwich. Excel has your back! You’ll see options like Confidential, Do Not Copy, or Draft. These are perfect for those sensitive documents where you want to give everyone a gentle nudge. Imagine sending out your latest quarterly report, and BAM! A faint but firm Confidential watermark appears, like a polite bouncer at a very important party. No one’s going to accidentally share that without thinking twice!
Click on the one you like, and poof! It appears, ghost-like, behind your data. It’s subtle, but it’s there. Like a secret message only you and your trusted allies understand. Easy peasy, lemon squeezy!
Option 2: Unleash Your Inner Picasso!
Now, this is where things get really exciting. What if you want something more… you? Maybe your company logo? Or a fun little graphic? Or even just your name scrawled in a cool font? That’s where Custom Watermark comes in. This is your personal art studio!
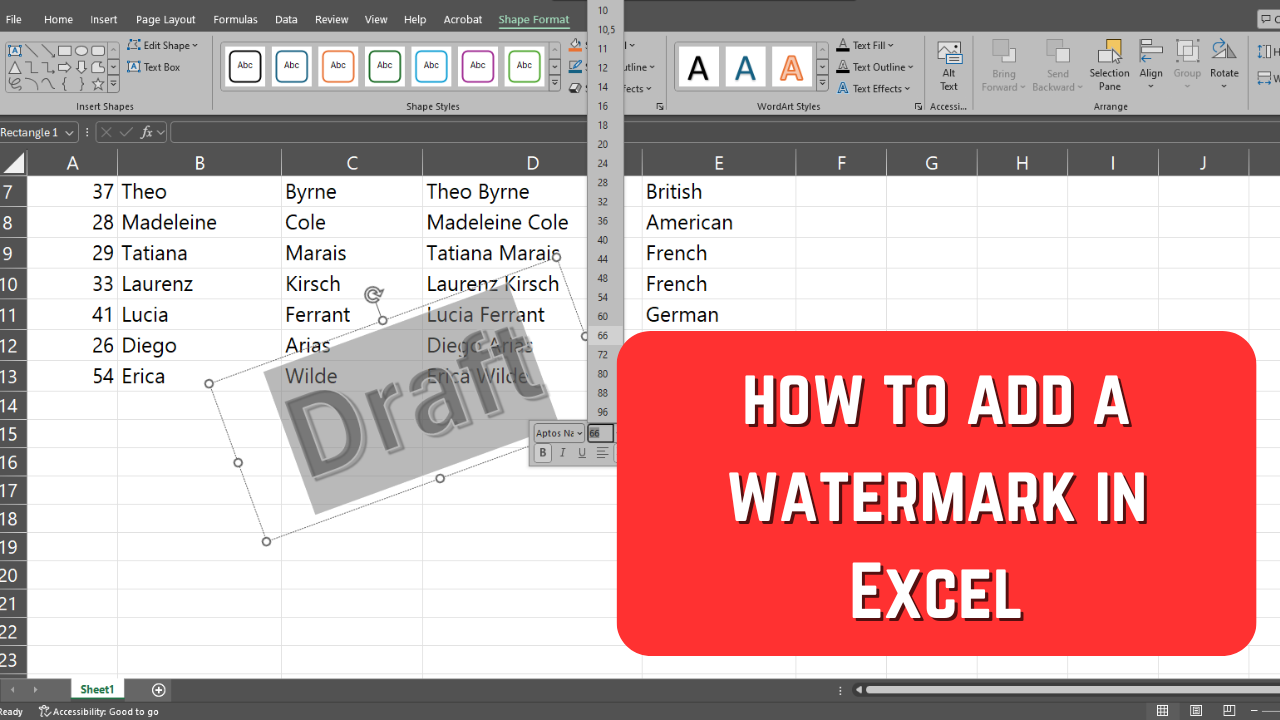
Click on Custom Watermark, and prepare to be amazed. You’ll see a window that’s practically bursting with options. You can choose a Picture watermark. This is where you upload your company logo, your cat’s adorable face (hey, no judgment!), or anything else your heart desires. Just click Select Picture, navigate to where your image is hiding on your computer, and BAM! It’s ready to go.
But wait, there’s more! If pictures aren’t your jam, you can go for a Text watermark. This is your chance to be witty, wise, or just plain practical. Type in whatever you want! Your name, your company name, a motivational quote, or even a stern warning to anyone who dares to mess with your data. You can even customize the font, size, color, and layout. Want it diagonal? Done! Want it a faint grey so it doesn’t distract too much? Easy!
“Adding a watermark is like giving your Excel sheets a stylish, digital tattoo. It says, ‘I was here, and I made this awesome thing!’”
Fine-Tuning Your Masterpiece
Once you’ve chosen your picture or typed your text, don’t just hit OK and run! Take a peek at the Layout options. You can choose to have your watermark appear Diagonal or Horizontal. Diagonal is often a good choice for a classic, understated look. Horizontal can be good for wider images or logos.
And then there’s the magical little checkbox: Washout. What does this do? Think of it as turning down the volume on your watermark. It makes it lighter, more transparent, so it doesn’t overpower your precious data. Usually, you’ll want this checked, especially if you’re using a logo or a colorful image. It’s like a subtle wink rather than a shouting match.
The Grand Reveal!
Once you’re happy with all your choices, hit that glorious OK button. And there it is! Your very own watermark, gracing your Excel sheet. You can print it, share it, and feel that immense satisfaction of knowing your work is officially yours. It’s a small step, but it’s a big deal for keeping your creations safe and adding that extra touch of professionalism (or personality!). So go forth, watermarkers! Your spreadsheets will thank you!


